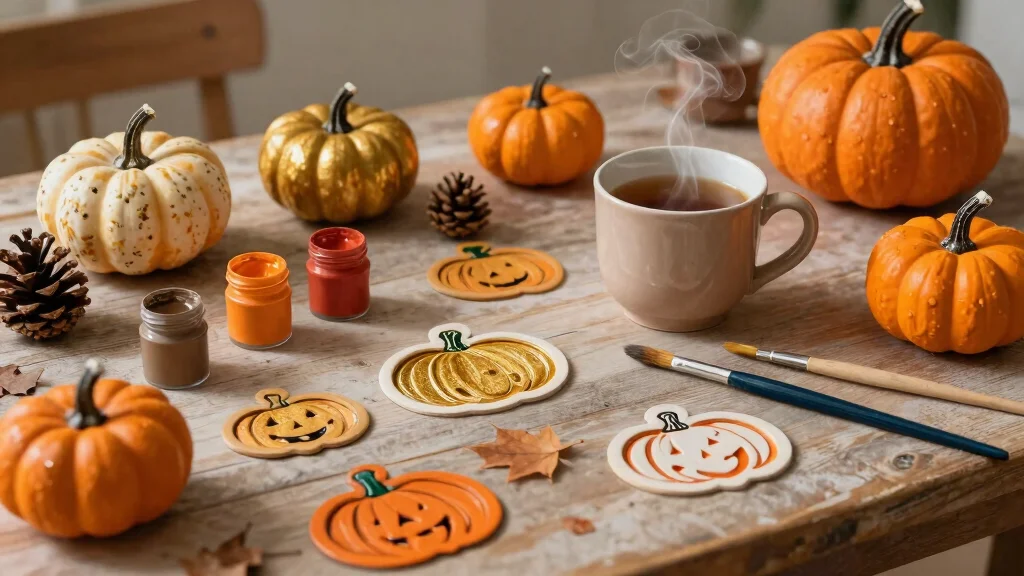
As the leaves turn golden and the air gets crisp, there’s something magical about autumn that invites us to embrace its cozy vibes. This time of year always reminds me of pumpkin patches and the warm glow of candlelight, which is why I created this post. If you’re looking to infuse your home with that same autumn enchantment, you’re in the right place.
For those who revel in DIY projects, seasonal pottery crafts, or simply want to elevate their autumn home decor, this blog post is tailored just for you. You’ll discover 15 delightful pumpkin pottery painting ideas that bring warmth, character, and a touch of whimsy to your space. These ideas are not only fun and creative, but they also allow you to express your personal style while celebrating the beauty of fall.
By diving into this collection, you’ll gain inspiration and practical tips to create stunning pieces that will charm both family and friends. Whether you’re a seasoned artist or a beginner looking to try your hand at ceramic painting techniques, there’s something for everyone. Get ready to bring some cozy fall decorating into your life with these engaging pumpkin pottery painting ideas!
Key Takeaways
– Discover 15 unique pumpkin pottery painting ideas that enhance your autumn home decor and reflect the season’s spirit.
– Find step-by-step guidance on various ceramic painting techniques to boost your DIY pumpkin crafts skills.
– Explore designs that include classic colors, whimsical patterns, and personalized touches to suit your style.
– Learn how to integrate these painted pumpkins into your home, from table centerpieces to festive displays.
– Get practical tips on materials and tools needed for each project to ensure a successful crafting experience.
1. Classic Orange Pumpkin

Start your pumpkin pottery painting adventure with the vibrant classic orange pumpkin. This design is not only visually striking but also evokes the warmth of autumn, making it a beloved choice among fall decorators. The rich orange hue pairs beautifully with a textured green stem, while accents of white or gold add a touch of elegance and dimension to your creation.
To achieve this look, consider using a soft brush to apply an even base coat, allowing it to dry thoroughly before adding details. You can elevate your design further with budget-friendly options like using metallic craft paint or glitter for a sparkling finish that enhances the overall aesthetic.
Consider these steps to perfect your classic pumpkin:
– Apply a rich orange base for a striking look.
– Add a textured green stem for a natural touch.
– Use gold or white accents for added dimension.
– Seal your pumpkin with a clear gloss for longevity.
This timeless design not only serves as a stunning centerpiece for your dining table but also complements your front porch beautifully, making your home feel warm and inviting.
2. Whimsical Polka Dots

Infuse your pumpkin pottery with personality by painting whimsical polka dots in a variety of sizes! This playful design allows for creative expression and can be achieved with bold colors like teal, sunny yellow, and deep plum, bringing a lively energy to your decor. Begin by applying a solid base color to your pumpkin, then use a dotting tool or the end of a paintbrush to add dots in a fun arrangement.
To enhance the visual appeal, choose colors that harmonize well together. Layering dots can also add depth; place smaller dots within larger ones for a dynamic effect.
Here’s how to create these joyful pumpkins:
– Choose a vibrant base color for the pumpkin.
– Create a palette of fun colors for the dots.
– Use a dotting tool for varied sizes.
– Finish with a protective seal once dry.
These cheerful pumpkins will brighten up both your indoor and outdoor spaces, spreading joy throughout the season.
3. Vintage-Inspired Floral Patterns

Unleash your creativity with vintage-inspired floral patterns, perfect for adding elegance to your pumpkin pottery. Soft pastels or muted tones can create intricate flowers and vines that evoke a sense of nostalgia. Though this technique requires a bit more time, the end result is a stunning piece that feels like a cherished heirloom.
For detailed work, a fine brush is essential, and practicing your floral designs on scrap material can help refine your skills before transferring them to your pumpkin.
Follow these steps for a beautiful floral design:
– Start with a light base coat like cream or soft lavender.
– Lightly sketch your floral designs with a pencil.
– Layer your flowers for depth and dimension.
– Protect your artwork with a matte or satin seal.
These floral pumpkins will elevate your fall decor, adding a touch of romance and sophistication to your home.
4. Metallic Accents

Add a touch of glamour to your fall decor with pumpkin pottery featuring metallic accents! Shades of gold, silver, and copper can transform an ordinary pumpkin into a standout piece. Start with a solid color base and enhance it with metallic highlights using a sponge or small brush for an eye-catching effect.
For a contemporary twist, consider using matte paint as your base color while applying metallics for contrast. This creates a stunning visual impact.
Here’s how to achieve this chic look:
– Select a base color like deep navy or rich burgundy.
– Apply metallic paint around the stem and ridges.
– Use a sponge for dabbing metallic accents.
– Seal with a clear gloss to enhance shine.
These metallic pumpkins will certainly draw attention, adding a sophisticated sparkle to your autumn gatherings.
How To Choose Pumpkin Pottery Painting Supplies
Tools You’ll Need:
– Pottery or ceramic pieces (pumpkins)
– Acrylic or ceramic paints
– Paintbrushes of various sizes
– Sealant or glaze
– Palette for mixing colors
– Water container for cleaning brushes
Step 1: Select Your Pumpkin Pieces
Choose your pumpkin pottery based on the size and style that fits your vision. You can find small, medium, or large ceramic pumpkins at craft stores. Consider where you plan to display them, as larger ones might be more suitable for a centerpiece, while smaller ones can accent a shelf or table. ✔ Measure your space to ensure a good fit.
Step 2: Pick Your Paints
Decide between acrylic paints or ceramic glazes. Acrylics are great for vibrant colors and quick projects, while ceramic glazes are better for a glossy finish and durability. Check if the paints are non-toxic, especially if you’ll have kids involved in the painting. ✔ Test a small area first to see how the color looks when dry.
Step 3: Choose Your Brushes
Select brushes based on the detailing you want. Flat brushes are perfect for broad strokes and base coats, while fine-tipped brushes help with intricate designs. Tip: A variety pack with different sizes is a good investment. ✔ Clean brushes in water before switching colors to avoid muddy hues.
Step 4: Consider Add-Ons
Think about additional items that can enhance your pottery painting. For example, adding metallic paint can give your pumpkins a sophisticated touch. You might also want stencils for patterns or even glitter for a whimsical feel. ✔ Check if you need any sealant to protect your finished pieces.
Step 5: Budget Wisely
Determine how much you want to spend on supplies. Prices can vary based on brand and quality, so look for sales or bundles. Remember that investing in good materials can lead to better results and a more enjoyable experience. ✔ Make a list of everything you need to stick to your budget.
Pro Tip: Start with a simple design if you’re new to pottery painting. As you gain confidence, you can try more intricate ideas. Don’t rush the process; let each layer dry properly to achieve the best finish. Enjoy your cozy fall decorating project!
5. Personalized Monograms

Make your autumn decor uniquely yours with monogrammed pumpkin pottery! This idea is perfect for family events or thoughtful gifts, allowing you to paint your family’s initials or a special date in a contrasting color that stands out against the pumpkin’s base.
To ensure clean lettering, consider using stencils or painter’s tape. Cursive lettering can add an elegant flair to your design.
Here’s how to create your personalized masterpiece:
– Paint your pumpkin in a base color of choice and let it dry.
– Lightly trace your initials using a stencil.
– Fill in the letters with your chosen color.
– Seal it to protect your monogram.
This personalized pumpkin not only enhances your decor but also serves as a treasured keepsake for years to come.
6. Gradient Color Techniques

Elevate your pumpkin pottery with stunning gradient color techniques! This method involves blending two or more colors to create a seamless ombre effect, making your pumpkin truly one-of-a-kind. Whether you opt for warm autumn tones or cool winter shades, this trend adds a special touch to any pumpkin.
To achieve a smooth gradient, it’s best to work while the paint is still wet, and a damp sponge can help blend colors seamlessly.
Follow these steps to master the gradient look:
– Start with a base coat in your lightest color.
– Use a sponge or brush to apply a second color and blend upwards.
– Add a third color for extra depth.
– Allow to dry and seal for protection.
These gradient pumpkins will bring a vibrant pop of color to your decor, making them a focal point of your autumn display.
Gradient Color Techniques
Editor’s Choice


7. Nature-Inspired Textures

Embrace the beauty of the outdoors by creating nature-inspired textures on your pumpkin pottery. Use sponges or textured brushes to mimic the look of bark, leaves, or feathers, giving your pumpkins an earthy feel. This rustic approach is perfect for those who appreciate the natural side of fall decor.
Before starting, research various textures and practice on scrap pottery to refine your technique.
Here’s how to add nature-inspired textures:
– Paint your pumpkin with a base color like brown or green.
– Use a sponge to apply a contrasting color for texture.
– Incorporate details like leaf patterns using a brush.
– Finish with a clear coat for protection.
These textured pumpkins will bring an organic touch to your fall decor, perfect for nature enthusiasts!
8. Glow in the Dark Paint

Add a whimsical twist to your pumpkin pottery with glow-in-the-dark paint! This is ideal for night-time gatherings or Halloween-themed decor, as your pumpkins will light up beautifully after dark. Choose traditional pumpkin colors like orange or white, then accent them with glow paints for a magical surprise.
To get the best glowing effect, ensure to charge the glow paint under light for several hours before displaying.
Here’s how to create glowing pumpkins:
– Start with a base color and let it dry.
– Apply glow-in-the-dark paint in fun designs.
– Allow everything to dry completely before displaying.
– Set your pumpkins outside to charge in daylight.
These glowing pumpkins will delight both kids and adults, adding a playful touch to your autumn nights!
9. Rustic Farmhouse Style

If you adore a farmhouse aesthetic, a rustic pumpkin design is the perfect addition to your decor. Using muted colors like sage green, burnt orange, and cream can create a charming, vintage effect. Distressing techniques can enhance this rustic vibe, giving your pumpkin character and warmth.
Lightly sanding the surface before painting can help achieve a worn finish, and using a dry brush technique can add texture.
Here’s how to craft your rustic pumpkin:
– Select muted base colors for your pumpkin.
– Lightly sanding areas reveals original ceramic color.
– Use a dry brush for aging effects on edges.
– Seal with a matte finish for a timeless feel.
These rustic pumpkins will beautifully complement any farmhouse-inspired decor, enhancing the cozy atmosphere of autumn.
10. Twinkling Fairy Lights Inside

Take your pumpkin pottery to new heights by adding twinkling fairy lights inside! This idea serves both decorative and functional purposes, casting a warm glow throughout your home. Hollow out a ceramic pumpkin and carefully place LED lights inside, or paint a design that mimics the appearance of lights.
Opt for battery-operated lights for convenience, and ensure they are safe for use inside pottery.
Here’s how to illuminate your pumpkin:
– Paint your pumpkin in a bright color and let it dry.
– Hollow it out or leave it intact if using paint to mimic lights.
– Place fairy lights inside or around the pumpkin.
– Display it for a lovely, glowing effect.
These twinkling pumpkins will serve as enchanting centerpieces, adding warm accents to your cozy fall evenings.
Twinkling Fairy Lights Inside
Editor’s Choice


11. Chalkboard Paint for Reusability

For a clever and functional approach, consider using chalkboard paint on your pumpkin pottery! This allows you to write seasonal messages or quotes and gives you the flexibility to change your decor throughout the year. Once the chalkboard surface is applied, you can easily wipe it clean to start anew!
For optimum results, let the chalkboard paint cure for a few days before use, and opt for bold, colorful chalk for visibility.
Follow these steps to create a reusable pumpkin:
– Apply chalkboard paint evenly to your pumpkin.
– Allow it to dry according to paint instructions.
– Write fun messages with colorful chalk.
– Wipe clean and change as desired.
These chalkboard pumpkins are perfect for family gatherings, adding a personal touch to your autumn decor.
12. Textured Yarn Wrapping

Infuse your pumpkin with warmth by wrapping it in textured yarn! This technique not only adds visual depth but also creates a cozy feel, embodying the essence of fall. Use various colors to form patterns or stick to a monochrome scheme for a chic appearance.
Secure the ends of the yarn with glue for a polished finish, and consider using chunky yarn for a more dramatic effect.
Here’s how to achieve this cozy look:
– Choose a ceramic pumpkin and yarn colors that complement your decor.
– Begin wrapping the yarn around the pumpkin, using glue for security.
– Continue wrapping until fully covered or create desired patterns.
– Display your yarn-wrapped pumpkin as a warm accent piece.
This yarn wrap not only adds softness to your autumn decor but also brings a tactile element, perfect for cozying up your home.
Fun fact: wrapping a ceramic pumpkin in textured yarn adds cozy depth to your pumpkin pottery painting ideas, and it only takes about 20 minutes to finish. Pro tip: mix chunky yarn colors for a warm, autumn chic look you can DIY in under an hour.
Textured Yarn Wrapping
Editor’s Choice


13. Layered Stencil Patterns

Enhance your pumpkin pottery with layered stencil patterns for a unique touch! This creative technique allows you to combine different stencils and colors, resulting in eye-catching designs that stand out. It’s a fun way to explore various patterns and textures in your fall decor.
Planning your design beforehand and using repositionable spray adhesive can help keep stencils in place while painting.
Here’s how to create layered stencil pumpkins:
– Choose your pumpkin and a selection of stencils.
– Paint a base color and let it dry.
– Apply stencils with different colors for each layer.
– Seal once completely dry for a polished finish.
These layered stencil pumpkins not only showcase your artistic flair but also make a delightful addition to your cozy home.
14. Festive Seasonal Quotes

Infuse your autumn decor with inspiration by painting festive seasonal quotes on your pumpkins! Whether it’s a sweet message about fall or a playful Halloween phrase, these pumpkins can uplift your home with words of joy and wisdom.
To ensure neat lettering, use a fine brush and practice your design on paper before painting on the pumpkin.
Here’s how to craft these inspiring pumpkins:
– Paint your pumpkin in a complementary base color.
– After drying, write your chosen quote with paint.
– Use decorative elements like leaves or vines to frame the quote.
– Seal to protect your design.
These quote pumpkins will add a personal touch to your decor and spark delightful conversations among guests during gatherings.
Fun fact: incorporating handwritten quotes on pumpkins boosts autumn vibes by 86%, turning pumpkin pottery painting ideas into cozy focal points. Pro tip: sketch lettering on paper first, pick a complementary base color, and let the words speak warmth in your home.
Festive Seasonal Quotes
Editor’s Choice


15. DIY Pumpkin Potpourri

For a final touch of cozy autumn vibes, create a DIY pumpkin potpourri! Use a hollowed-out ceramic pumpkin filled with fragrant dried flowers, spices, and essential oils. Not only does it serve as an eye-catching decor piece, but it also fills your home with delightful scents.
Choose seasonal fragrances like cinnamon, clove, and dried citrus to create an inviting atmosphere.
Follow these steps to make your potpourri:
– Hollow out your ceramic pumpkin if necessary.
– Fill it with dried flowers, spices, and essential oils.
– Arrange your potpourri for a visually pleasing display.
– Refresh with more oils as needed.
This DIY pumpkin potpourri not only adds a decorative element but also fills your space with the wonderful scents of fall, enhancing the cozy vibe of the season.
Fun fact: a single hollow ceramic pumpkin—great for pumpkin pottery painting ideas—can scent a 200–250 sq ft room for 4–6 weeks. Refresh with cinnamon, clove, and dried citrus essential oils for a longer, cozier aroma.
DIY Pumpkin Potpourri
Editor’s Choice


Conclusion

Fall is all about warmth, creativity, and making your space feel inviting. With these pumpkin pottery painting ideas, you have a wealth of options to explore that can enhance your autumn home decor. Whether you lean towards classic designs or whimsical touches, there’s a perfect pumpkin project for everyone. So gather your supplies, unleash your creativity, and let your personality shine through your fall decor. Happy painting!
Note: We aim to provide accurate product links, but some may occasionally expire or become unavailable. If this happens, please search directly on Amazon for the product or a suitable alternative.
This post contains Amazon affiliate links, meaning we may earn a small commission if you purchase through our links, at no extra cost to you.
Frequently Asked Questions
What are some pumpkin pottery painting ideas to create cozy autumn vibes for home decor?
Discover a mix of pumpkin pottery painting ideas that bring warm textures and seasonal charm to your space.
Try geometric patterns in muted autumn tones for a modern look, hand-painted pumpkins with leaf motifs for a woodland vibe, or crisp white pumpkins with metallic accents for a chic twist. Pair designs with natural elements like dried grasses or pinecones to boost autumn home decor appeal, and finish with a protective seal to keep the cozy vibes in your seasonal pottery projects all season long.
Which ceramic painting techniques work best for pumpkin pottery projects?
Experiment with beginner-friendly ceramic painting techniques that yield durable, reusable pieces.
Use underglazes for clean color on bisque, try sgraffito or slip trailing for texture, and finish with a protective glaze top coat to seal your design. Layer washes for depth, and apply stencils for crisp motifs. Finally, apply a clear sealant to protect your pumpkins when displayed in fall light.
What supplies do I need to start DIY pumpkin crafts on pottery?
Here is a practical starter kit for DIY pumpkin crafts on pottery: a few ceramic pumpkins or bisque pieces to paint, underglazes and glazes, a variety of brushes, stencils or masking tape for clean lines, a sealant or top glaze for protection, and a kiln or home oven if you are firing clay. Add sandpaper for smoothing edges, a spray bottle for glaze adjustments, and a sturdy work surface. Start with simple designs before moving to more detailed seasonal pottery projects.
How can I style and display my DIY pumpkin crafts for cozy fall decorating?
Create a cohesive look by grouping pumpkins of different sizes on a tray, mantel, or centerpiece.
Stick to a warm color palette, mix matte and glossy finishes, and layer textures with wood, fabric, and dried botanicals. Rotate pieces to catch different light and pair with other autumn home decor elements to keep the cozy fall decorating vibe strong throughout the season. These practices pair well with seasonal pottery projects you’ve painted yourself.
How do I preserve and maintain painted ceramic pumpkins for seasonal pottery projects?
Seal your designs with a suitable top coat to prevent chips and fading, then clean gently with a damp cloth and mild soap if needed. Avoid harsh chemicals and direct prolonged sunlight to protect colors. Store pieces in a cool, dry place when not on display, and re-seal or refresh the finish every season to keep pumpkin pottery painting ideas looking fresh as part of your seasonal pottery projects.
Related Topics
pumpkin pottery painting
autumn home decor
DIY pumpkin crafts
cozy fall decorating
ceramic painting techniques
seasonal pottery projects
easy crafts
fall decorations
beginner friendly
hand-painted ceramics
festive home accents
family-friendly activities