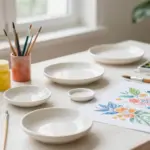
Pottery painting has me craving creativity and an adorable touch to my home decor. There’s something special about putting your personal stamp on a piece of art that will serve a purpose, like a trinket dish, to hold your little treasures. If you’re someone who enjoys DIY projects and loves to add a personalized flair to your space, this post is just for you.
I’ve gathered together 17 pottery painting ideas for trinket dishes that are not only charming but also easy to replicate. Whether you’re a seasoned artist or a beginner looking to dive into ceramic painting techniques, you’ll find ideas that inspire you to get crafty. These decorative pottery projects are colorful and versatile, making them perfect for any occasion, from a thoughtful gift to a delightful addition to your own home decor.
Get ready to explore fun and vibrant designs, like floral patterns and whimsical creatures, that will elevate your pottery game. By the end of this post, you’ll have a treasure trove of DIY trinket dish ideas that are engaging, inspiring, and perfect for adding character to your living space.
Key Takeaways
– Discover 17 unique pottery painting ideas for trinket dishes that you can easily create at home. Each idea is designed to inspire your creativity and make your decor pop.
– Learn various ceramic painting techniques that will help you achieve beautiful designs, even if you’re a beginner.
– Dive into different themes such as floral, geometric, and nature-inspired designs that cater to various tastes and preferences.
– Find practical tips for painting, such as using the right brushes and choosing quality paints to enhance your creations.
– Get inspired by colorful dish designs that can be customized for seasonal themes or personal initials, making every piece a reflection of your style.
1. Floral Fantasy

Embrace the beauty of nature with vibrant floral designs on your trinket dish. The charm of flowers like peonies and daisies adds a cheerful touch to your decor, creating a sense of warmth and liveliness. Whether you opt for intricate detailing or a simple bloom, floral patterns bring a refreshing and timeless appeal to any space. To get started, sketch your floral ideas lightly with a pencil. Use various brush sizes to achieve depth and texture, and consider a sponging technique for a watercolor effect. Don’t hesitate to mix colors until you find the combination that speaks to you. Tips:– Choose a color palette inspired by your favorite flowers.
– Incorporate leaves or stems for added detail.
– Seal your dish with a food-safe glaze for durability!
Step-by-step Instructions:1. Prepare your workspace with protective coverings.
2. Lightly sketch your floral design.
3. Begin painting from the center of the flower outwards.
4. Layer colors for depth and vibrancy.
5. Seal with glaze once dry.
Common Questions:– What paint is best for ceramics? Look for ceramic-specific paints.
– Can I use regular acrylic paint? It’s not recommended; it may not be food-safe.
For pottery painting ideas trinket dish lovers, start with light pencil sketches of blooms. A simple peony or daisy lifts any space, and layering with different brushes makes the design pop.
2. Geometric Glam

Geometric patterns add a contemporary flair to your pottery painting. Their clean lines and sharp angles create a sophisticated yet playful vibe. Designs such as triangles and checkerboards can be easily achieved, especially with painter’s tape for crisp edges. This modern aesthetic is perfect for those looking to elevate their decor with bold statements. Consider using a monochromatic palette or vibrant color blocks to suit your style. Metallic paints can also offer an eye-catching twist that enhances the overall look of your piece. Tips:– Use a ruler for straight lines.
– Consider layering colors for depth.
– Mix matte and glossy finishes for a striking contrast.
Step-by-step Instructions:1. Clean the dish thoroughly before painting.
2. Tape off areas for your geometric design.
3. Paint in sections, allowing each to dry before removing tape.
4. Seal with a clear glaze after it dries completely.
Common Questions:– How do I prevent bleeding under the tape? Press the tape down firmly for a tighter seal.
3. Ombre Charm

Ombre designs bring a beautiful gradient effect to your trinket dish, effortlessly blending colors from light to dark. This soft transition adds an elegant touch, perfect for enhancing your home decor. By selecting two or three harmonious colors, you can create a stunning visual that captivates the eye. Start with the lightest shade at the base and gradually blend in the darker tones toward the rim. The ombre technique is not only visually appealing but also surprisingly simple to execute. Tips:– Use a wet brush to facilitate blending.
– Practice on scrap materials first if you’re unsure.
– Add metallic paint for a touch of shimmer.
Step-by-step Instructions:1. Prepare your dish and gather your paint colors.
2. Start with the lightest color at the bottom, applying it evenly.
3. Working upwards, mix in the next darker shade, blending as you go.
4. Finish with a glossy sealant for shine.
Common Questions:– Can I achieve ombre with only one color? Yes, just vary the amount of white you mix in.
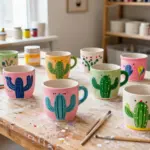
4. Whimsical Creatures

Add a playful spirit to your trinket dish by painting whimsical creatures. From cute animals to magical beings, these designs can infuse joy into your decor. Start by choosing a character you love or let your imagination run wild with your own creations! A light sketch will help you outline before filling in with vibrant colors. Consider enhancing your design with fun accents like stars or polka dots to create an enchanting scene. The playful nature of these designs makes them a delightful addition to any space. Tips:– Use fine brushes for detailed work.
– Keep the color palette bright and cheerful.
– Personalize the creature with accessories or patterns.
Step-by-step Instructions:1. Draw your whimsical creature on the dish lightly.
2. Begin painting with lighter colors first.
3. Add details and outlines with darker shades.
4. Seal with a protective glaze once dry.
Common Questions:– What if I make a mistake? Ceramic paint can often be painted over if it’s not fully dry.
5. Minimalistic Magic

For lovers of simplicity, a minimalistic design can be incredibly striking. This approach focuses on muted colors and subtle patterns, allowing the form to shine without unnecessary embellishments. A trinket dish painted in matte black or white offers a chic touch, while a single line drawing adds modern flair. This elegant style highlights your decor’s beauty through simplicity, making it a versatile choice for any setting. You can easily integrate it into existing decor for a cohesive look. Tips:– Choose a color that complements your existing decor.
– Use fine brushes for precise lines and details.
– Consider a matte finish for a sophisticated touch.
Step-by-step Instructions:1. Select your base color and apply a smooth coat.
2. Once dry, lightly sketch your minimal design.
3. Paint the design with fine brushes.
4. Finish with a clear matte sealant.
Common Questions:– Is minimalism more challenging? Not really! It’s about intention and form.
Minimalistic Magic
Editor’s Choice


6. Sea-Inspired Splendor

Infuse your home with ocean vibes through sea-inspired designs! Picture waves, seashells, and marine colors like turquoise and sandy beige to evoke a refreshing atmosphere. These themes are perfect for beach enthusiasts or anyone wanting to bring a touch of the coast indoors. Create wave patterns, paint seashells, or scatter starfish across your dish to mimic the beauty of the shore. The key is to use gradient techniques that reflect the ocean’s natural beauty. Tips:– Incorporate metallic paints for shimmer resembling sunlight on water.
– Use sponges or brushes for textured wave effects.
– Add sand or gravel for dimensional detail.
Step-by-step Instructions:1. Choose colors inspired by the beach.
2. Paint a base layer with lighter beach tones.
3. Create wave patterns or add shells with darker shades.
4. Seal with a water-resistant glaze.
Common Questions:– Can I use real sand? Yes! Just make sure to seal it well.
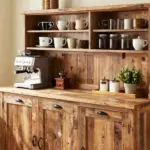
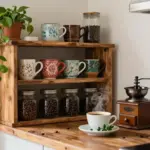
7. Rustic Charm

Rustic designs bring warmth and character to your trinket dishes, evoking a cozy, inviting feel. Focus on earthy tones and natural motifs to create pieces that feel handmade and unique. Techniques like sponge painting or stippling can add a weathered look, enhancing the rustic aesthetic. Colors such as terracotta and olive green create a comforting atmosphere, while adding textures like twine or lace elevates the charm. This style is perfect for bringing a touch of the countryside into your home. Tips:– Use a matte finish for a more rustic appearance.
– Blend colors to create depth.
– Adding small details like leaves or flowers enhances the rustic feel.
Step-by-step Instructions:1. Prepare a color palette inspired by nature.
2. Start with a base layer in a warm tone.
3. Use sponge techniques to add texture.
4. Finish with a protective matte glaze.
Common Questions:– How do I achieve an aged look? Experiment with blending techniques and layered colors.
8. Personalized Initials

Add a personal touch to your trinket dish by incorporating initials or monograms. This design is both functional and decorative, making it a perfect gift or a unique addition to your home. Select a font style that resonates with you and play around with color schemes that reflect your personality. Embellishments like dots or swirls can enhance your design, adding an extra layer of charm. This approach makes your dish not just a piece of decor, but a heartfelt statement. Tips:– Use a fine-tip brush for lettering.
– Practice your design on paper before painting.
– Consider using stencils for precision.
Step-by-step Instructions:1. Decide on your initials and sketch them lightly on the dish.
2. Paint using fine brushes, starting with lighter colors.
3. Add embellishments around the initials once dry.
4. Seal with a clear glaze to protect your design.
Common Questions:– What if I mess up the initials? You can often paint over it once dry to correct mistakes.
Personalized Initials
Editor’s Choice


9. Artistic Abstracts

Let your imagination run wild with abstract designs! This creative approach invites spontaneity and exploration, allowing you to use bold colors and various techniques to craft a one-of-a-kind piece. Swirls, splashes, and drips can come together to form a captivating statement on your trinket dish. Experimenting with different brushes and tools lets you play with textures and shapes, embracing the organic feel of art. Remember, there are no strict rules in abstract art—let your instincts guide you! Tips:– Choose a color palette that reflects your mood.
– Layer colors for interesting depth and texture.
– Don’t be afraid to get messy!
Step-by-step Instructions:1. Prepare the dish with a base color.
2. Start adding colors in different areas, blending as desired.
3. Experiment with various application techniques (brushes, sponges, etc.).
4. Seal with a clear gloss for a polished finish.
Common Questions:– How can I prevent colors from muddying? Work quickly and avoid over-blending.
Fun fact: When you let spontaneity guide abstract designs, about 70% of crafters complete a striking trinket dish in just 15 minutes. Start with bold swirls, try three brushes, and embrace the drip—your pottery painting ideas trinket dish becomes uniquely yours.
How To Choose the Right Pottery Painting Ideas for Your Trinket Dish
Tools You’ll Need:
– Pottery dish (ceramic or bisque)
– Acrylic paints or underglazes
– Paintbrushes in various sizes
– Palette or mixing dish
– Water cup for rinsing brushes
– Apron or old shirt to protect your clothing
Step 1: Determine Your Style
Before you start painting, think about the style you want for your trinket dish. Do you prefer something whimsical like fun doodles or elegant patterns like lace? Identifying your style helps guide your color choices and design techniques. Consider browsing online for inspiration to find what resonates with you.
Step 2: Choose Your Colors
Selecting the right colors is crucial for your pottery painting project. Look for colors that complement each other, or go for contrasting shades if you want something bold. A color palette of three to five colors usually works well. Test your colors on a piece of paper to see how they look when mixed or layered. Remember, vibrant colors can change appearance when they dry.
Step 3: Select Your Painting Techniques
You have various ceramic painting techniques to choose from. Whether you opt for sponging, stippling, or freehand designs, pick techniques that suit your comfort level. For beginners, simple geometric patterns or floral designs are great starting points. If you’re feeling adventurous, try combining techniques for a unique look!
Step 4: Plan Your Layout
Before you dive into painting, sketch a rough design on paper or lightly outline it on your dish with a pencil. This planning step ensures your painting stays organized and balanced. If you’re going for intricate designs, consider using stencils or painter’s tape for clean lines. Make sure to leave space for overlapping colors to avoid a cluttered look.
Step 5: Gather Your Supplies
Make sure you have all the necessary supplies at hand before you start painting. This includes your ceramic dish, paints, brushes, and any additional tools like sponges or stencils. Having everything ready will keep your workflow smooth and uninterrupted. It’s also a good idea to protect your workspace with newspaper or a plastic sheet to avoid any mess.
Step 6: Start Painting!
Now comes the fun part! Apply your base colors first and let them dry completely before adding details. Use fine brushes for intricate work, and don’t forget to clean your brushes between colors. Take your time, enjoy the process, and feel free to add layers for depth and texture. If you make a mistake, simply paint over it once it’s dry. You can also add a clear glaze after your design is complete for a glossy finish.
Pro Tip: If you’re unsure about your design, practice on a piece of paper or a spare tile before moving to your trinket dish. This way, you can experiment without any pressure, ensuring the final product is just as you envisioned!
Creating a personalized trinket dish can be an incredibly rewarding project. By choosing the right styles, colors, and techniques, you can make a beautiful piece that adds charm to your home decor. Happy painting!
10. Seasonal Themes

Celebrate the beauty of each season with themed trinket dishes! From autumn leaves to winter snowflakes, each design can reflect nature’s changing palette throughout the year. For spring, think pastels and florals; summer can burst with vibrant sun motifs; autumn can embrace rich earth tones, and winter can highlight icy blues and white snowflakes. This approach allows you to create pieces that evoke the emotions and colors of each season, bringing a refreshing touch to your decor. Tips:– Use seasonal color palettes.
– Incorporate symbols that represent each season.
– Change designs to match the time of year!
Step-by-step Instructions:1. Research seasonal motifs that inspire you.
2. Choose your colors and sketch designs on your dish.
3. Paint and layer colors for depth.
4. Seal with a clear finish to protect your art.
Common Questions:– Can I use the same dish for all seasons? Yes, just layer over the original design.
Seasonal Themes
Editor’s Choice


11. Elegant Lace Patterns

Lace patterns can add a sophisticated touch to your trinket dish design. This technique creates a refined and delicate look, perfect for a chic decor style. You can utilize lace stencils or even actual lace to imprint beautiful designs onto your dish. Soft colors like creams and pastels enhance the effect, while bold colors can provide striking contrast. This elegant approach makes your dish a standout piece in any setting. Tips:– Secure lace with tape to hold it in place.
– Apply paint lightly to avoid smudging.
– Experiment with different lace patterns for variety.
Step-by-step Instructions:1. Lay the lace flat against the dish and secure it.
2. Use a sponge to apply paint over the lace gently.
3. Carefully lift the lace to reveal the pattern.
4. Seal with a clear glaze once dry.
Common Questions:– Can I use fabric lace? Fabric lace might absorb paint and not create a clean design.
12. Nature-Inspired Textures

Bring the essence of nature into your home with texture-inspired designs on your trinket dish. This technique focuses on incorporating elements like leaves and stones into your painted designs, giving them a unique tactile finish. You can use real leaves to create imprints or paint textures that mimic natural surfaces. Earthy colors and organic shapes enhance the natural feel, making your dish a beautiful representation of the outdoors. Tips:– Experiment with various natural objects for imprints.
– Use a sponge for a textured background.
– Layer colors for a rich, organic look.
Step-by-step Instructions:1. Select natural elements to imprint or mimic.
2. Prepare your dish with a base color.
3. Apply paint with a sponge or brush, adding texture as desired.
4. Seal with a matte glaze after drying.
Common Questions:– Will the texture be noticeable? Yes, use enough paint to create a defined imprint.
Nature-Inspired Textures
Editor’s Choice


13. Kid-Friendly Designs

Engage your little ones with delightful and whimsical designs perfect for kids! Think playful animals, bright colors, and simple patterns that encourage creativity without the pressure of perfection. Themes like dinosaurs or fairy tales can inspire their imaginations and allow them to express themselves freely. Using non-toxic, washable paints ensures safety and easy cleanup, making this a fun activity for both parents and children. Tips:– Let kids choose their color palettes.
– Encourage them to be spontaneous with their designs.
– Use larger brushes for easier handling.
Step-by-step Instructions:1. Gather kid-friendly paints and brushes.
2. Start with a base layer in a fun color.
3. Allow kids to create their own designs freely.
4. Seal their masterpieces once dry for protection.
Common Questions:– How do I clean up paint spills? A damp cloth usually does the trick quickly!
14. Celestial Patterns

Draw inspiration from the night sky with celestial patterns on your trinket dish. Stars, moons, and galaxies can lend a dreamlike quality to your decor. Using deep blues, silvers, and golds can create a magical atmosphere that captivates the eye. You can use sponges to create a starry background or tiny brushes to depict constellations and phases of the moon. This enchanting design can be a wonderful focal point in your home. Tips:– Use a dark base color for the background to enhance brightness.
– Try metallic paints for stars and moons.
– Consider adding glow-in-the-dark paint for a magical touch!
Step-by-step Instructions:1. Prepare the dish with a dark base coat.
2. Use sponges to dab lighter colors for a galaxy effect.
3. Paint stars and moons with fine brushes.
4. Seal with a clear glossy finish.
Common Questions:– Can I use glow-in-the-dark paint? Yes! Just ensure it’s non-toxic.
When I try pottery painting ideas trinket dish, celestial patterns turn a plain piece into a tiny night sky. Start with a dark base, dab on silver or gold specks with a sponge, and sketch constellations with a fine brush.
15. Textured Brush Strokes

Explore the beauty of brush strokes to create a textured masterpiece on your trinket dish. This technique allows for artistic expression through varied paint application directly onto the surface. Bold strokes can create dynamic designs that feel alive and full of character! Mixing colors while the paint is wet can add depth and intrigue to your design, celebrating the organic feel of art. Tips:– Experiment with different brushes to see what textures you can create.
– Layer paint for varied effects.
– Don’t be afraid to be messy!
Step-by-step Instructions:1. Choose a color palette to work with.
2. Dip your brush and apply strokes directly on the dish.
3. Allow colors to blend naturally while wet.
4. Finish with a protective glaze.
Common Questions:– Can I mix paints on the dish itself? Absolutely! Just make sure to clean your brushes between colors.
16. Color Blocking

Color blocking is an exciting way to make your trinket dish stand out! This technique involves pairing solid colors side by side to create a bold visual impact. You can opt for contrasting colors for a striking effect or similar shades for a more harmonious appearance. This method lets you explore color theory while crafting a modern piece that catches the eye. Tips:– Be strategic in your color choices for maximum impact.
– Use painter’s tape for clean lines.
– Don’t hesitate to mix different shapes!
Step-by-step Instructions:1. Tape off areas on the dish for your color blocks.
2. Paint each section with your chosen colors.
3. Allow to dry before removing tape for clean edges.
4. Seal with a glossy finish to enhance the colors.
Common Questions:– How do I choose colors? Use a color wheel for inspiration and combinations.
Color Blocking
Editor’s Choice


17. Fun Doodles

Unleash your inner artist with delightful doodles on your trinket dish! Simple drawings and patterns can be both adorable and personal. Use fine liners or brushes to create spontaneous doodles that tell a story or reflect your unique style. From quirky animals to abstract shapes, let your creativity flow freely! Doodling encourages you to express yourself without the pressure of perfection, resulting in a charming piece of art. Tips:– Keep your doodles simple for quick application.
– Use contrasting colors to make designs pop.
– Consider themes that resonate with you for a personal touch.
Step-by-step Instructions:1. Choose a color palette that excites you.
2. Begin doodling directly on the dish with your fine brush.
3. Layer colors if desired, allowing them to dry in between.
4. Seal with a clear finish for protection.
Common Questions:– Can I add text? Yes, just ensure it’s legible and fits the design.
Conclusion

Painting your own trinket dish opens up a world of creativity and personalization in home decor. From whimsical designs to elegant patterns, each idea is an opportunity to express yourself.
Whether you’re creating gifts, home decor, or simply exploring your artistic side, these pottery painting ideas can inspire delightful pieces that you’ll treasure. So, grab your paints and dive into the joy of DIY pottery painting to make each trinket dish uniquely yours!
Note: We aim to provide accurate product links, but some may occasionally expire or become unavailable. If this happens, please search directly on Amazon for the product or a suitable alternative.
This post contains Amazon affiliate links, meaning we may earn a small commission if you purchase through our links, at no extra cost to you.
Frequently Asked Questions
What are some easy pottery painting ideas for a cute trinket dish?
Here are beginner-friendly pottery painting ideas that make a trinket dish look adorable.
Start with a soft pastel wash and layer in simple motifs like polka dots, stripes, or a floral outline.
Use masking tape to segment the dish for a clean geometric look.
Try a tiny hand-drawn scene that reflects your style, or add a monogram in the center for a personalized touch.
These pottery painting ideas trinket dish are perfect for decorative pottery projects at home.
Finish with a clear seal or glaze to protect the design.
Which ceramic painting techniques work best for colorful dish designs on trinket dishes?
There are several ceramic painting techniques that really pop on trinket dishes.
Start with a bright base using water-based underglazes, then layer details with fine brushes.
Try sponging for soft backgrounds, dotting for playful patterns, or wax-resist to keep areas white.
Combine masking for sharp borders and add fine line work with a liner brush.
Finish with a clear glaze to preserve your colorful dish designs and keep them looking fresh as part of your decorative pottery projects.
How can I personalize trinket dishes with DIY trinket dish ideas?
Personalizing your trinket dish is easy with a few DIY trinket dish ideas.
Pick a theme you love—plants, celestial motifs, or a favorite quote—then choose a cohesive color palette.
Add initials or a tiny illustration in the center, create a bordered edge with a metallic paint, and finish with a protective seal.
These tips work great for home decor crafts and help you craft a one-of-a-kind piece that fits your space.
What supplies do I need and what steps should I follow for a decorative pottery project?
To get started on a decorative pottery project, gather a plain ceramic dish, ceramic paints or acrylic paints formulated for pottery, assorted brushes, masking tape, stencils, a sponge for texture, and a clear sealant or glaze.
Steps: 1) clean and dry the surface, 2) sketch your design lightly, 3) paint in layers, allowing each layer to dry, 4) add details and accents, 5) apply a sealant or glaze, 6) cure per product directions.
This approach keeps your pottery painting ideas trinket dish vivid and durable.
How do I seal and preserve my painted trinket dish to keep it durable?
Sealing is key to longevity. Once your design is completely dry, apply a clear coat that’s suitable for your materials—food-safe if you plan to use the dish for small items that touch food, or purely decorative if not.
Apply 2-3 light coats, allowing proper drying time between layers.
If using a glaze, fire as directed by the product.
Avoid dishwasher use unless the coating specifies it. With proper sealing, your colorful dish designs stay vibrant for years, fitting well with your decorative pottery projects.
Related Topics
home decor
pottery painting
trinket dish
DIY pottery
ceramic techniques
colorful designs
beginner friendly
decorative crafts
handmade gifts
personalized decor
easy projects
artistic expression