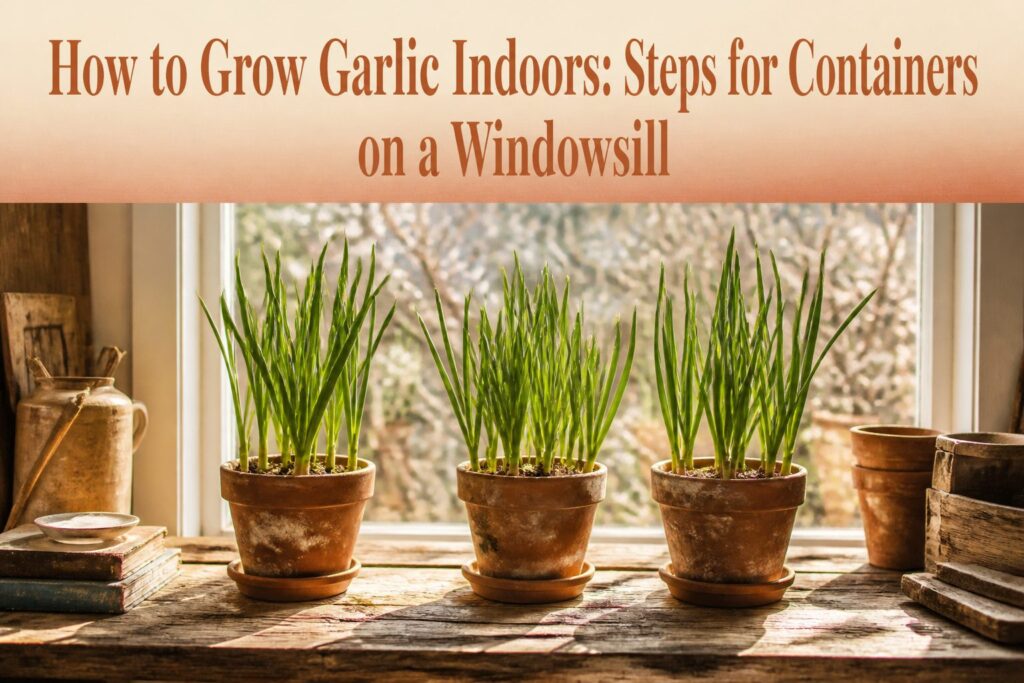
A windowsill of garlic greens costs about $22 and ten days of waiting, but full bulbs demand eight to ten months and still come out smaller than anything from a garden bed. The difference is not patience; it is cold.
Hardneck cloves need forty days near freezing before they will even think about dividing into a real bulb, a step most indoor growers skip entirely and then wonder why they harvested only one fat clove.
I learned that after a north-facing window gave me pale, floppy shoots that tasted like wet grass, until a $20 shop light hung six inches above the pot fixed the color and the flavor in a week.
[link-whisper-related-posts]1. Choose Garlic Cloves
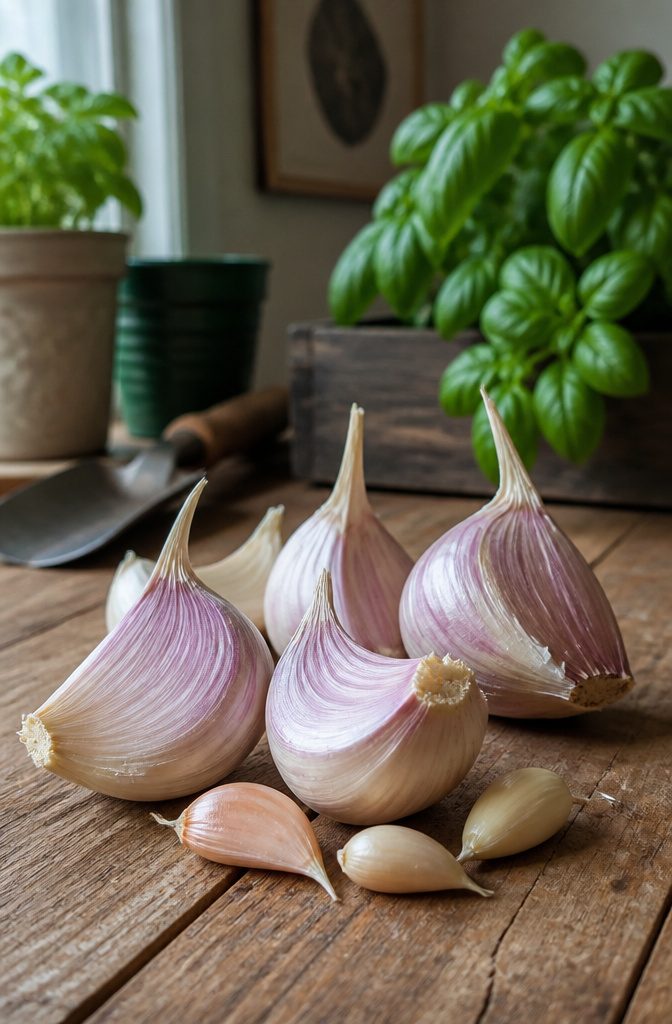
Organic cloves make the difference because supermarket garlic is often treated to prevent sprouting, and that chemical residue does not wash off.
Larger cloves can yield up to 20% more garlic than smaller ones, so I sort through the bulb and set aside anything that feels lightweight or has a soft spot.
Firmness is the test that matters most. A clove that gives under gentle pressure is already breaking down inside, and the papery husk will not protect it once it sits in soil.
I also pass on cloves with dark streaks, mold spots, or any green shoot that looks yellowed and weak rather than pale and firm.
The husks stay on for planting; they help the clove sprout and protect it from rot in the first damp weeks.
Garden centers and online sellers are the safer bet for untreated organic stock, since even a sprouting grocery clove might carry enough inhibitor to stall once it is buried.

Large Opening and Capacity: This garlic keeper measures 4.4" x 3.9" diameter, which can easily hold 3 normal-size garlic bulbs. The wide opening makes the garlic holder easy and convenient to take the garlic out with your hands. A must for garlic lovers! Not only a garlic jar, also it can be used for onion, patato or ginger.

GUARD YOUR GARLIC: Keep your garlic safe and organized with this classy terra cotta garlic keeper. Works for small and medium sized bulbs, larger sized bulbs may not fit.
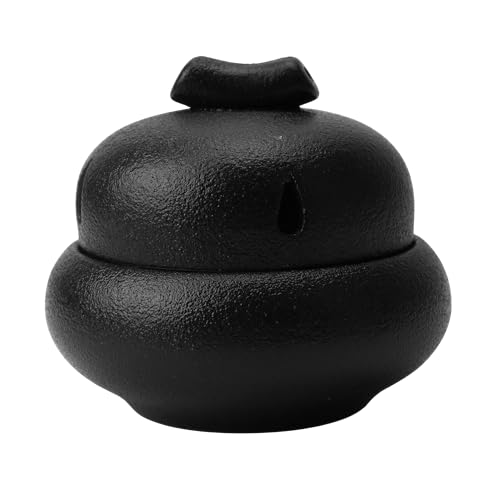
High-Quality & Durable: Made of premium ceramic fired at high temperatures, this garlic holder is strong, long-lasting, and built for everyday use.
2. Pick a Container
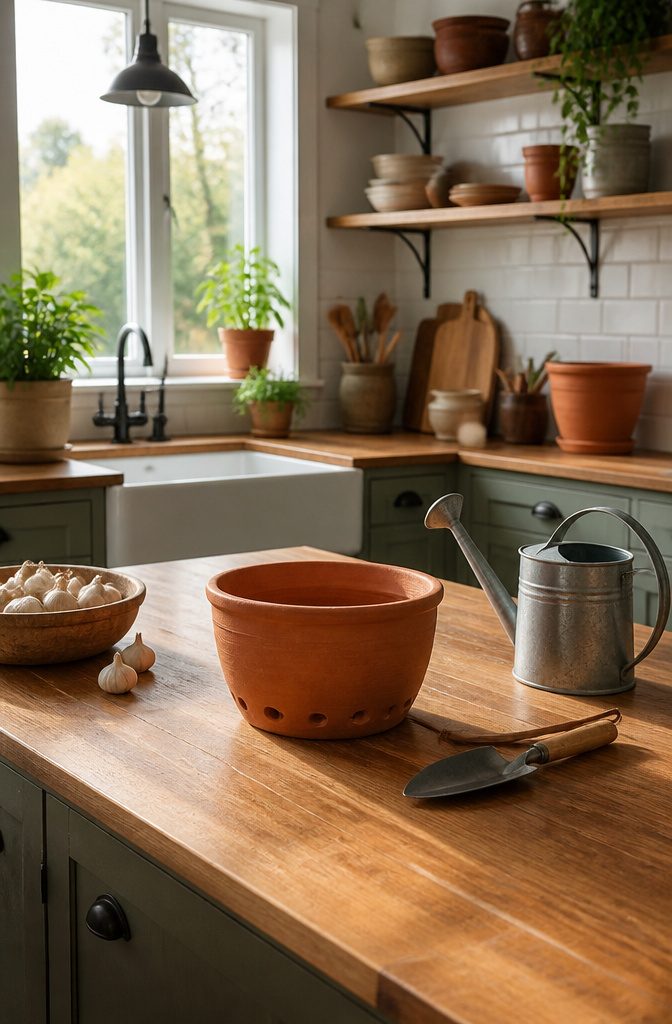
The container needs to be at least 8 inches deep with drainage holes that actually work.
Width matters too; 12 inches across gives you room for 3–4 cloves spaced apart without crowding. Terracotta, a wooden box, even a cleaned-out food bucket will do the job if it meets those two specs.
A shallow bowl looks nice on a windowsill but garlic needs at least 6 inches of depth for roots to spread.
No holes, because I planned to water carefully. The cloves turned to mush in under two weeks.
Drainage is not a suggestion; it is the difference between garlic greens and a moldy disappointment. If you find a pot you love without holes, drill them for ceramic or glass, or punch them through plastic with a heated nail.
Pre-moisten your mix before planting and watch whether water runs out freely. If it pools on top, your container is already telling you the roots will sit wet, and wet garlic rots before it grows.

Perfect for everyday use

Made in France since 1850. Made of all natural materials. High-fired Burgundy clay using Emile Henry hr. ceramic (high resistance)

5 Lbs of fresh and peeled garlic cloves
3. Prepare the Soil Mix
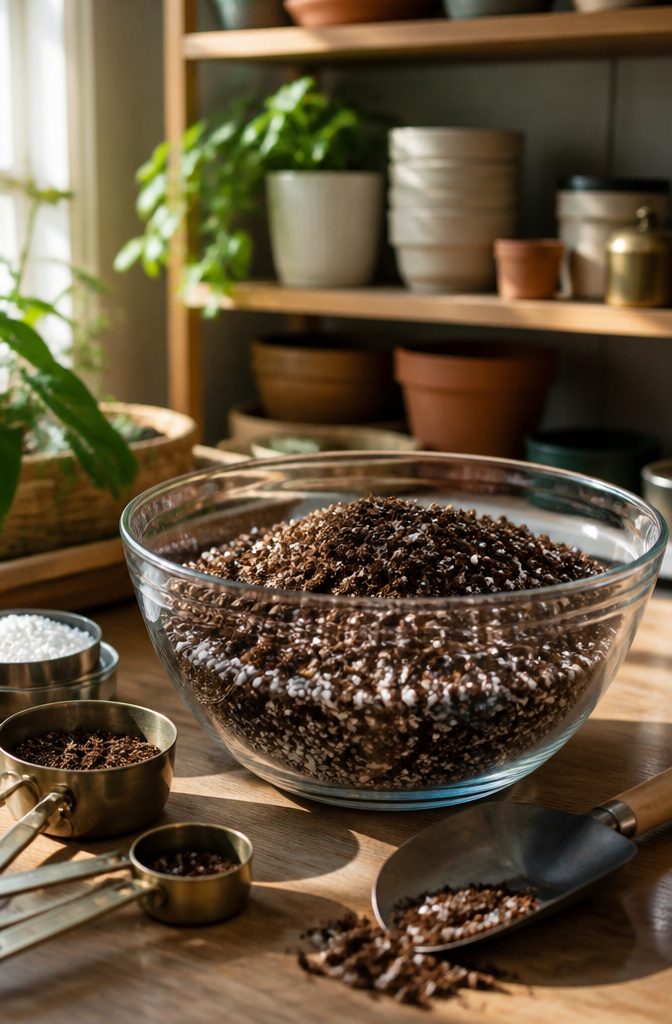
Regular garden soil holds onto water too long for a pot on a windowsill, and garlic left sitting in moisture rots before it ever greens up.
Well-draining mix is what you want, though sources describe it differently: one calls for potting soil plus perlite, another prefers a loamy or sandy blend.
I split the difference and use three parts all-purpose potting soil to one part perlite. That ratio has kept the mix light enough that water runs through within a few seconds, which matters more than the exact brand.
Vermiculite works in place of perlite if that is what you have; both create the air pockets the cloves need.
The container should be at least 6 inches deep for greens, 8 inches if you are hoping for even small bulbs, and drainage holes are non-negotiable.
I leave about two inches of space below the rim so soil does not spill when I water.

Beautiful Roses On Blue Background Onions Sprouting? Potatoes Going Soft? Not Anymore. Plastic Bags Trap Moisture And Let Light In—the Two Things That Make Produce Spoil Faster. This Storage Bag Blocks Light And Absorbs Excess Moisture, So Your Onions, Potatoes, And Garlic Stay Firm And Fresh For Weeks.

Tennessee State Flag Onions Sprouting? Potatoes Going Soft? Not Anymore. Plastic Bags Trap Moisture And Let Light In—the Two Things That Make Produce Spoil Faster. This Storage Bag Blocks Light And Absorbs Excess Moisture, So Your Onions, Potatoes, And Garlic Stay Firm And Fresh For Weeks.

Solid Color Pink Onions Sprouting? Potatoes Going Soft? Not Anymore. Plastic Bags Trap Moisture And Let Light In—the Two Things That Make Produce Spoil Faster. This Storage Bag Blocks Light And Absorbs Excess Moisture, So Your Onions, Potatoes, And Garlic Stay Firm And Fresh For Weeks.
4. Plant the Cloves
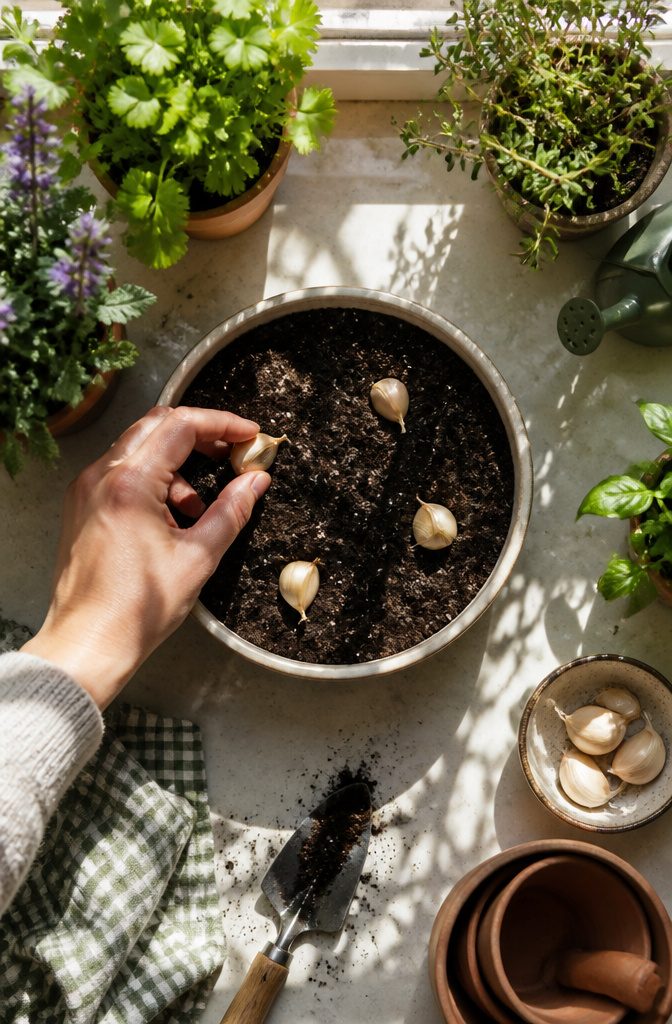
Cloves go into the soil pointy side up, 2 to 3 inches deep and 4 to 6 inches apart from each other.
The flat end sits at the bottom where roots will push out, and the tip stays close enough to the surface for the shoot to break through without burning energy it does not have.
I planted a batch flat-side-up once, thinking the orientation could not matter that much. The sprouts still emerged, but they came out twisted and pale, looping back through the soil before finding daylight.
Some never made it above the rim. The ones that did were weeks behind the properly oriented cloves in the same container, and never filled out the same.
Space matters too. Four inches works for greens you plan to cut early; six inches gives the bulb room to swell if you are growing toward a full head.
I split the difference at five inches when I want both options open. Cover with soil, press lightly to settle the clove, and water until a little drains from the bottom.
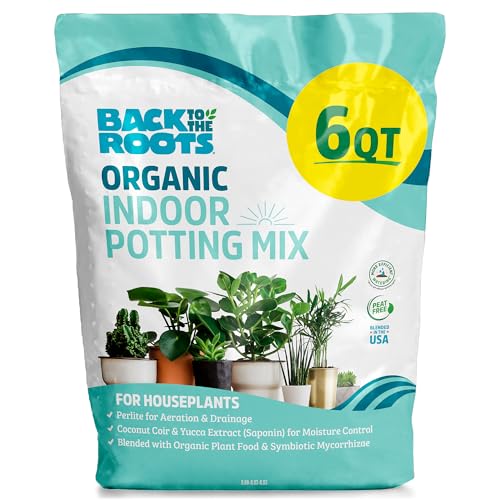
Includes 6qt of Back to the Roots Indoor Potting Mix. Our Potting Mix contains organic yucca extract that aids in retaining moisture in the soil which keeps your indoor plants happy and healthy

INDOOR GROWING: Growing indoors is easy under the right conditions; Miracle-Gro Houseplant Potting Mix is an indoor plant potting soil that combines key elements container plants need to thrive

CHUNKY AROID SOIL BUILT FOR MONSTERA & ALOCASIA: Our small-batch aroid mix blends Douglas fir bark, pumice, lava rock, New Zealand tree fern fiber and charged biochar into an airy, chunky monstera potting mix that mimics a rainforest floor. Made for Monstera, Alocasia, Philodendron, Anthurium, Hoya, Syngonium and rare aroids.
5. Set Up Light
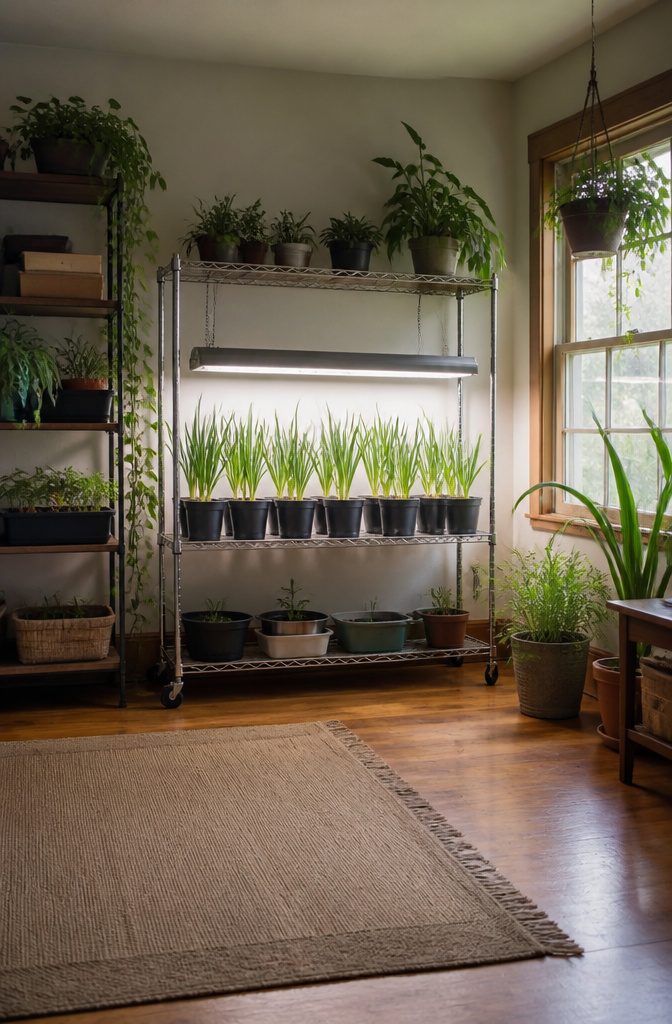
Garlic grown indoors needs 12 to 16 hours of light daily, a demand that most windowsills simply cannot meet, especially in winter. My first attempt leaned hard on a south-facing kitchen window that got maybe six hours of direct sun in December.
The shoots stretched pale and thin within ten days, leaning toward the glass like they were searching for something better. That window failed because I wanted it to work, not because it actually could.
A full-spectrum grow light solved it, and cheaply. A basic 4-foot shop light hung on a chain from a wire shelf works fine, the kind with two T8 fluorescent tubes that cost under $20 at any hardware store.
It pulled about 40 watts total, ran on a $10 outlet timer, and sat roughly six inches above the pot tops. The greens turned thick and upright within a week.
Temperature matters nearly as much as the light itself.
Garlic stays happiest between 60 and 75 degrees Fahrenheit, which happens to match most heated rooms. The trouble comes if you set pots directly on a cold windowsill in January; the roots chill while the tops bake under a lamp.
A small thermometer on the soil surface showed me that gap. Raising the pot an inch off the glass with a bamboo trivet evened things out, no extra equipment needed.

Elegant Design for Modern Kitchens: our beige ceramic garlic keeper for counter adds a stylish touch to any kitchen or dining table; The yet elegant design of the garlic holder effortlessly complements all decorations styles, making it both a functional and aesthetic addition to your culinary space

Sturdy Ceramic Construction: Ceramic garlic keeper has a thick ceramic wall. The surface has a smooth, glazed finish. Garlic container feels heavy when you hold it. Garlic jar stays in place on the counter as you reach for a bulb

【Sturdy Ceramic Material】Crafted from high-quality ceramic; resists absorbing odors; durable and scratch-resistant; ensures long-lasting use in your kitchen
6. Water and Feed
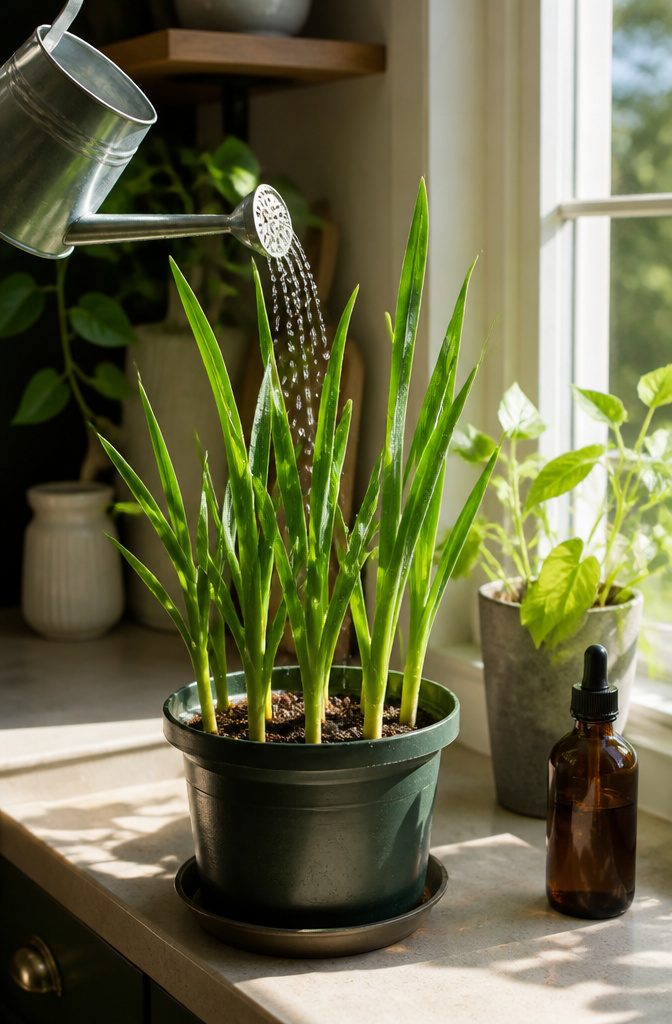
Water thoroughly after planting, then let the top inch of soil dry out before watering again. That dry-inch rule is what separates a living plant from a rotted clove, and I learned it the hard way.
My first indoor batch sat in constantly damp soil because I watered on a calendar schedule, not on what the soil actually needed. The cloves turned to mush before any green showed above the surface.
For feeding, a balanced fertilizer every two to three weeks keeps growth steady without pushing the plant too hard. I run on the three-week mark now, using a diluted organic liquid fertilizer worked into the regular watering routine.
Bi-weekly works if your container mix is leaner, but the every-three-weeks pace has kept my current windowsill pot healthy through two growing cycles.
The overwatering mistake cost me the whole first planting; the fertilizer timing just took one season to settle.
7. Watch for Problems
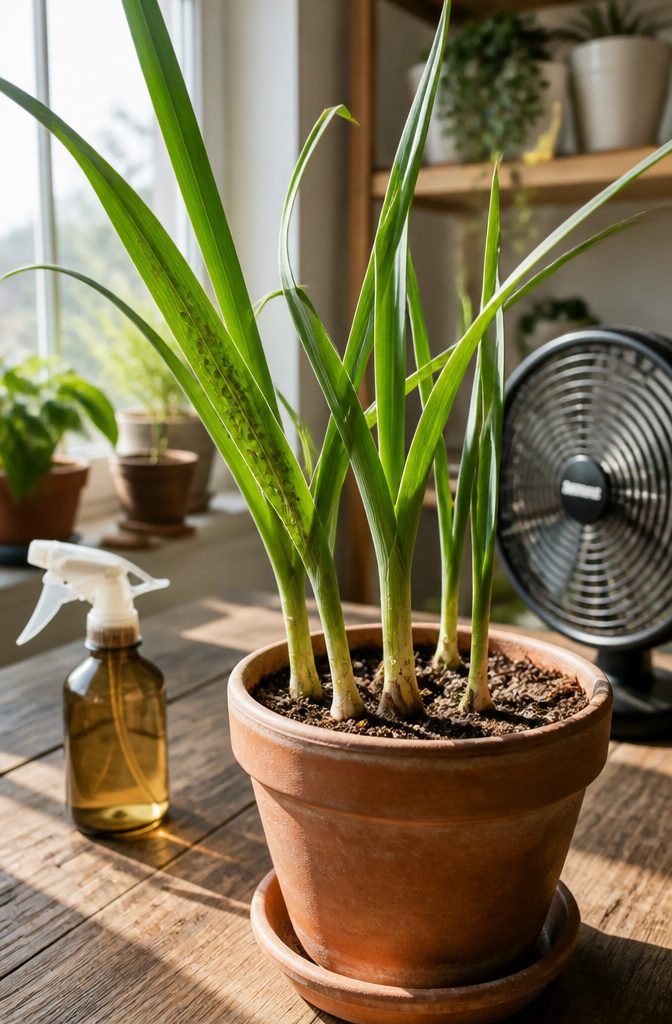
Aphids and whiteflies find indoor garlic just as appetizing as the outdoor kind, and the first sign is usually sticky residue on the leaves or the sill beneath the pot.
Neem oil and insecticidal soap are the controls that have worked for me; I dilute either one to the label strength and spray the foliage thoroughly, including the undersides where the colonies cluster.
Two applications spaced about a week apart usually break the cycle without stressing the plant.
Fungal trouble is less common on a windowsill than in a greenhouse, but it still shows up when the soil stays wet and the air around the cloves is still.
The fix is mechanical before it is chemical: a potting mix that drains fast, a container with holes that actually flow, and enough space between plants so a small fan or an open window can move the air.
I check the pots every few days while the new growth is tender, because that is when pests move in and when a few minutes of attention saves a crop.

Wisconsin State Flag Onions Sprouting? Potatoes Going Soft? Not Anymore. Plastic Bags Trap Moisture And Let Light In—the Two Things That Make Produce Spoil Faster. This Storage Bag Blocks Light And Absorbs Excess Moisture, So Your Onions, Potatoes, And Garlic Stay Firm And Fresh For Weeks.

Flag Of Azerbaijan Onions Sprouting? Potatoes Going Soft? Not Anymore. Plastic Bags Trap Moisture And Let Light In—the Two Things That Make Produce Spoil Faster. This Storage Bag Blocks Light And Absorbs Excess Moisture, So Your Onions, Potatoes, And Garlic Stay Firm And Fresh For Weeks.

Iowa State Flag Onions Sprouting? Potatoes Going Soft? Not Anymore. Plastic Bags Trap Moisture And Let Light In—the Two Things That Make Produce Spoil Faster. This Storage Bag Blocks Light And Absorbs Excess Moisture, So Your Onions, Potatoes, And Garlic Stay Firm And Fresh For Weeks.
8. Harvest Greens or Bulbs
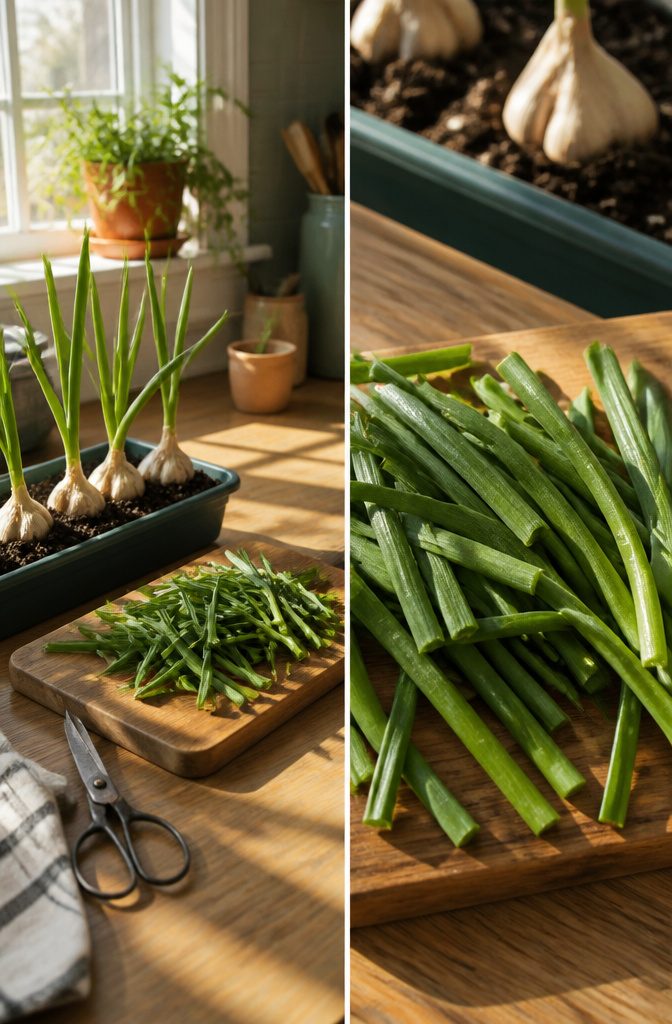
Garlic gives you two completely different harvests from the same clove, and the timing splits wide. Snip the greens once they hit 6 inches tall, leaving about an inch of growth so the plant keeps pushing.
Those greens show up fast, roughly 10 days in, and carry a sharp, fresh allium bite that works anywhere you’d scatter chives or green onion.
The bulbs stay in the soil for the long haul: 8 to 10 months until the leaves yellow and dry back, the same signal outdoor growers watch for. I usually run both tracks at once.
The greens tide me over through winter cooking, while a few cloves sit untouched in their pots, shrinking my grocery list months later with full bulbs I cure for two weeks in whatever corner of the apartment gets decent airflow.
The bulbs store deeper flavor, the kind that holds up to roasting, but waiting nearly a year for every clove feels like leaving money on the table when the greens are right there.

INDOOR POTTING SOIL MADE FOR HOUSEPLANTS: A premium potting soil for indoor plants that replaces dense, generic potting mix and bagged dirt. This houseplant soil holds gentle moisture while letting roots breathe, so pothos, snake plant, peace lily, monstera and other house plants grow fuller and greener.
🌳 PREVENTS BROWN SPOTS, ROOT ROT, AND DROPPING LEAVES Created to provide well-draining soil using organic aged bark, coco coir, and perlite to maintain an optimal balance of water and air for your monsteras. ⭐ INGRIDIENTS: Peat moss, perlite, coco coir, biochar, worm castings, bark.
Hardneck vs. Softneck Garlic
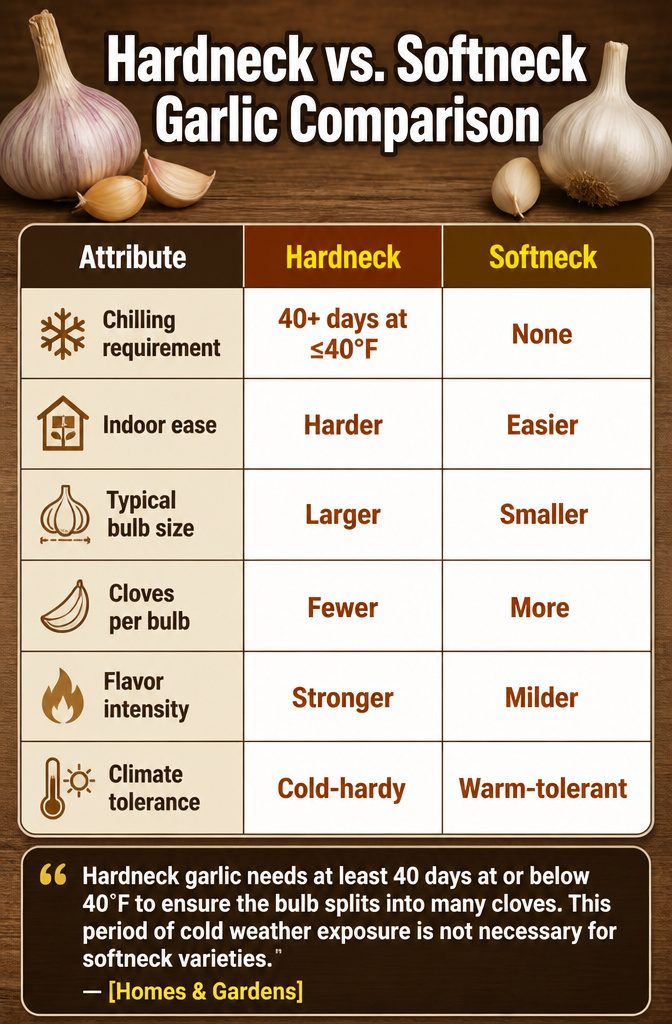
Hardneck garlic delivers the punchier flavor most cooks want, but it demands a chilling period that complicates windowsill growing. At least 40 days at or below 40°F before planting triggers the clove division that creates a full bulb.
Skip it and you end up with a single, undivided bulb that looks more like an onion. Softneck varieties skip this requirement entirely and handle the warmer, steadier temperatures of an indoor room without complaint.
The tradeoff shows up in the kitchen and in the planter. Hardneck bulbs run larger with fewer, easier-to-peel cloves.
Softnecks mature faster and yield more cloves per bulb, though smaller ones. For indoor growers working a windowsill without a spare refrigerator drawer, softneck removes a whole step that hardneck makes mandatory.
| Attribute | Hardneck | Softneck |
|---|---|---|
| Chilling requirement | 40+ days at ≤40°F | None |
| Indoor ease | Harder | Easier |
| Typical bulb size | Larger | Smaller |
| Cloves per bulb | Fewer | More |
| Flavor intensity | Stronger | Milder |
| Climate tolerance | Cold-hardy | Warm-tolerant |
Hardneck garlic needs at least 40 days at or below 40˚F to ensure the bulb splits into many cloves. This period of cold weather exposure is not necessary for softneck varieties.
That chilling requirement is the deciding factor for most renters and first-home growers.
No cold garage or extra refrigerator shelf? Softneck varieties like ‘California Early’ keep the project on a weekend timeline.
Have a porch that stays near freezing through late fall? Hardneck varieties like ‘Music’ reward the extra step with bigger, richer-tasting bulbs and the bonus of edible scapes in late spring.
What You Need Before Starting
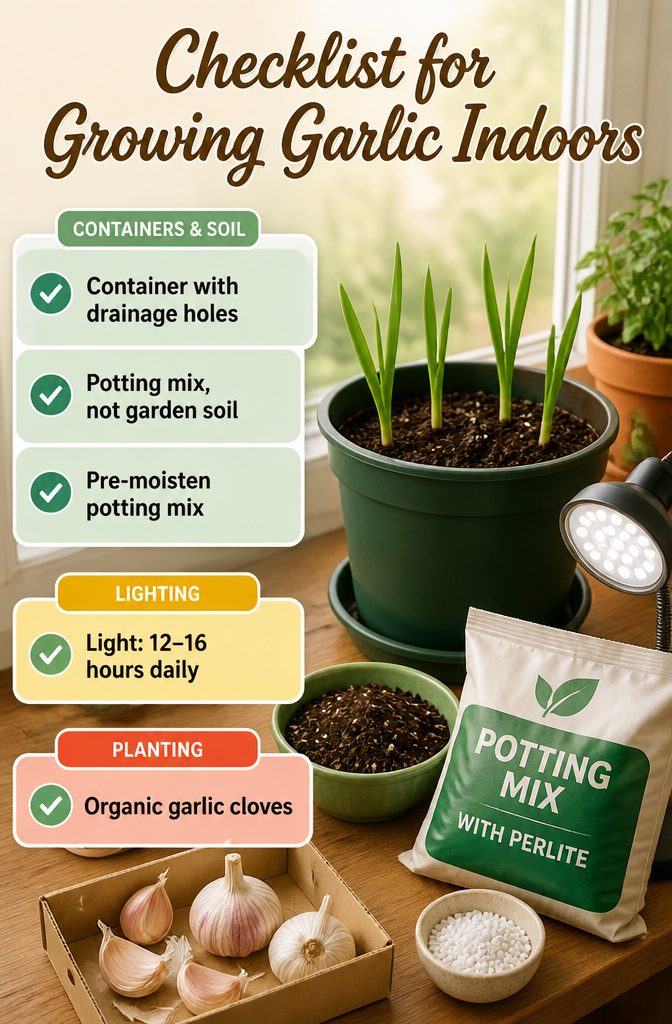
A windowsill garlic setup does not take much room, but the wrong container turns the whole project into a rot lesson. Drainage holes are non-negotiable; without them, cloves sit in water and mold before they root.
I use pots at least 8 inches deep and 12 inches wide, which leaves enough space for 3–4 cloves set 5 inches apart. Terracotta, plastic, or a recycled box all work if the depth is there.
- Potting mix, not garden soil. Garden soil holds too much moisture and invites fungal trouble. A soil-less mix with perlite or vermiculite plus coconut fiber or peat moss drains fast enough to keep cloves healthy. Pre-moisten it before planting so you can check that water actually runs out the bottom.
- Light: 12–16 hours daily. A south- or west-facing window with 6–8 hours of direct sun can work for greens, but bulbs need more. A full-spectrum grow light at around 40 watts for a small setup fills the gap in winter or on darker sills.
- Organic garlic cloves. Supermarket bulbs are often treated to stop sprouting. Garden-center organic cloves cost a few dollars more and actually grow. Split the bulb into individual cloves 1–2 days ahead, paper husks still on.
My first run cost about $22: two plastic pots, a bag of potting mix, and a five-bulb pack of organic seed garlic. The grow light came later, after I realized the window alone was not enough.
Indoor vs. Outdoor Growing
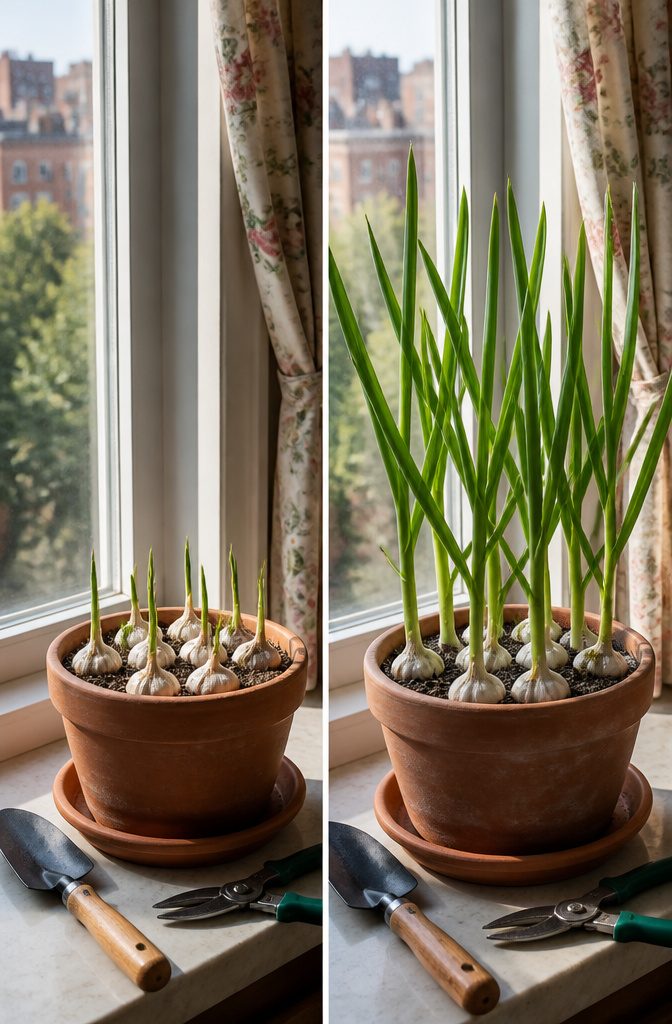
Growing garlic indoors is a different project from growing it outside, and the gap matters more than most people expect.
Outdoor garlic gets planted in fall, sits through winter freeze, and bulks up into full heads by mid-summer with a shelf life of nearly six months.
Indoor garlic on a windowsill skips the cold period entirely, which means it rarely forms a new bulb at all.
What you harvest instead are garlic greens: mild, grassy shoots ready in a couple of weeks and useful anywhere you’d drop scallions or chives.
I started this in a rental with no yard, which is the reason most people land here. A sunny ledge and a six-inch pot with drainage holes was all the infrastructure I had, and all the infrastructure the project needs.
Outdoor growing means waiting months for one harvest, while indoor growing needs staggered planting every week or two if you want a continuous supply of greens.
Pre-freezing cloves in the refrigerator for several weeks before planting can nudge indoor garlic toward small bulb formation, though the results stay modest compared with garden harvests.
Light is the other dividing line. Outdoor garlic follows the season; indoor garlic needs you to guarantee at least four hours of direct sun daily, supplemented with grow lights if your windowsill falls short.
Watering discipline flips too: outdoor soil drains naturally, while indoor pots require a loamy or sandy potting mix and a careful hand to avoid rot.
Common Mistakes and What I Learned
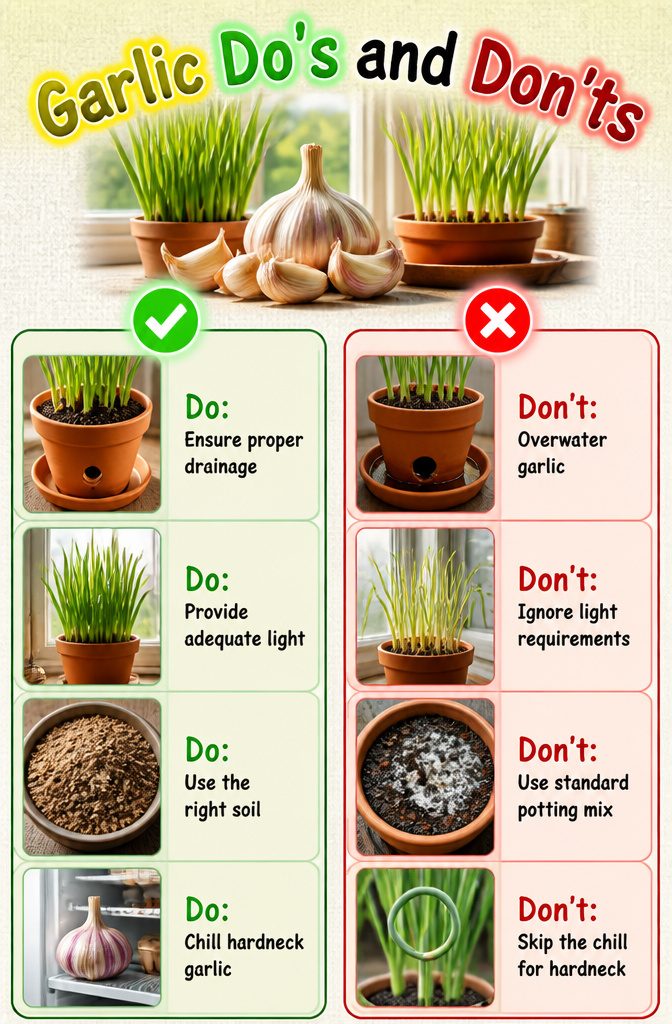
The first few rounds of garlic on my windowsill taught me more than any guide. Here is what went wrong and what actually changed once I fixed it.
- Overwatering and rot came from treating garlic like a houseplant. The cloves sat in a saucer of drainage runoff, and three out of four turned soft and brown inside ten days. A container with drainage holes and a loamy or sandy mix that lets water pass through stopped the losses entirely.
- Too little light produced leggy, pale greens that flopped against the glass. The pots were on a north-facing ledge getting maybe four hours of indirect sun. Moving them to a spot with 12 to 16 hours of light daily, or adding a 40-watt full-spectrum grow light for the small setup, gave me upright shoots with actual flavor.
- Wrong soil brought fungus. Standard bagged mix held moisture too long and grew a thin white film on the surface. Switching to the sandy, fast-draining mix the cloves actually wanted kept the top layer dry enough to stop it.
- Skipping the chill for hardneck meant no bulbs at all, just scapes. Softneck garlic does not need this step, which is why it is better suited to indoor growing. For hardneck, several weeks in the refrigerator before planting is what triggers the cloves to flower and eventually form a new bulb. I now keep a spare head in the fridge starting in late fall if I want bulbs by summer.
How Long Each Method Takes
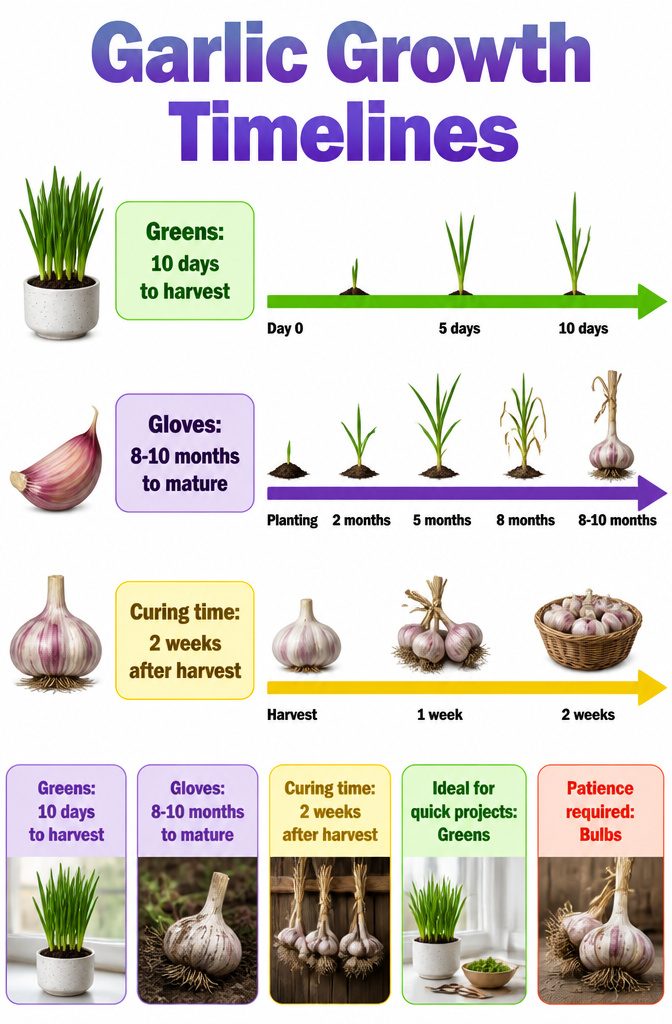
Garlic greens and full bulbs live on completely different clocks, and that gap shapes every decision about where to put the pot. Greens come up in about 10 days, snippable once they hit 6 inches.
The clove stays in the soil, so one planting keeps producing for weeks. Bulbs are another commitment entirely: 8 to 10 months from a single clove to something you can pull and use.
Sources vary on the greens; some say 3 to 5 weeks, but 10 days matches what most window-sill growers actually see when the kitchen stays warm.
The bulb route also tacks on curing time.
After pulling, the bulbs need 2 weeks in a cool, dry place with air moving through them. Flavor deepens during that stretch, and the paper skins tighten enough for storage.
For a renter working a Saturday, the math is obvious.
Greens fit a weekend timeline and a $15 setup. Bulbs demand patience I do not always have, plus the risk of rot over 10 months of watering.
I plant cloves for greens when I want a project I can finish before the lease changes. Bulbs only make sense if I know I will still be standing at that same windowsill come fall.
Frequently Asked Questions
How long does it take to grow garlic indoors?
Garlic greens are ready to snip in about 10 days, and full bulbs need 8 to 10 months until the leaves yellow and dry back.
Greens keep producing for weeks if you leave an inch behind each cut. Bulbs also need 2 weeks of curing in a dry, airy spot after pulling.
What type of garlic is best for indoor growing?
Softneck garlic is better suited to windowsill growing because it skips the chilling period hardneck varieties need.
Hardneck garlic demands at least 40 days at or below 40°F before planting to form a divided bulb, a step most indoor growers cannot easily provide. Softneck varieties like ‘California Early’ mature faster and handle room temperature without complaint.
How do I care for garlic plants indoors?
Give the plants 12 to 16 hours of light daily from a south-facing window or a full-spectrum grow light, water only after the top inch of soil dries out, and feed with diluted organic liquid fertilizer every 2 to 3 weeks.
Keep the temperature between 60 and 75°F, and raise the pot off a cold windowsill in winter so the roots do not chill.
Check every few days for aphids or whiteflies, and treat with neem oil or insecticidal soap at the first sign.
Is it okay to plant garlic from the grocery store?
Supermarket garlic is usually treated with chemicals to stop sprouting, and that residue does not wash off.
Garden centers and online sellers are the safer source for untreated organic stock. The exception is a grocery clove that has already sprouted on its own, which might grow, though even those sometimes carry enough inhibitor to stall once planted.
Is garlic hard to grow inside?
Indoor garlic is straightforward if you avoid a few common traps: no drainage holes, regular garden soil, overwatering, and too little light.
The project fits a small windowsill and a $15 setup, though growing full bulbs takes far longer than greens and almost never matches outdoor harvests. Mistakes rot the cloves fast, but the fixes are simple and cheap.
What are some common mistakes people make when planting garlic?
Overwatering or letting the pot sit in drainage runoff rots cloves within days.
Standard potting mix holds moisture too long for garlic, so a fast-draining soil-less blend with perlite or vermiculite is necessary. Too little light produces leggy, pale shoots that lack flavor.
Planting cloves flat-side-up delays and weakens the sprouts. Skipping the refrigerator chill for hardneck means the bulb never divides.