
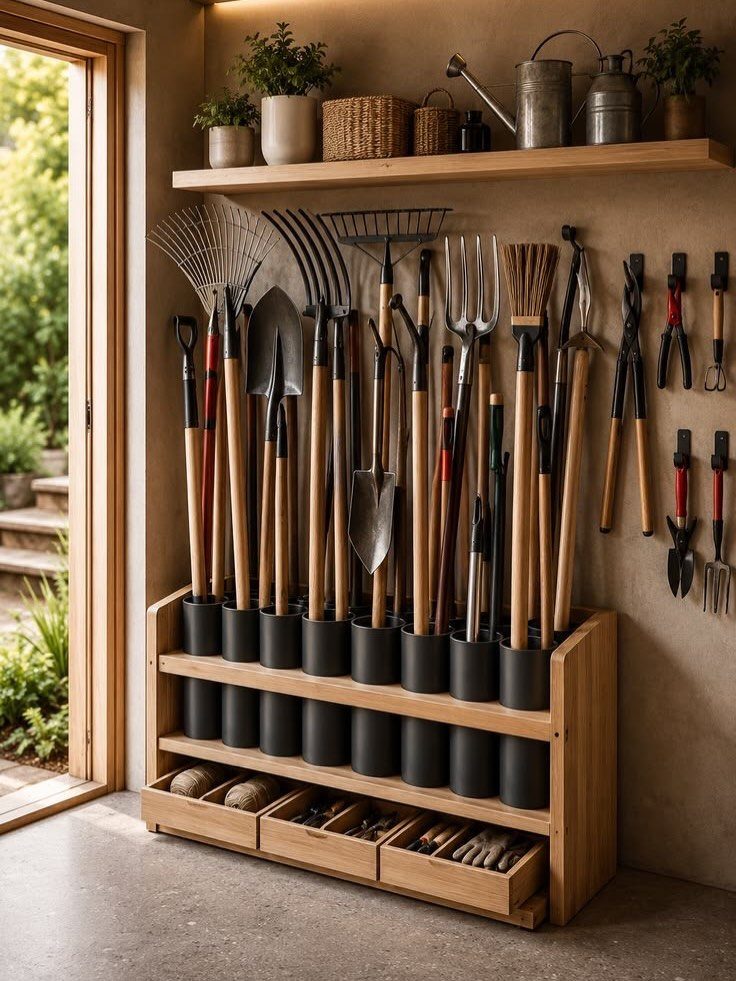
Tool shed storage ideas run from screw-in hooks to a weekend of plywood and French cleat cuts, and the one that fits depends on whether you own the structure or answer to a landlord.
Renters and newer homeowners lean toward slatwall, rolling carts, and pegboard that leave few marks; owners can lag-bolt overhead lofts and built-ins without permission.
A 6×4 shed, the size that fits most small yards, still holds a push mower and full yard arsenal if you think in cubic feet and keep the floor clear.
[link-whisper-related-posts]1. Lawn and Garden Corner
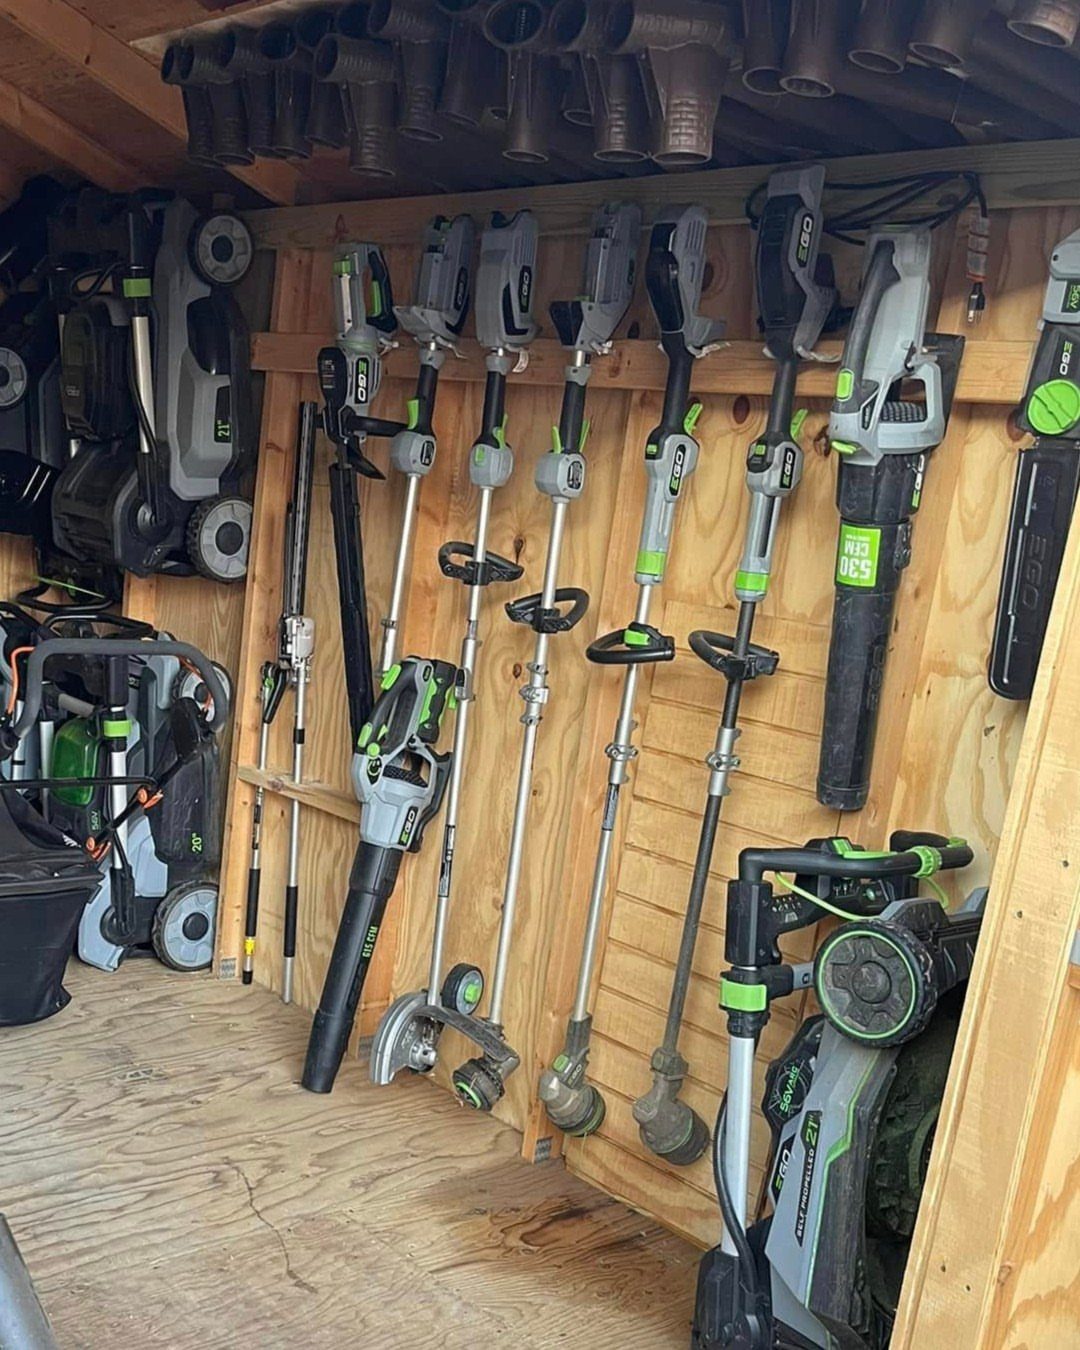
Corner hanging keeps lawn gear off the floor and out of the way. String trimmers, edgers, and blowers can live on simple hooks along 2 meeting walls, with folded mowers tucked underneath on a low shelf or the ground itself.
I like this setup because it uses space that usually goes to waste.
A 6×4 shed, which fits most small yards, still has room for the basics: shovels, rakes, pruners, plus a push mower or compact wheelbarrow. Give everything a specific spot so the floor stays clear for walking.
For smaller hand tools, a bin or basket on that same shelf keeps trowels and pruners from scattering. Sturdy hooks at varied heights let you hang long-handled tools without crowded clanking.
2. Pegboard or Slatwall Systems
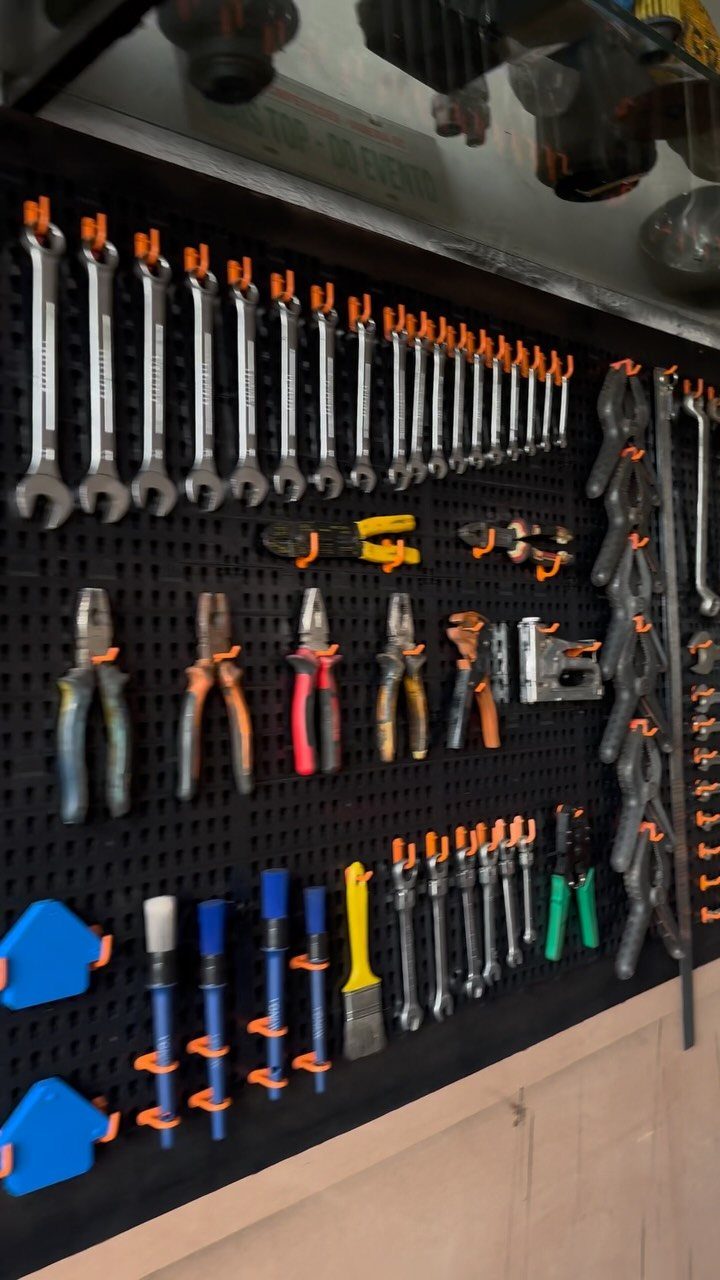
A slotted wall panel above a workbench turns empty vertical space into flexible storage. Orange plastic hooks grip wrenches, pliers, clamps, even paintbrushes; move them as your collection shifts.
This system suits renters and newer homeowners because it installs with basic hardware and leaves minimal marks if you relocate. Slatwall slots or standard pegboard holes both work; the panel itself mounts in an afternoon.
What I appreciate is the rearranging. Buy a new tool?
Shift hooks left or right. Season changes?
Swap paintbrushes for pruning shears. Nothing gets buried in a drawer or lost behind boxes.
Keep frequently used items at arm height. Longer pieces like levels and extension cords hang vertically on double hooks to stop swinging and save width.

Value Package: Our pegboard tool organizer comes with 120pcs pegboard accessories,16 different type pegboard hooks including 5pcs pegboard bins, curved hooks, angled hooks, straight hooks, and ring tool holder, multi tool rack. 49pcs of them are peg locks for fixing hooks

METAL NAILBOARD: Our peg board panels are made of high quality steel with a powder coated finish that is strong, scratch resistant and easy to clean. Each small pegboard has a weight capacity of up to 50 lbs. This is a favorite product for tool organizers, DIY enthusiasts, store owners and office workers.
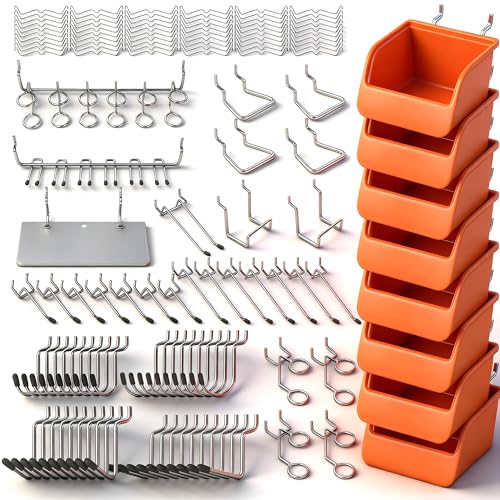
Product includes 15 different types of hooks and organizers, and is fully functional for a wide range of hanging applications.
3. Adjustable Rack Shelving
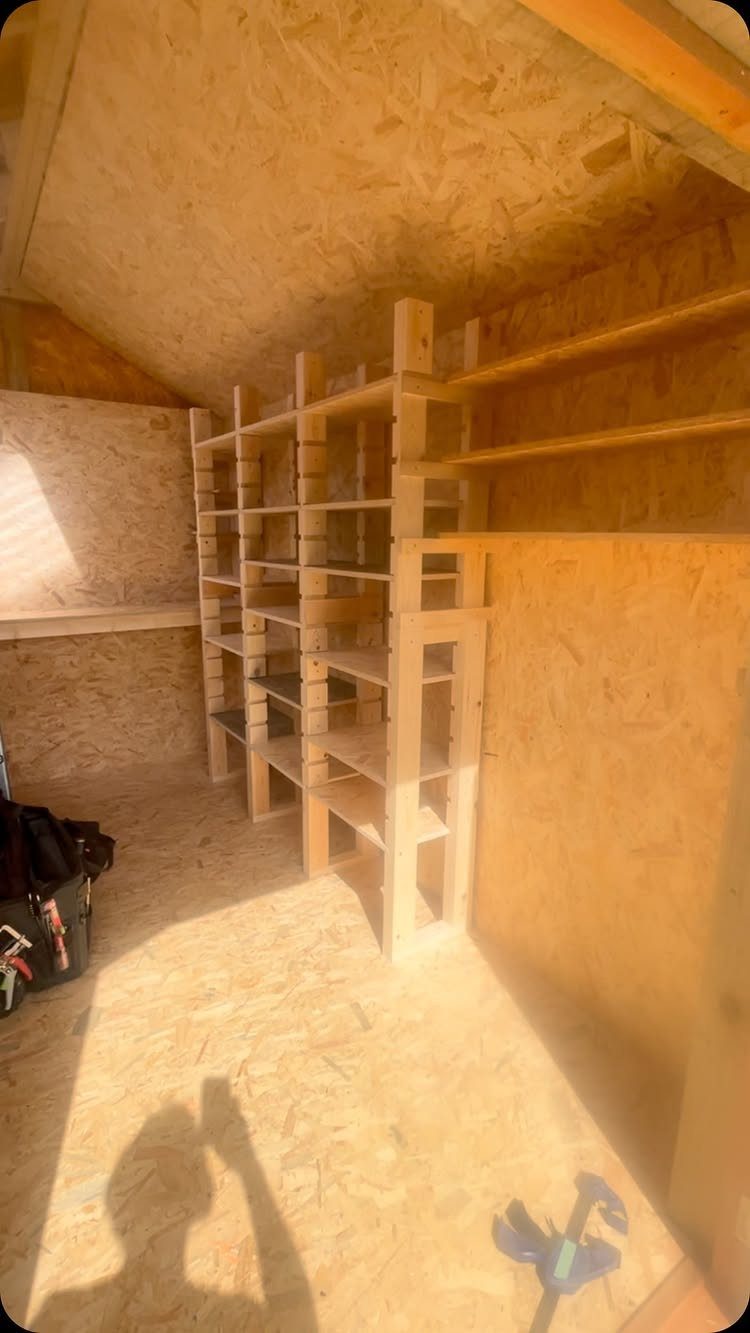
Built-in wooden shelving with multiple height slots lets you move shelves as storage needs change.
Metal wire versions work the same way, their open design keeping contents visible. I would pick wood for a shed I owned and wire for something temporary; both reconfigure without tools once the uprights are in.
The real value is accommodating what you have now and what you acquire later.
Bulky power tools sit on wide spacing; hand tools and supplies rise to narrower gaps. Nothing gets relegated to mystery piles in corners.
Check that shelf clips or pins are rated for weight before loading. A single collapsed shelf undoes the whole system.
4. Rolling Utility Carts
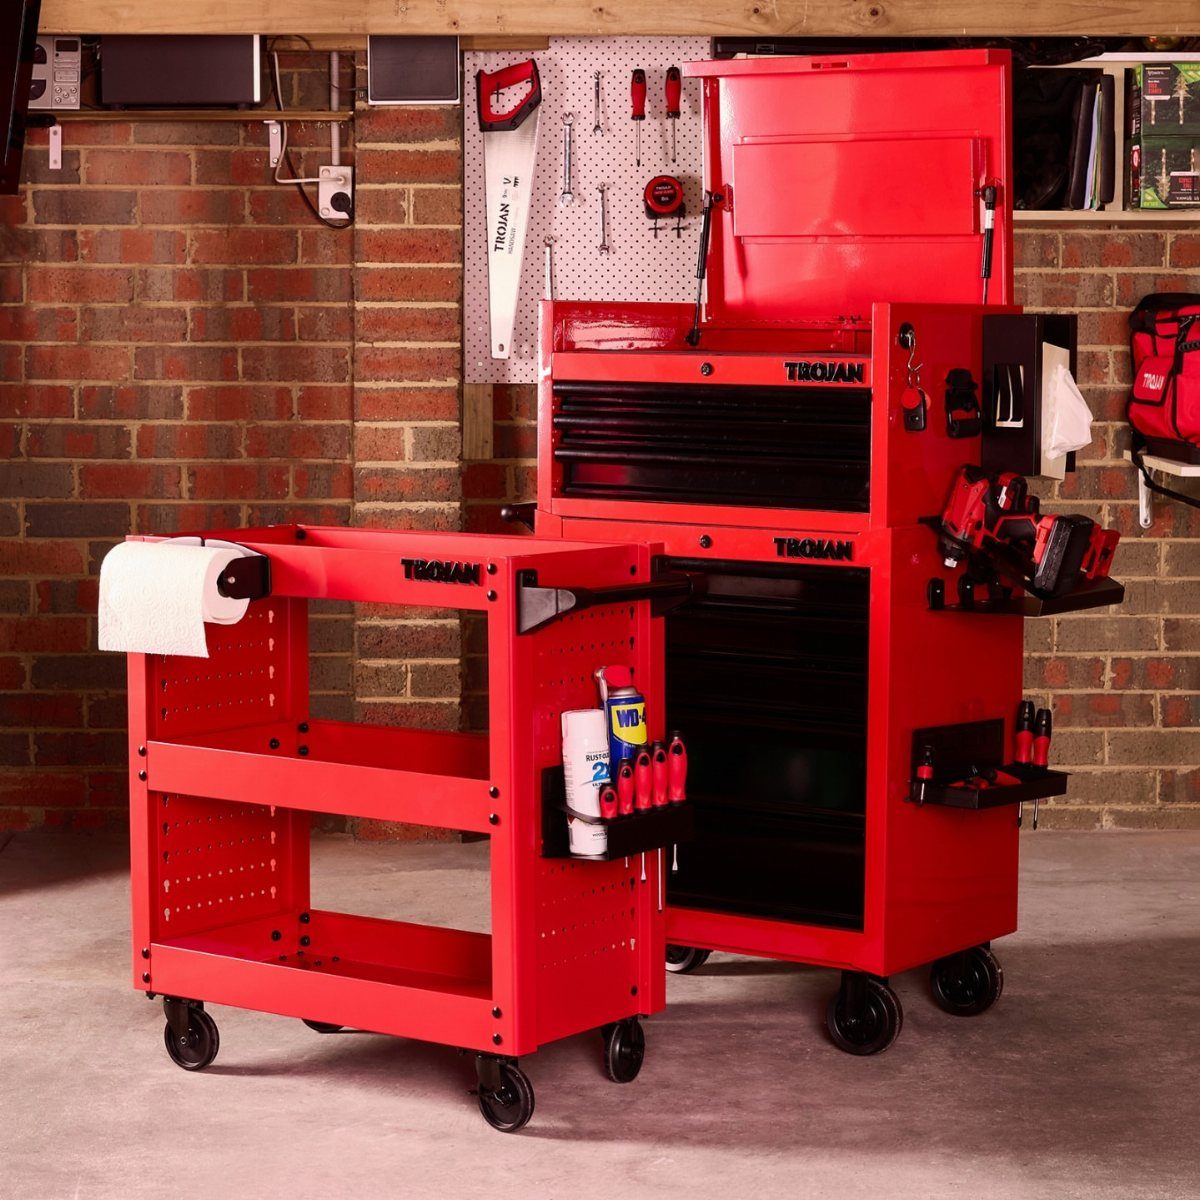
A tiered cart rolls where the work happens, then returns to the shed when done. Three-level rolling carts carry tools, spray cans, and paper towels within arm’s reach; some add power strips for charging cordless gear mid-project.
This matters most on spread-out properties.
Making 3 trips to fetch a drill, then screws, then the level, burns weekend time. One loaded cart cuts that to one trip.
Look for locking casters so the cart stays put on slopes. Removable trays or bins help sort by task: plumbing fix on one level, garden cleanup on another.
I would not store weather-sensitive items here permanently. The cart is at its best as a mobile staging zone, not long-term housing.
5. Labeled Toolboxes and Bins
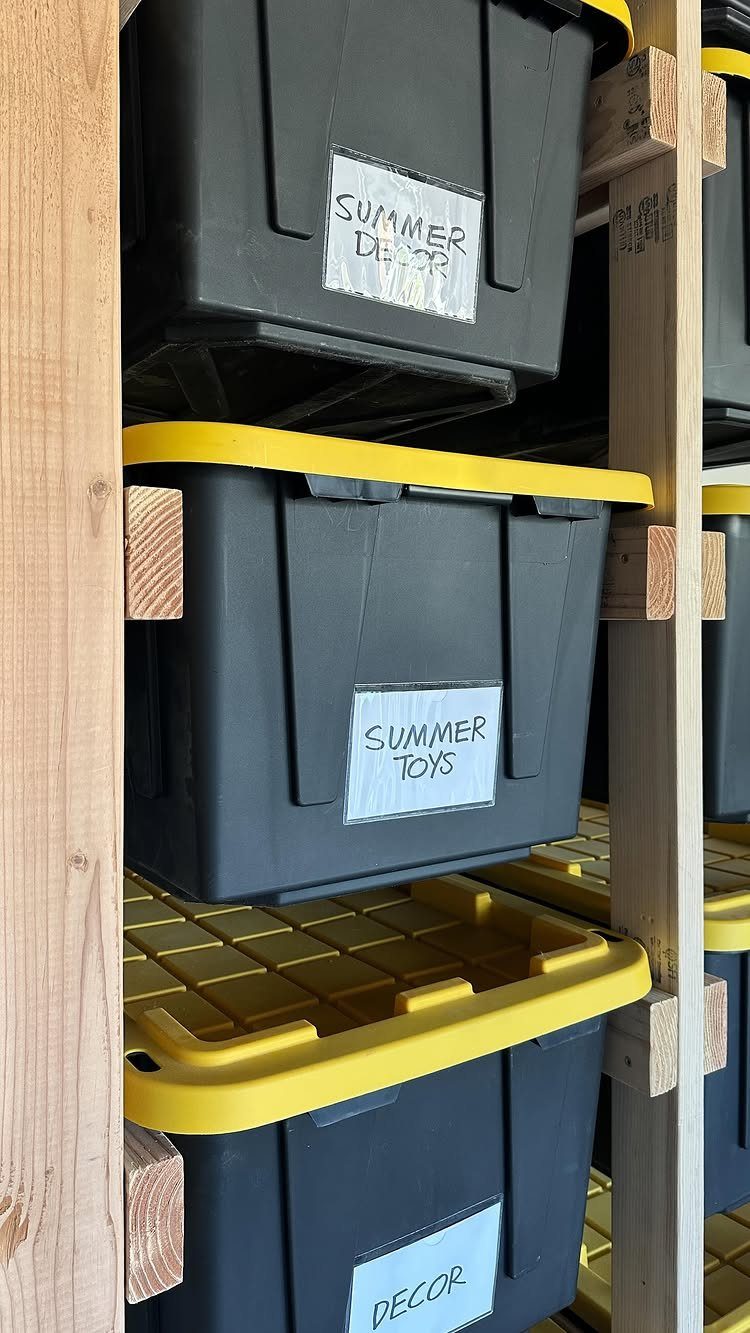
Broad categories like plumbing, electrical, fasteners, and adhesives work better on shed bins than seasonal labels meant for house storage.
Any consistent labeling beats none.
Masking tape and a Sharpie last years in a dry shed; printed labels look sharper but require more setup. Pick the method you will actually maintain.
The payoff shows up mid-project.
Searching through unmarked bins for a specific fitting or bit interrupts flow and stretches a Saturday morning into afternoon. Labels restore the rhythm.
Stack same-size bins so labels stay visible at the edge. Mixed sizes end up with hidden layers you forget exist.

LIFTING DESIGN: Use the included hand crank or power drill (not included) to raise and lower the garage storage rack, making it easy to place items without a ladder. The maximum lifting range is 79", and the suitable ceiling height is less than 10 feet.
6. Custom Tool Holders
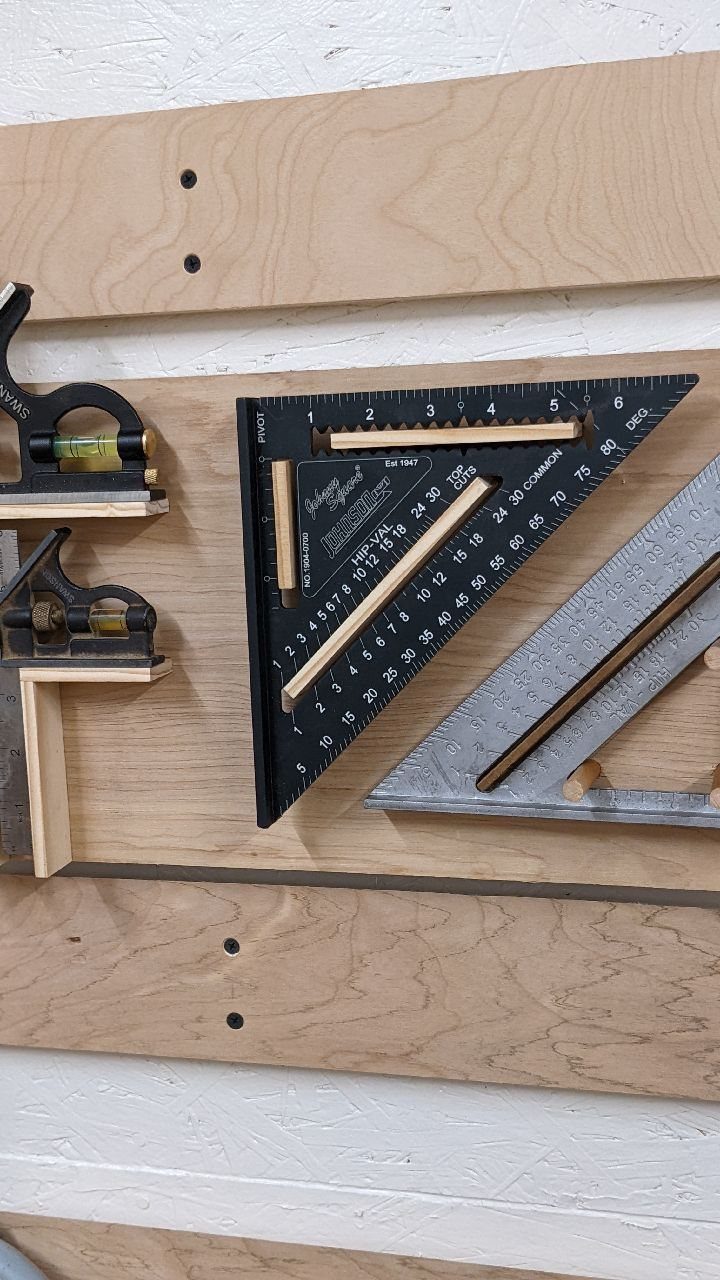
Custom wooden supports sized to specific tools eliminate the gap between generic holder and actual shape.
Building these takes measuring your actual tools first, not guessing. Plywood backing and hardwood dowels handle most hand tools; deeper pockets suit bulkier squares and levels.
I would start with the 3 tools used most often.
Perfect fits for daily pieces beat half-finished walls of holders for tools you touched once. Expand as habits clarify.
You spend an hour measuring and cutting once, then never hunt for that square again. An hour per fitted holder pays back in grab-and-go speed and in protecting edges from drawer jostling.
7. Wall Mounted Power Tool Station
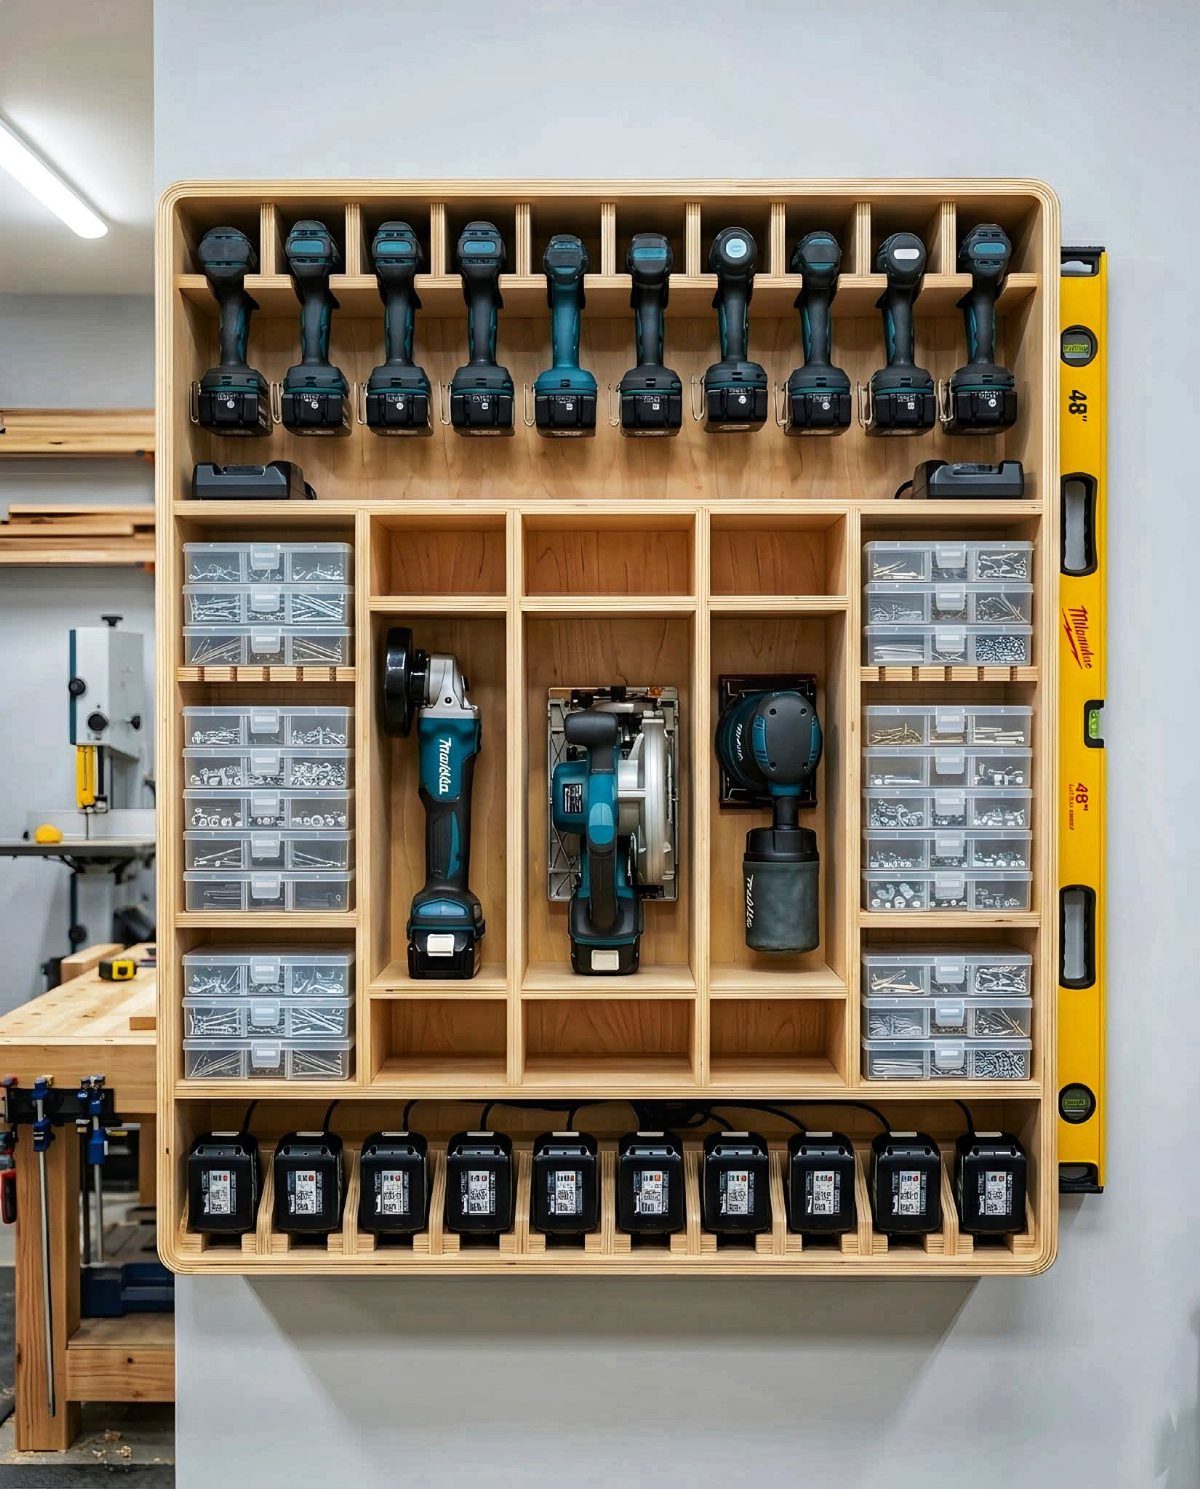
A wall-mounted plywood station keeps cordless drills, chargers, and small hardware in one grab-and-go zone. The visible setup uses a single panel with dedicated pockets for each driver plus clear bins for bits and fasteners.
Before building, measure your actual collection.
Two drills and a sander need less width than the full six-tool spread shown; scale the panel to your wall, not the photo. Leave clear space around chargers for airflow so they do not overheat.
I would mount this at standing height, not bench height, since shed work often happens without a formal workbench. A level, hung beside the station, finds its own home there too.
Check that wall studs or blocking support the weight; plywood is heavy once loaded, and shed walls are often thin. Pre-drill to prevent splitting.

Value Package: Our pegboard tool organizer comes with 278pcs pegboard accessories, 16 different type pegboard hooks including 12pcs peg board bins, curved hooks, angled hooks, straight hooks, and ring tool holder, multi tool rack. 109pcs of them are peg locks for fixing hooks
8. Overhead Loft Storage
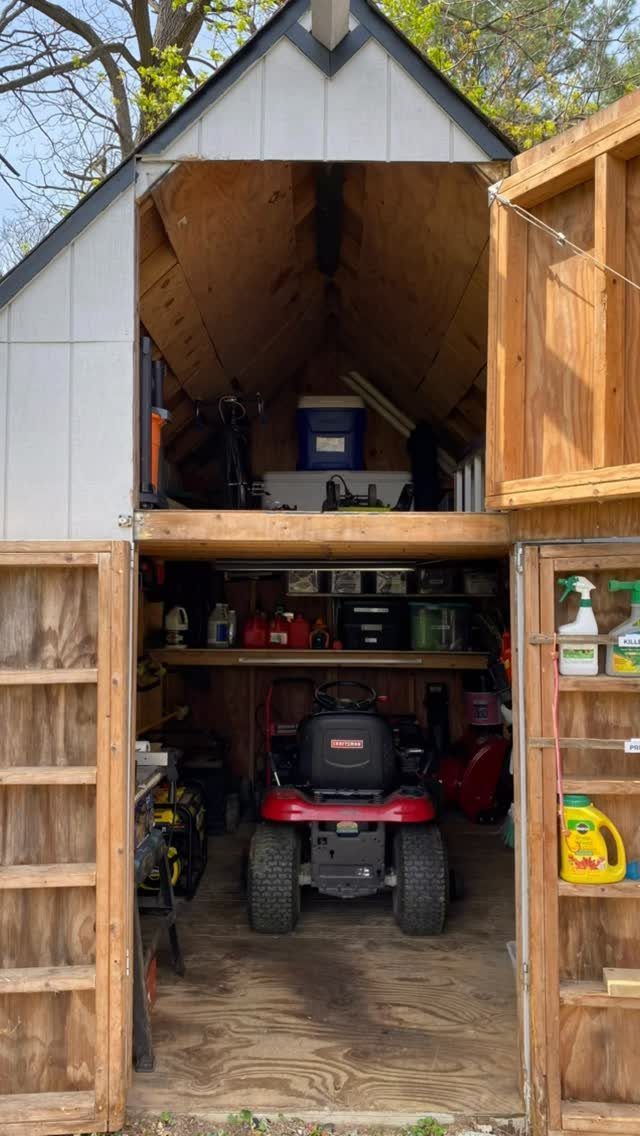
An open loft turns the shed’s top third into storage without shrinking floor space for the mower below.
The visible setup runs a wooden platform across one end, open to the rafters, with bins and coolers slid back from the edge.
This suits anyone whose shed footprint is fixed but height goes unused.
I would build with 2-by-4 joists and plywood decking, lag-bolted to wall studs, not toenailed. The riding mower’s weight belongs on the slab, not the platform.
Spring prep, the maker noted, is less than 3 weeks out; gear stored overhead now stays accessible when yard season hits.

5 shelf wire rack offers handy storage space and easy access to tools and supplies
9. Wall Hooks for Everyday Yard Tools
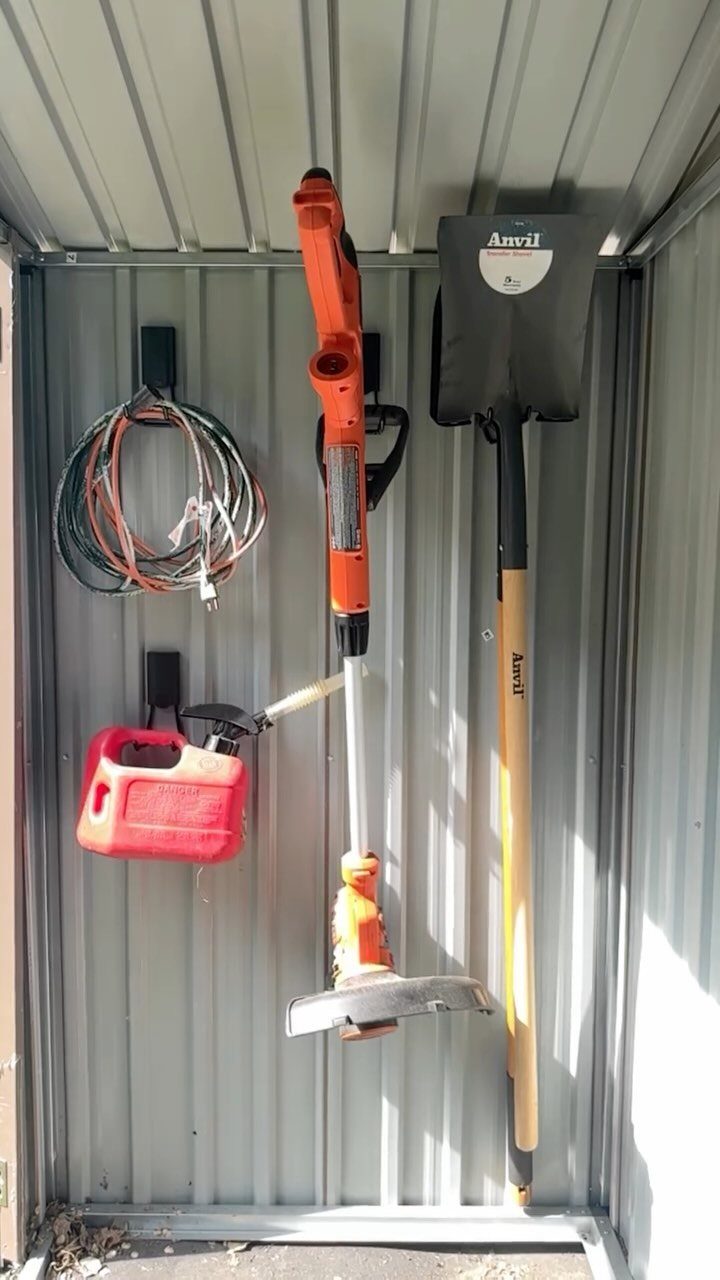
Heavy wall hooks scattered at varied heights let extension cords, gas cans, trimmers, and shovels each hang without tangling or leaning.
The metal shed walls need backing to take screw-in hooks without stripping; wooden walls can take longer screws to grip studs.
This is the fastest upgrade on the list. A dozen hooks, 20 minutes, and the floor clears.
I would keep gas cans low, below head height, and cords coiled on 2 hooks spaced to match the coil’s diameter.
Trimmers hang by their shaft, blades up, away from shins and hands. Shovels stay vertical, blade down, so dried dirt falls off.
Paired hooks for each item beat single hooks; the tool stays put when you bump it. Check that hook throats fit your handles: larger hooks cover most long-handled yard gear, smaller hooks suit cords and trimmers.

GIVE EVERY TOOL A HOME: Turn an underused garage or shed corner into a dedicated spot for your garden tools. The triangular design brings scattered tools together, helping free up floor space and keeping everyday essentials easy to find, reach and return after use.
10. French Cleat Wall System
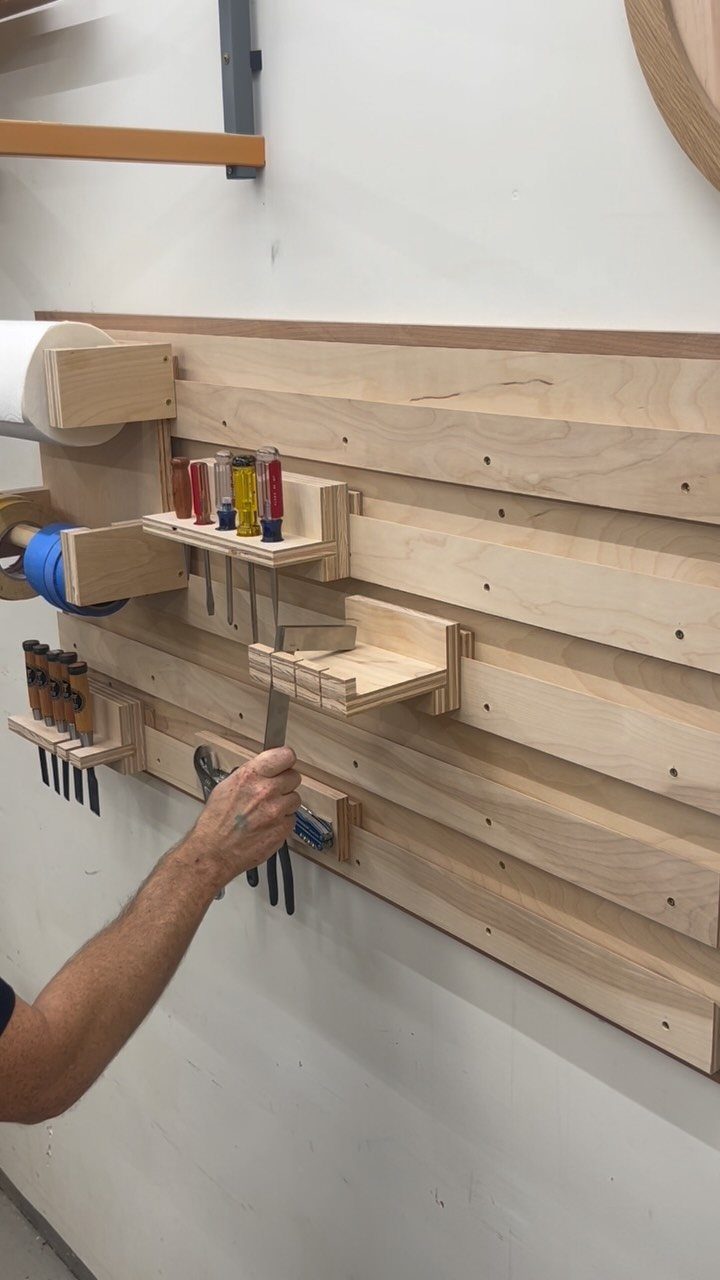
A French cleat system pairs a wall-mounted horizontal beveled strip with matching bevels on the back of shelves, holders, and bins. Lift a piece off to move it; the angled interlock carries serious weight when engaged.
Plywood strips, cut with a table saw or careful circular-saw rips, form both halves. The visible setup shows chisels, screwdrivers, tape, and even paper towels each on their own small backers that share one wall rail.
This suits growing collections better than fixed layouts. A new tool means building one holder, not reworking the whole wall.
I would start with a single rail run level across the studs, then add backers as needed.
Check that your saw cut is truly at the correct angle; a shallow cut slips, a steep one gaps. Hardwoods like maple or oak for small holders resist splitting when you drive mounting screws.

HIGH-STRENGTH MATERIAL: Garage Lumber Storage Rack is made of 1.2mm high-quality thick steel pipe, which is not easy to deform and bend, and its safe load-bearing capacity is beyond doubt. The surface of the garage storage rack is powder-coated, and the sturdy design enables it to withstand daily wear and tear. Not only beautiful, but also waterproof and not easy to rust

【Perfect for Storage】 Ideal for shed, workshop, garage, outdoor workspace or any area where long items need to be stored neatly; This is a very strong storage solution for lumber, firewood, sheet metal, PVC, pipes, ladders, skis, snowboards, golf clubs and more!

Free Up Valuable Floor Space: Delta’s Wall Storage Rack will help you make the most of unused wall space in your garage, basement, shed and more. This durable, 3-tier shelving unit will safely store items horizontally for versatile storage solutions. Wall-mounted storage allows you to create custom solutions and provides extra space storage, even in the smallest space.
11. Toolbox Drawer Organizers
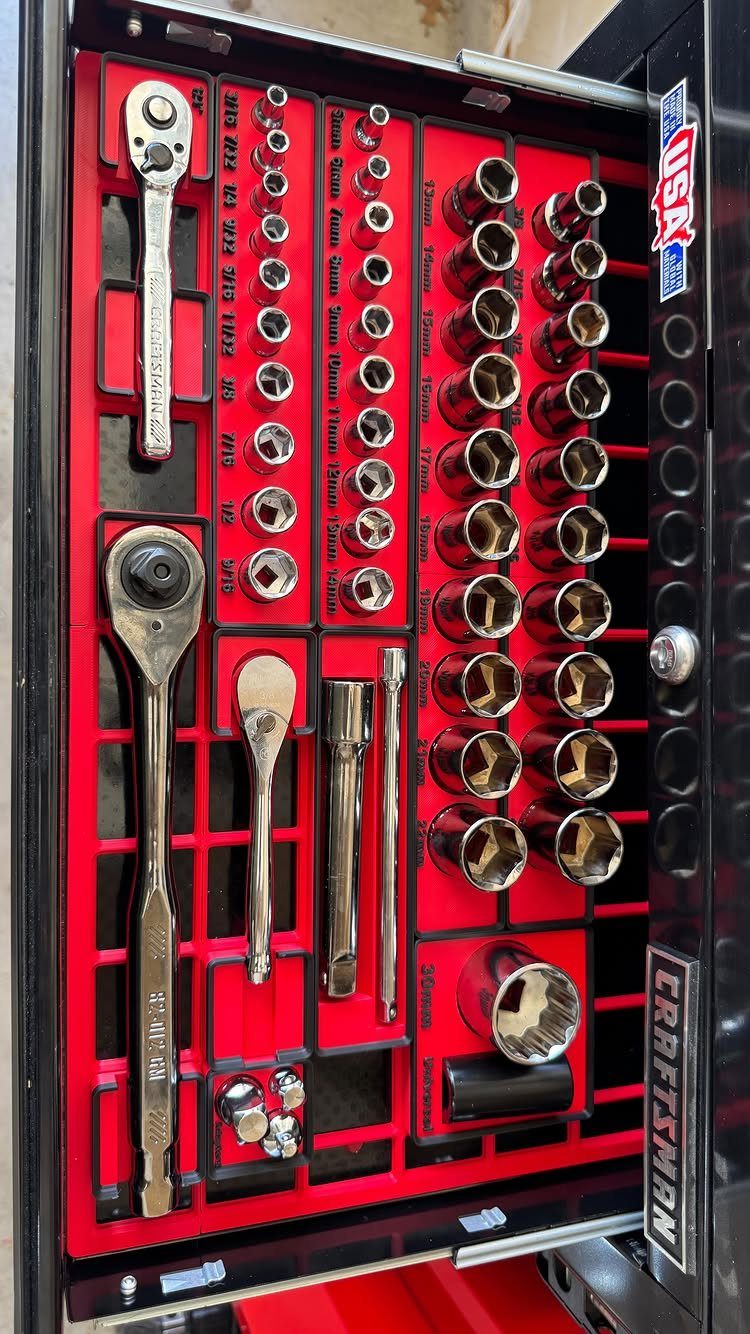
Drawer organizers with custom-cut foam or divided trays turn a toolbox’s loose bottom into labeled homes for sockets, ratchets, and extension bars.
The visible setup uses red and black trays sized to a Craftsman drawer, every item nested in its cutout or divider.
Foam costs more than plastic bins but holds shape after years of grabbing and returning. Measure your drawer interior, then subtract a bit all around for trays that slide in without binding.
I would label each socket slot by size; the seconds spent labeling pay back in not holding up a project to read stamped markings. Trays without labels become mystery piles by month two.
Entry-level socket sets run 40–60 pieces; count yours before ordering or cutting foam. A half-empty tray shifts and looks worse than no tray at all.
12. Built-In Plywood Wall Shelving
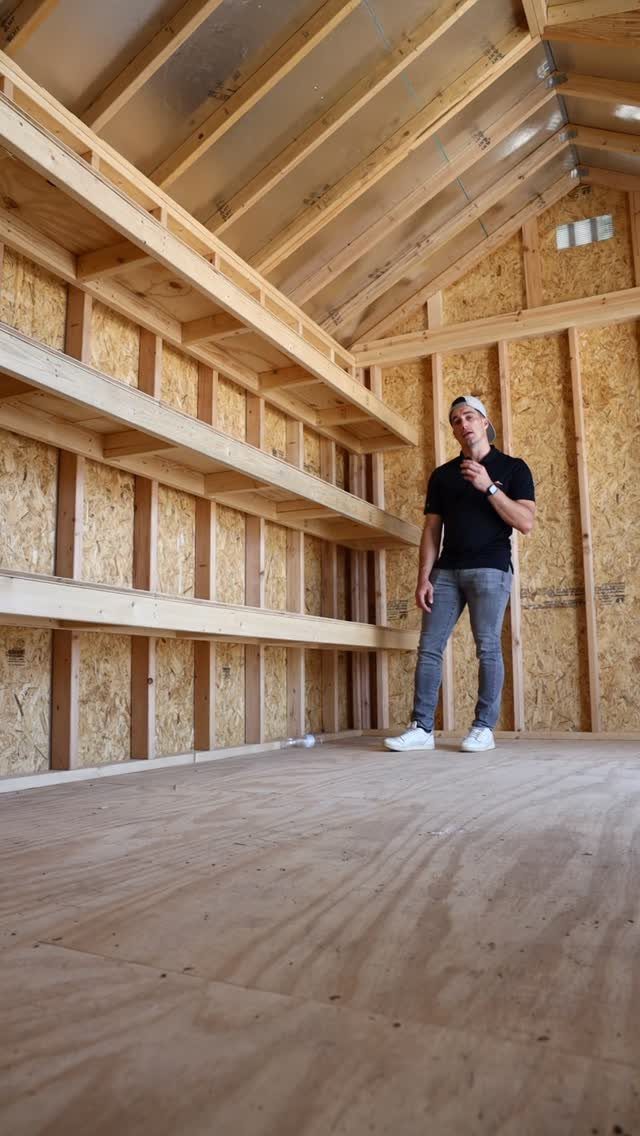
Built-in plywood shelving spans a full wall from floor to ceiling, turning the shed’s structural sides into storage. The visible setup uses simple horizontal planks on vertical cleats, unfinished to match the raw wood walls.
This fits new sheds or gut renovations where you frame the shelving with the walls. Retrofitting into an existing shed means removing siding or working from inside with long screws; plan for that.
I would run deeper shelves for bins and small equipment, shallower ones for hand tools only. Deeper shelves loaded heavy need mid-span support or they bow by the second season.
Check that vertical supports hit studs, spaced to match your framing on center.
Plywood shelves, thick enough for the span, hold up under normal tool weight without sagging. Level each shelf as you go; eyes catch a slant in bare plywood faster than painted finish.
Importance of Organization
A cluttered workbench kills momentum faster than anything else in a shed.
When I have to move 3 things to reach the drill, then hunt for the bit that belongs with it, the project stops being fun and starts being work.
A dedicated station at standing height, not tucked behind flower pots, changes that rhythm.
Tools come back to the same spot by reflex instead of by decision. The minutes I spend returning things after use pay back the next time I reach and find.
The same habit applies to seasonal gear. When spring prep hits in under 3 weeks, I want the pruners where I left them in October, not buried under bags of fertilizer that migrated to that shelf.
Space Efficiency
Floor space in a 6×4 shed disappears fast.
The mower alone claims most of it. What stays usable is everything above knee height and below the rafters.
I think of sheds in cubic feet, not square. That top third, open to the rafters with a simple plywood platform, holds bins of holiday lights and camping gear the mower never meets.
Low shelves under hanging tools keep the floor corridor open for walking and for wheeling anything with tires.
Rolling carts exploit the same logic on a smaller scale. One trip across the yard, fully loaded, beats three with arms full and a cord dragging behind.
Wall-mounted systems work best when you stack upward but keep everything within arm’s reach.
Nothing belongs where it needs a ladder for monthly use. Reserve overhead and deep shelves for the once-a-season items.
Material Considerations
I have seen it in a friend’s shed, shelves that looked fine in June and sagged to a curve by October. The fix is thicker stock or a cleat mid-span, not after the fact.
Metal wire shelving, the adjustable rack kind, handles heavy equipment without that risk. The open design costs nothing in visibility.
Both materials need the same check: which surface touches damp tools or fertilizer dust. Unfinished plywood soaks and swells.
Powder-coated wire resists rust better than bare steel. I would rather replace a basic metal shelf every few years than stack rusty cans on kitchen-grade storage that came indoors.
Personalization of Storage
I have never been a wall-hanging person for most tools. Drawers feel right to me; pegboards felt like wasted depth and endless rearranging every time I bought something new.
A friend with a basement shop swears by his French cleats for exactly that flexibility, one new holder instead of a wall rework. Both of us are right for our own habits.
The real test is what you actually reach for. Small boxes and drawer units suit modeling supplies and hobby gear spread through a house.
Compact roll-around drawers worked in my tighter spaces. Someone with a riding mower and full yard arsenal needs a different answer than someone wiring a lamp on weekends.
Start with how you shop for tools. If you buy one new driver and it should live beside its charger, a system that moves easily beats one cast in outlines.
If your collection stays fixed for years, fitted holders pay back their build time in grab-and-go speed. The efficiency is in the match, not in copying any photo exactly.
Frequently Asked Questions
What is the best way to store tools in a shed?
Pegboard or slatwall systems above a workbench, adjustable rack shelving, and labeled bins each suit different habits.
I like wall panels with movable hooks because new tools slide in without reworking the whole setup. Combine that with clear floor space by hanging long-handled yard gear and tucking bulky items on low shelves or rolling carts.
Is it cheaper to buy or build a storage shed?
Building usually runs 40–60% less than buying a kit of the same size, but that only holds if you already own the tools and the time.
What items should never be stored in a shed?
Weather-sensitive items belong inside; rolling carts excel as mobile staging zones, not permanent homes for paint, batteries, or paperwork.
It also notes that gas cans belong on low hooks below head height, not pooled on floors or crowded near sparks. For electronics and chargers, leave open air space so heat can escape.