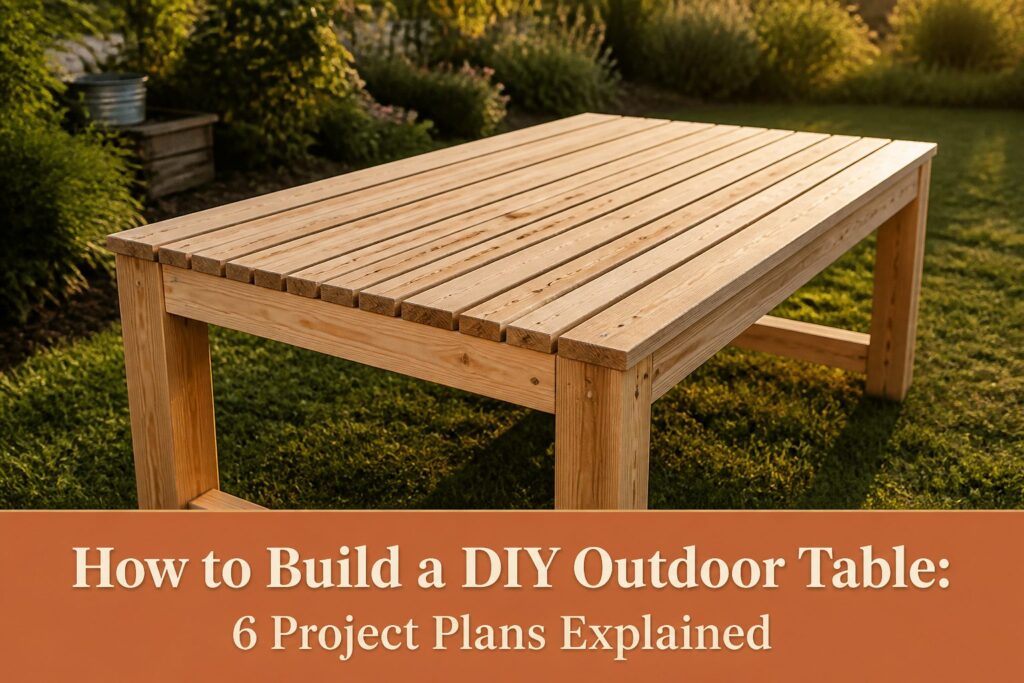
A finished outdoor table built from 2x4s and 2x6s runs about $45 in lumber and a single Saturday of cutting and assembly, but the gap between slats is where most first builds fail.
Leave them tight and water pools; go too wide and plates wobble. The quarter-inch spacing in these six plans accounts for both drainage and the seasonal swelling that warps an otherwise square frame.
[link-whisper-related-posts]1. Gather Materials and Tools
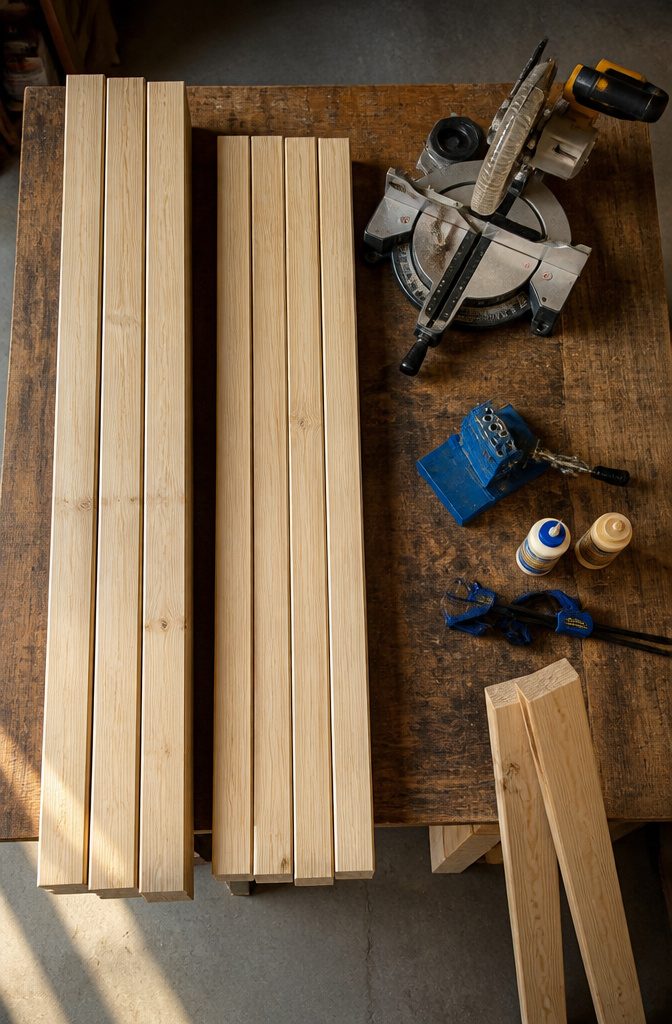
Cedar and redwood hold up longest against rain and sun, though treated lumber will get the job done if the budget is tight.
For the frame, 4–2x4s at 8 feet and 7–1x4s at 10 feet give you enough length after the waste from angled cuts. The slats call for 2x6s, which feel sturdier under plates and drinks than anything thinner.
A Kreg Jig for pocket holes saves the visible fasteners for another project. Pair it with exterior-rated wood glue; the standard bottle in your shop cabinet softens and lets go after a wet season.
Screws need to be self-tapping exterior, 1-1/4" to 2" for the slats and 2-1/2" for the legs, and the star-bit heads strip out far less often than Phillips when you are driving them at awkward angles.
The tool list is short. A miter saw handles every crosscut and the few angles; a drill drives the screws and bores the pocket holes; clamps hold the frame square while the glue sets.
That is the whole pile, and nothing here rents for more than a Saturday morning to collect.
2. Cut Lumber to Size
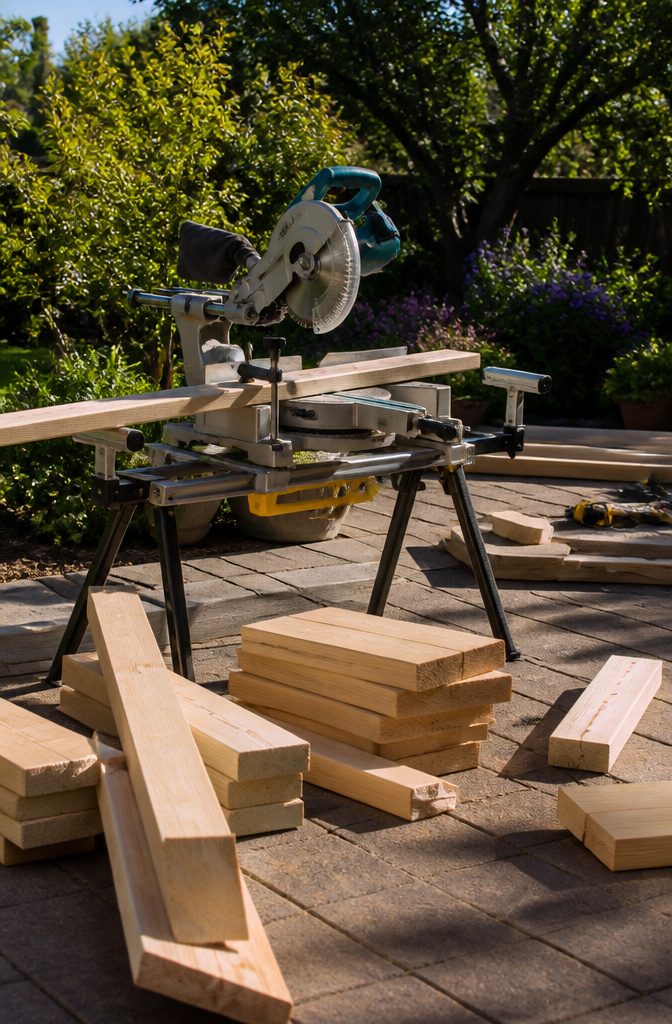
A miter saw with a stop block is the cleanest way to get every leg, apron, and stretcher identical, though a circular saw works if your hand is steady.
The first table I built was a simple 72 inches long by 30 inches wide, sized to fit a narrow patio without swallowing it. A 9 1/2 foot farmhouse table uses the same cutting process, just more steps around the sawhorses.
Accuracy here matters more than speed. On that first build I rushed a leg cut and left it an eighth inch long, figuring I would sand it flush later.
The wobble that showed up after assembly took an hour of shaving and shimming to fix, and the table still rocks slightly on uneven ground. Now I cut each piece, set it against the next, and check before moving on.
If you are gluing two 2x4s into a square leg, cut them after the glue-up so both ends stay flush; if you are using a 4×4, cut to length first and trust the single board.
Rounded edges on standard 2-inch lumber make the lamination obvious, so buy true 4x4s unless you own a table saw to square the faces yourself.
3. Assemble the Frame
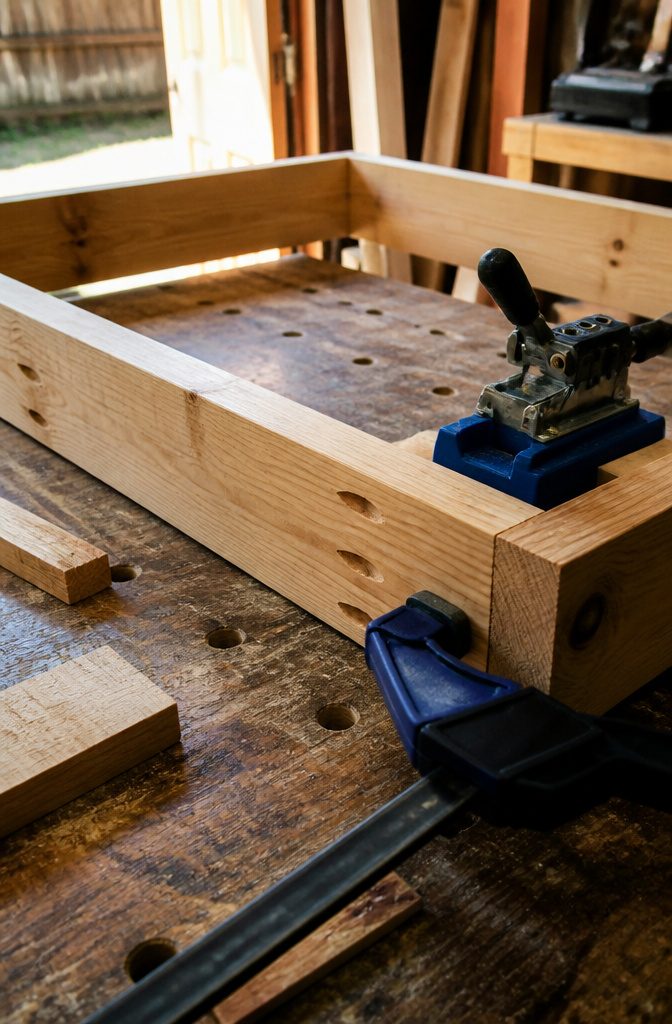
A Kreg Jig sets the drill bit to a fixed angle, usually around 15 degrees, and collars the depth so the pocket lands in the same spot every time.
That consistency is why the jig matters more than freehand drilling, but the clamp matters more than the jig itself.
The first frame I assembled went in loose, hand-held, and the corners opened up by nearly a quarter inch once the screws seated. The diagonal measurements read 47 and 48 inches instead of matching.
I backed the screws out, clamped the corner to a flat work surface with a bar clamp, and re-drilled. The second try squared to within a sixteenth.
The sequence that works is clamp first, drill second, drive third, check last.
Set the apron pieces good-side-out on a flat surface, offset each apron a half inch from the outside edge of the leg, then clamp before any screw enters the pocket hole.
Drive exterior washer-head screws through the pocket holes, then measure corner to corner. If the diagonals differ, the frame is out of square and the tabletop will rack.
A corner brace cut from scrap, mitered at 45 degrees on both ends and screwed in with 1 1/4 inch wood screws, pulls the joint tight and gives the tabletop planks a solid place to land later.
Check the diagonals before the glue dries, because clamping pressure hides the problem until the screws are set.
4. Attach the Legs
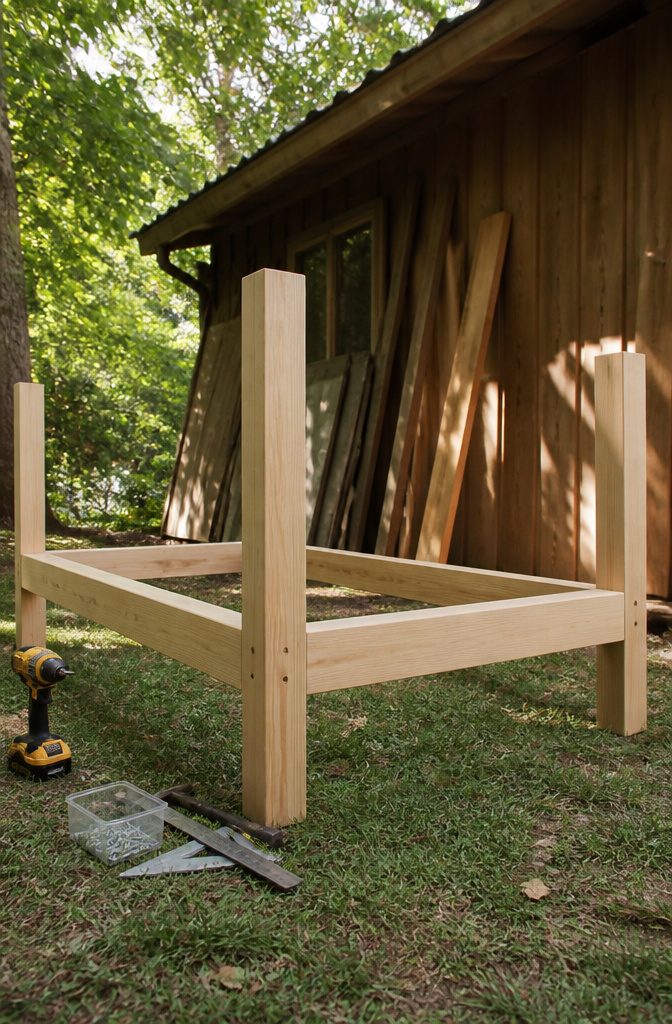
Leg placement decides whether your outdoor table stays put or walks across the patio every time someone leans on it.
I learned this the hard way with a corner-legged bench that racked sideways the first time my brother sat on the end.
Inset legs, tucked inside the frame rather than flush at the corners, create a box structure that resists that sideways twist. The frame rails themselves become braces instead of just connection points.
Most plans call for three screws per leg, pre-drilled with a 1/8" bit to keep the wood from splitting. Angle those screws slightly rather than driving straight in; the diagonal pull grips better against the leg pushing outward.
Pocket holes should face down on the lower stretchers and up where they meet the apron, so nothing shows once the top goes on.
Use exterior-rated glue and the blue-coated screws meant for outdoor projects, since standard pocket screws will bleed rust through your finish by next spring.
The real test comes after assembly.
Flip the table right-side up and set it on the actual ground where it will live, not your level garage floor. Patio slabs dip, decks sag, and grass hides lumps that turn a perfectly square frame into a rocker.
Shim the feet where they touch dirt or stone, and mark which leg needs trimming before you take the table apart to cut it.
5. Install Tabletop Slats
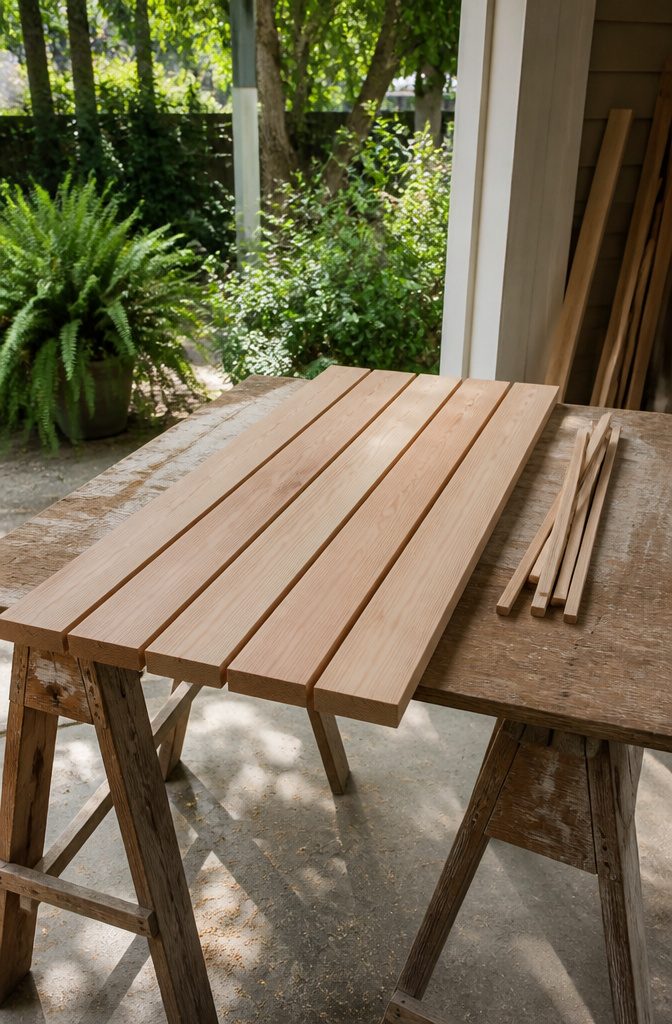
Seven 1x4s at 10 feet run the full width of this tabletop, and the gap between them matters more than most people guess.
A quarter-inch space between each slat gives rain a place to go instead of pooling, and it lets the boards swell and shrink through humid July afternoons and dry October weeks without warping against each other.
Uniform gaps keep the whole thing from looking like a first project, so I keep a few scrap strips the same thickness as my spacers and let them ride along as I work.
Some builders start from one edge and call it done; others lay the center slat first and work outward so any odd width splits to both sides.
Either way works if you check spacing with a dry fit before the first nail goes in.
The boards in your stack probably measure a hair off from true 3.5 inches, so a rigid 1/8-inch gap on paper turns into a 3/16-inch reality once you count the actual lumber.
Tight slats with no gap at all trap water, and within two seasons you will see the rot start where you cannot reach it anymore.
Glue helps, but four 2.5-inch nails per slat, two at each end, do the holding; keep those nails in a straight line so the underside does not look like a random pattern if someone glances under during a cookout.
6. Sand and Finish
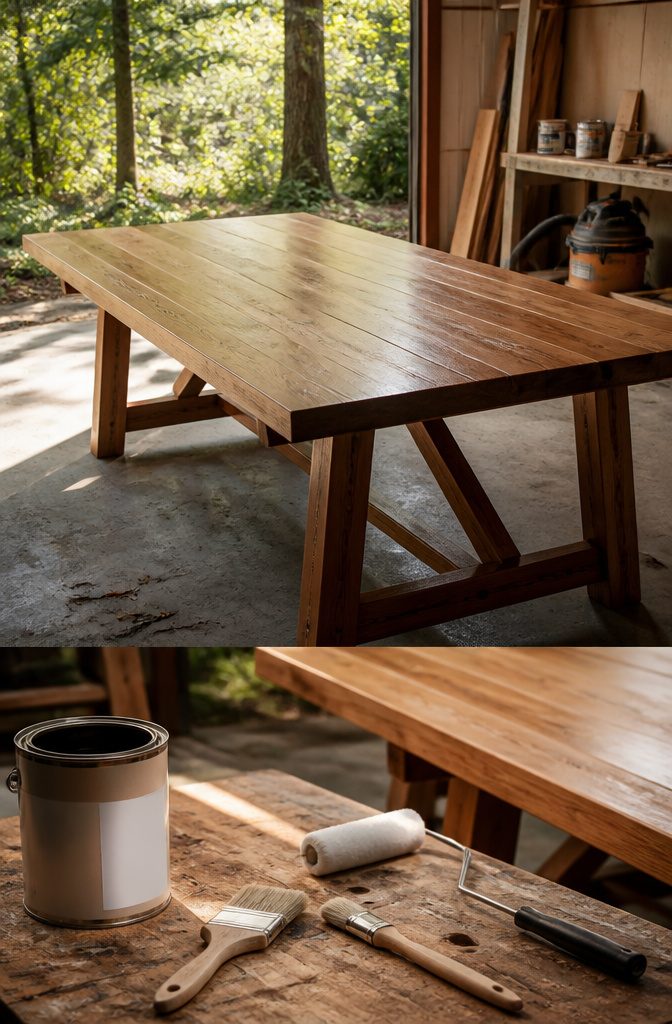
Sanding starts at 120 grit and works up to 220. The jump matters more than the final number; skipping straight to fine paper just polishes the rough spots without leveling them.
A shop vac with a brush attachment pulls dust out of pores better than a rag, and any residue left behind becomes bumps under the finish.
For color, Behr outdoor stain carries pigment that blocks UV. Cedar left bare drifts to gray in a season or two, which some people want, but stain keeps the tone you picked on day one.
For clear protection, spar urethane is the right resin for the job. It flexes with humidity swings and handles direct sun without the clouding you get from standard polyurethane.
Two thin coats of either product always beats one thick coat. Thick layers skin over before the bottom cures, trapping solvent that later wrinkles or peels.
Stain without urethane gives color but no waterproof film.
Urethane without stain leaves the wood natural, which is fine if graying does not bother you. The combination, stain then urethane, is what most weekend builds need to survive the first winter.
7. Simple Rectangular Table
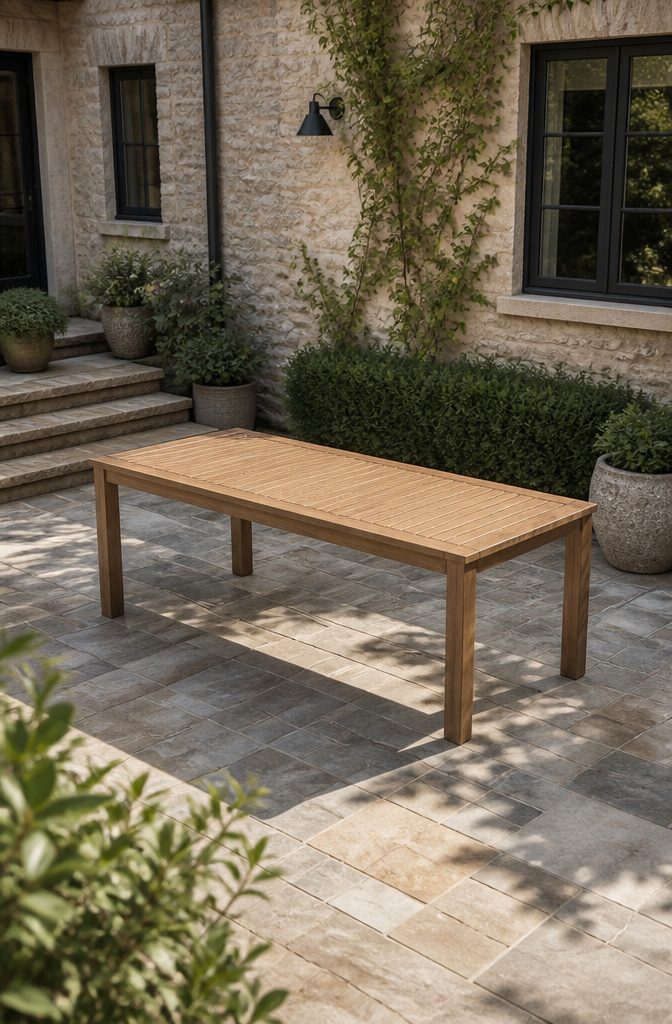
A 72" long by 30" wide rectangle is the footprint that taught me outdoor furniture does not have to fight you.
Every cut is square, every joint is a straight butt or a pocket hole, and the only angled piece is the miter saw blade set to 90 degrees.
That forgiving geometry is exactly why this was the first table I built for the patio; the mistakes I made were visible only to me, and even then only for the first week.
The slatted top runs boards the long way with a quarter-inch gap between them so rain drips through instead of pooling for days.
Some builders rip 2x8s for the base to get a chunkier leg, but 2x4s work without a table saw and still feel solid once the pocket screws bite.
A K4 jig is plenty; the Foreman is faster, not better, for a build this small.
The whole frame and top came to about $45 at the lumberyard, counting only the boards that left the store in my cart: four 2x4s for legs and aprons, five 2x6s for the slats, and a box of exterior screws.
The finish was extra, though a single quart of spar urethane covers this twice with enough left for the matching bench.
Skip the urethane and you are under $50 with a table that lasts two seasons instead of ten, which is a fair trade if you are testing whether you will actually use it before building something permanent.

FAST SELF TAPPING: The drill-bit-shaped tip of these self drilling screws allows these screws to be used without a pilot hole, saving user time. Used for metal-to-metal or metal-to-wood connections, and are most commonly used in thin metal applications such as working with steel studs
8. Farmhouse Style Table
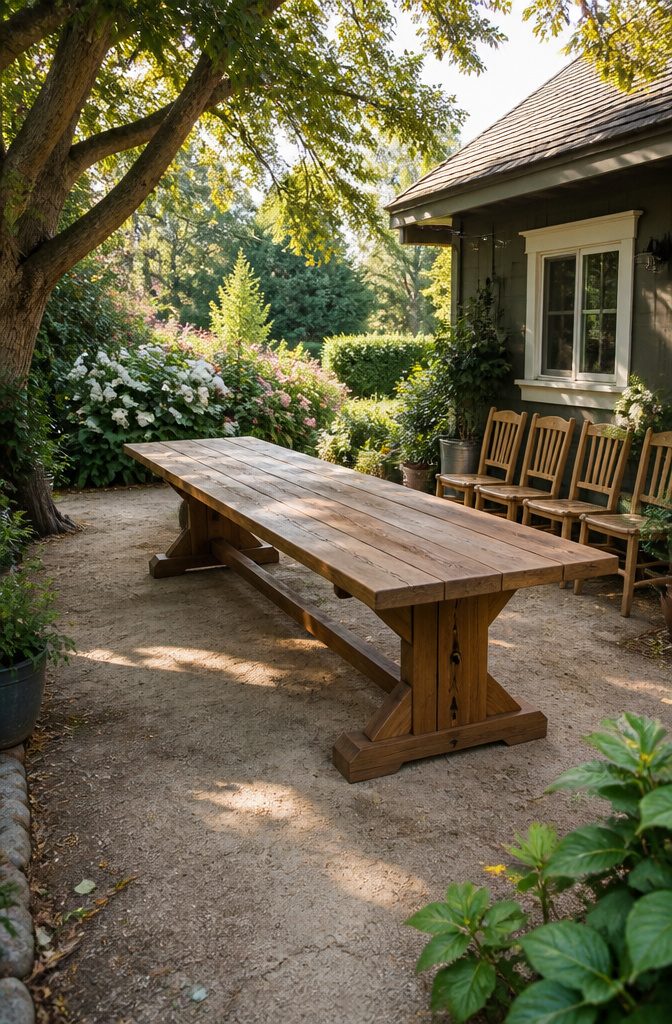
A farmhouse table built to real scale runs about 9 1/2 feet long, and that single dimension changes every practical thing about the project.
Redwood or cedar boards this wide and thick carry real visual weight; the trestle base or heavy apron that holds them level becomes structural carpentry, not weekend joinery.
Ten chairs fit around the finished table, four per side and one at each end, or more if you swap in benches.
The lumber alone costs more than an entire small patio set, and cutting, hauling, and leveling pieces this size eats days before the first coat of finish.
Transport is the hidden headache. A tabletop in nine-foot lengths does not slide into a standard hatchback; you are renting a truck or paying for delivery, then wrestling the boards through a gate that suddenly looks narrow.
Assembly in the yard makes more sense than building in the garage and hoping the piece clears the doorframe.
This is a table you build because you have the space to keep it, not because you want a quick Saturday project.

INCLUDES: (2) T-Track Flip Fence Stop (3 inches) with 5/16" T-Bolt

INCLUDES: (1) T-Track Flip Fence Stop (3 inches) with 5/16" T-Bolt
INCLUDES: (1) T-Track Flip Fence Stop (2-1/4 inches) with 5/16" T-Bolt
9. Modern Slatted Table
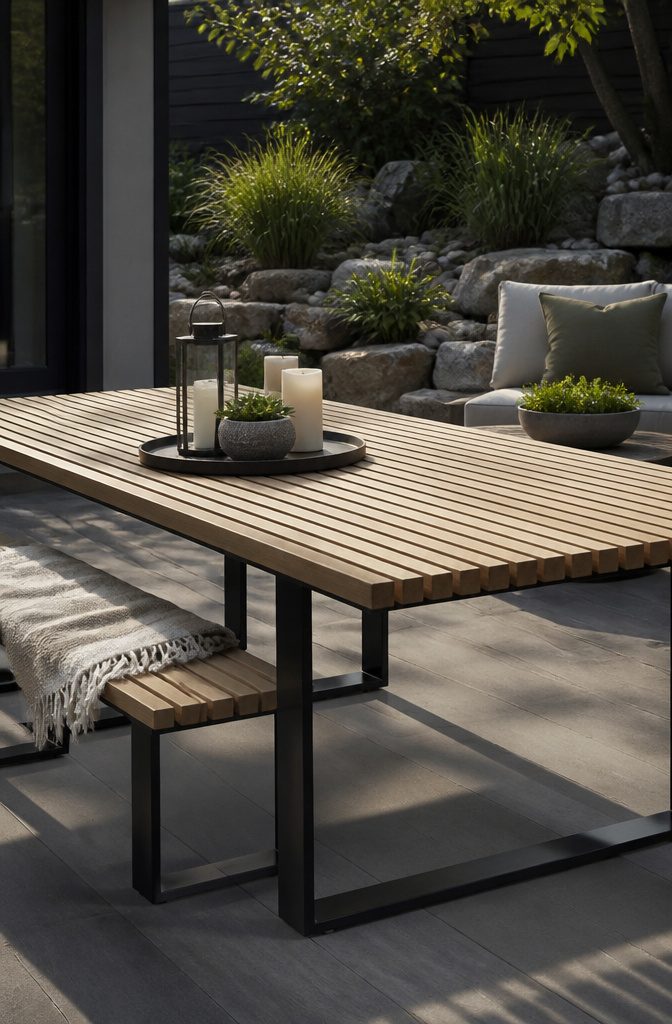
Clean-lined slats with deliberate gaps set this design apart from a basic plank top. The spacing does the drainage work, but it also reads as the visual point of the whole piece, not a practical afterthought you notice later.
I think that distinction matters if you are building for a small patio where the table sits in plain sight all day.
The frame tucks underneath so completely that the slats seem to float above the legs.
Getting that effect takes a recessed apron or a secondary support layer set lower than the slat bottoms; otherwise you end up with visible rail shadow that breaks the illusion.
Keep the gap between slats uniform at roughly a finger’s width, and the eye reads the top as one plane rather than a row of separate boards.
Wood choice shapes the final look more than the joinery does. Cedar or white oak in narrow strips gives a Scandinavian lean; wider slats in pressure-treated pine read more utilitarian.
Either works, but the slat width and gap need to stay proportional or the whole top looks like a deck that lost its way.

CIRCULAR PICNIC TABLE — A beautiful cedar circular picnic table for outdoor eating or tea parties

Age Range: Designed and crafted specifically for toddlers and little ones

Age Range: Designed and crafted specifically for toddlers and little ones
10. Narrow Community Table
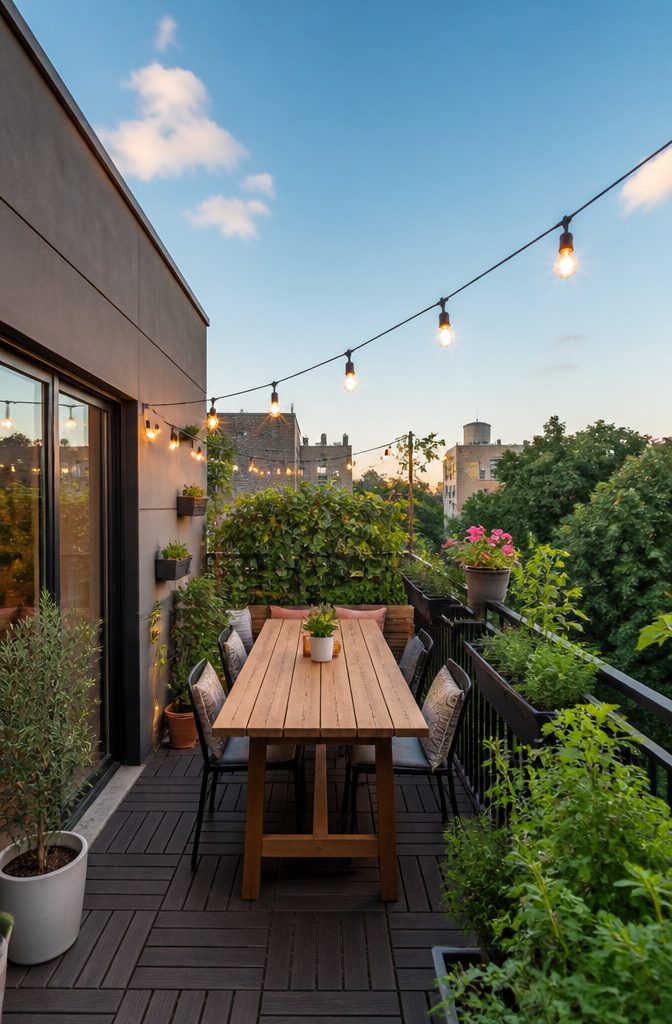
The narrow community table is the least-documented design I found while digging through plans for this article. Most bloggers chase the big farmhouse spread; the slim profile gets skipped entirely.
That is a shame, because 72 inches long by 30 inches wide hits a specific need: conversation across the width actually works when the person opposite you is close enough to hear over a grill.
You give up some width, but a narrow table fits small patios and still seats six if you plan the leg placement right. A 30-inch surface leaves less maneuvering room for plates and serving bowls than the standard 36-inch deck.
You gain eye contact and legroom on tight balconies where every inch of floor space matters. One builder I followed calls these "community table size" and notes the smaller footprint leaves walk-around space that wider boards steal.
For renters with a 6-foot patio slab or a balcony barely deeper than a doorway, this is the format that fits without dominating.
The 2×8 top and 2×4 base version needs a table saw to rip the supports, though swapping in 2x4s for the base drops the tool list to a drill, pocket hole jig, and miter saw.
Either way, lumber runs cheap enough that a mistake on the first rip does not ruin the weekend budget.

COMPLETE JIG POCKET HOLE SYSTEM: The BORA Compact Jig Pro includes the mini compact pocket hole jig kit, 50 piece BORA pocket hole screw set, square pocket hole drill bit, and drill with stop collar, and anti slip pads, providing everything you need for your professional joinery tool set for all your home improvement projects in the shop or on the go.

Easy Woodworking Tools: Kreg pocket-hole joinery is the fast, strong, easy way to join wood-drill, drive, and done

【High Quality】The pocket screw jig is made of high quality aluminum alloy. It's durable and won't rust or crack. The equipped cutter head has perfect performance, sharp and burr-free. Ideal for building train tables, workbenches, entry hutches, bookcases and dressers and more
11. Concrete Top Table
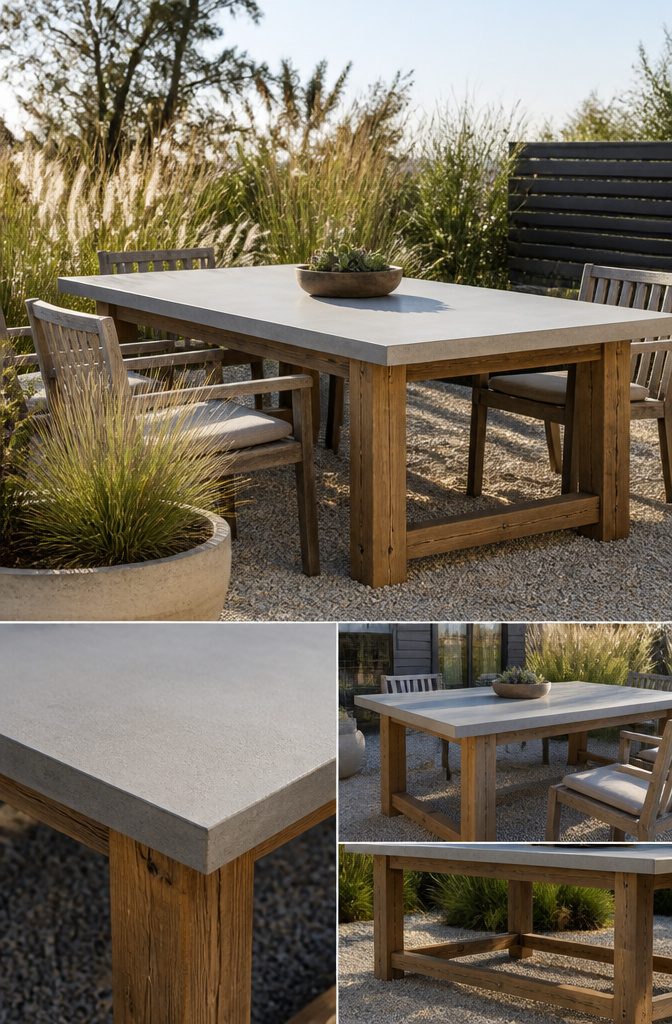
A concrete top table splits the difference between the warmth of wood and the weather resistance of stone.
The base is ordinary lumber, built like any outdoor frame, but the surface is a poured slab that sits on top rather than being bolted down. That separation matters more than most first-timers expect.
The concrete wants a base that does not move.
Wood flexes with humidity and temperature swings; concrete does not. If the frame breathes even a sixteenth of an inch seasonally, the slab cracks along the grain of the stress.
I have seen builders skip the plywood sub-surface that distributes load evenly, or use regular construction screws that back out and let the top rock.
The form itself is the step wood-only builders miss: you are not just building a mold, you are building a mold that stays flat and level while 150-plus pounds of wet mix settles and cures.
Concrete takes patience, but you get a top that shrugs off hot pots and never warps.
A sealed concrete surface shrugs off red wine, grill grease, and a summer of UV without the annual sanding and re-oiling a wood tabletop demands. The weight is the trade.
Two people can tilt and roll a wooden farmhouse table; this one stays where you build it. Plan the route from form to patio before you mix, or you are cutting the base apart to move it through a gate.
What This Costs
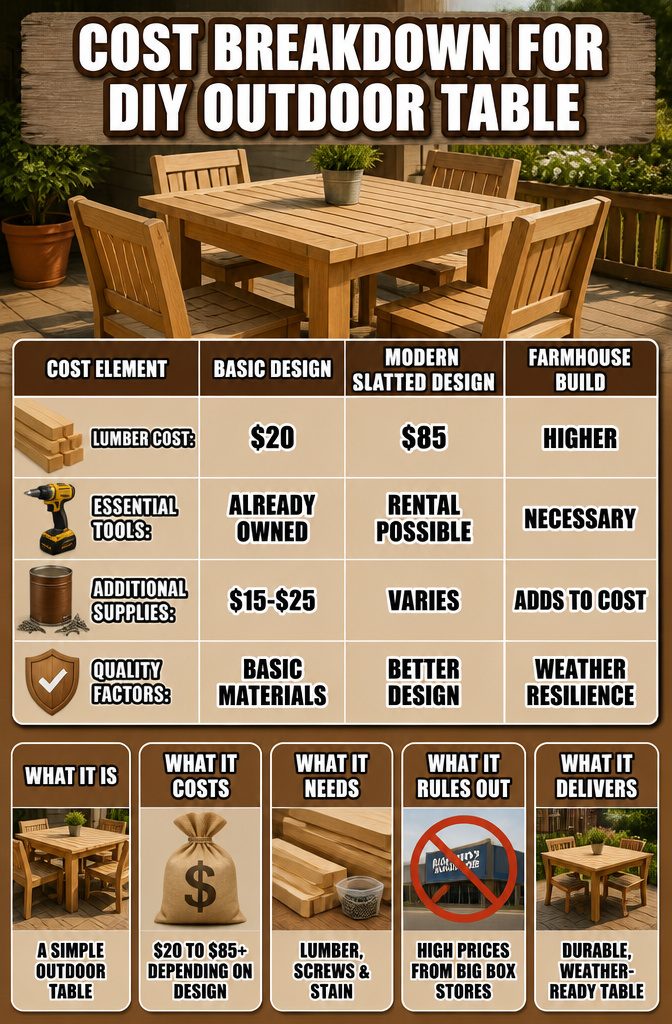
A simple outdoor table built from 2×4 and 2×6 structural Douglas fir runs about $20 in lumber at 2024 lumberyard prices, assuming you already own a drill and a Kreg jig.
That gets you a 35-inch square top with four seats around it, nothing fancy, nothing weak.
The modern slatted design I keep coming back to cost me closer to $85 once I added up the 1×4 slats, the 2×6 legs and cross supports, the 2×2 framing, and the decking screws.
Buying from a local lumberyard instead of a big box store kept that number from hitting triple digits.
Redwood for a farmhouse build runs higher still, though no one pins down an exact figure; the premium buys you a species that handles rain and sun better than standard pine without turning to fuzz.
Tool rental only enters the picture if you lack a miter saw or a power drill.
Glue, exterior pocket-hole screws, and a quart of exterior stain add maybe $15 to $25. Regional prices shift with freight zones and what your local yard is moving that week, so treat any total as a snapshot, not a contract.
Tools That Matter
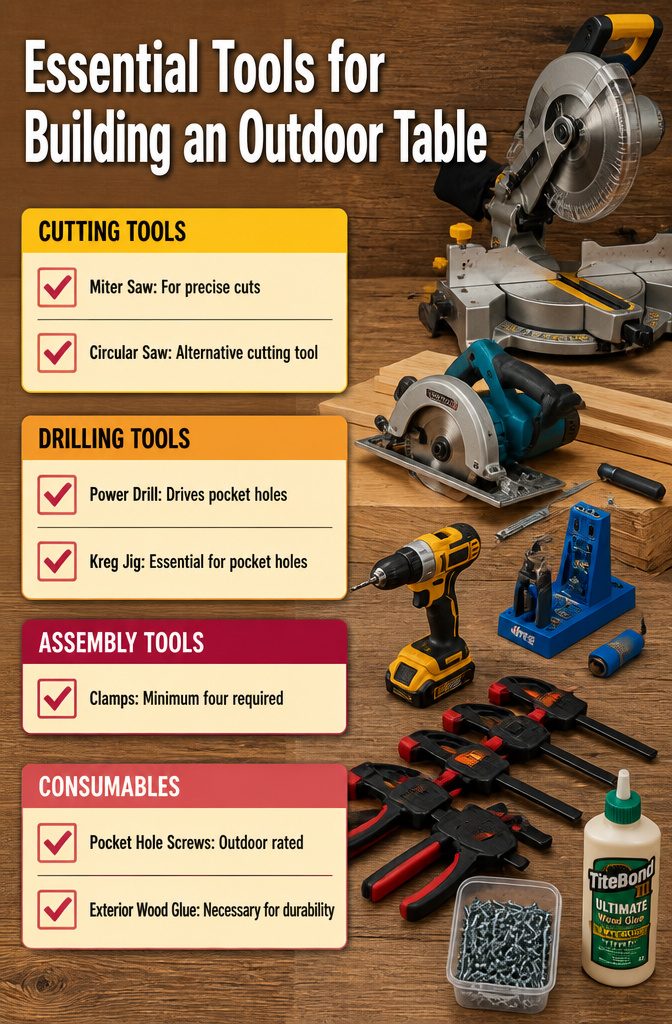
A miter saw makes the repeated cuts almost automatic, but it is not the only way through this project.
- A circular saw with a guide handles every straight cut the miter saw does. A clamped straightedge keeps the blade on line, and for a weekend build that is accurate enough. Borrow one if you can; most people know someone who owns a circular saw.
- The drill drives the pocket holes and the screws. Nothing exotic here, just a standard power drill with variable speed.
- The Kreg Jig is the one tool worth buying, not borrowing. Pocket holes are the hidden backbone of these table plans, and the jig sets the angle and depth so the joint does not fail. A hand drill alone will not reproduce what it does.
- Clamps matter more than people expect. They hold pieces square while the glue sets and while the pocket holes go in. Four is the minimum; six is easier.
- Exterior 2 ½" pocket hole screws and exterior wood glue are the consumables that separate an outdoor table from an indoor one. Standard screws rust; standard glue softens. The outdoor-rated versions cost a few dollars more and keep the joints solid through seasons of rain.
Wood Types Compared
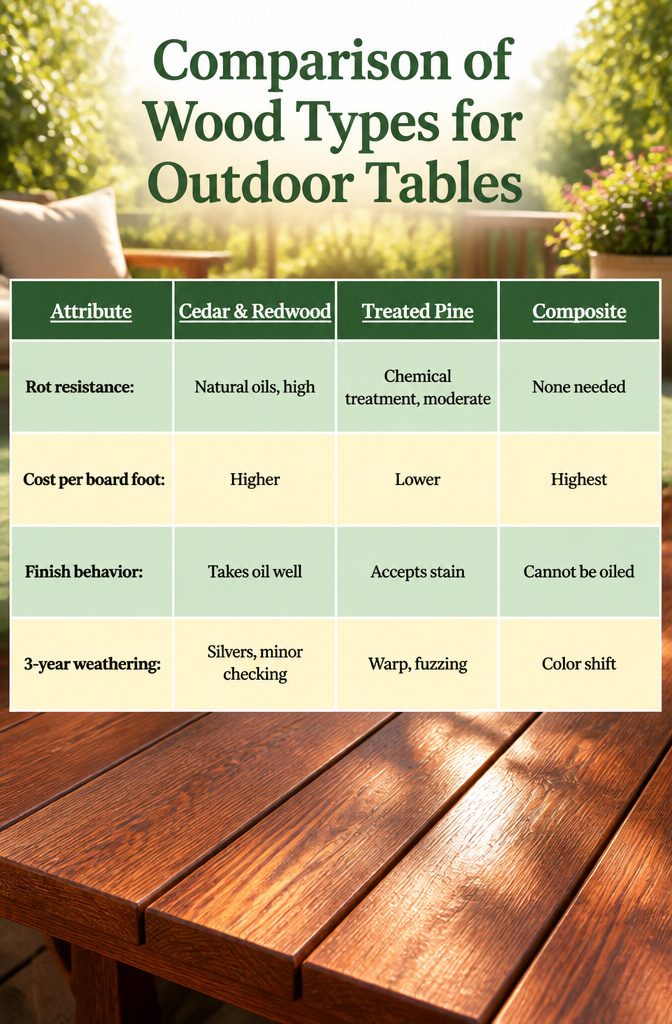
Cedar and redwood earn their place in outdoor builds for one reason: they survive without becoming a maintenance hobby.
The natural oils in both species push back rot, bugs, and the warp that turns a flat tabletop into a ski slope after a wet season.
Treated pine costs less per board foot and takes stain without complaint, but the chemical treatment only slows decay; it does not stop it, and the boards check and twist once the surface finish wears thin.
Composite boards ask for nothing after installation, yet they feel hollow under a saw and refuse the oil-based Spar Urethane that gives wooden tables their depth.
Three years in, the difference shows.
A cedar table in Chicago gray will have silvered and maybe picked up a crack or two, but the grain still holds its shape. Redwood under Arizona sun does much the same.
Treated pine in either place is likely working loose at the joints, and the surface has fuzzed where water got in. Composite stays flat and clean, though the color has shifted and the scratches do not sand out.
| Attribute | Cedar & Redwood | Treated Pine | Composite |
|---|---|---|---|
| Rot resistance | Natural oils, high | Chemical treatment, moderate | None needed, non-rotting |
| Cost per board foot | Higher | Lower | Highest |
| Finish behavior | Takes oil well; oils enrich grain | Accepts stain; requires reapplication | Cannot be oiled or stained |
| 3-year weathering | Silvers, minor checking | Warp, joint loosening, fuzzing | Color shift, surface scratches |
An outdoor table should be tough. After all, it stays out in the weather and needs to withstand summer BBQ spills, toy car races, rocks from the yard and all the things your family will place on it.
That toughness starts with the board you pick. For a weekend build you do not want to rebuild, cedar or redwood is the money spent once.
Finishing for the Weather
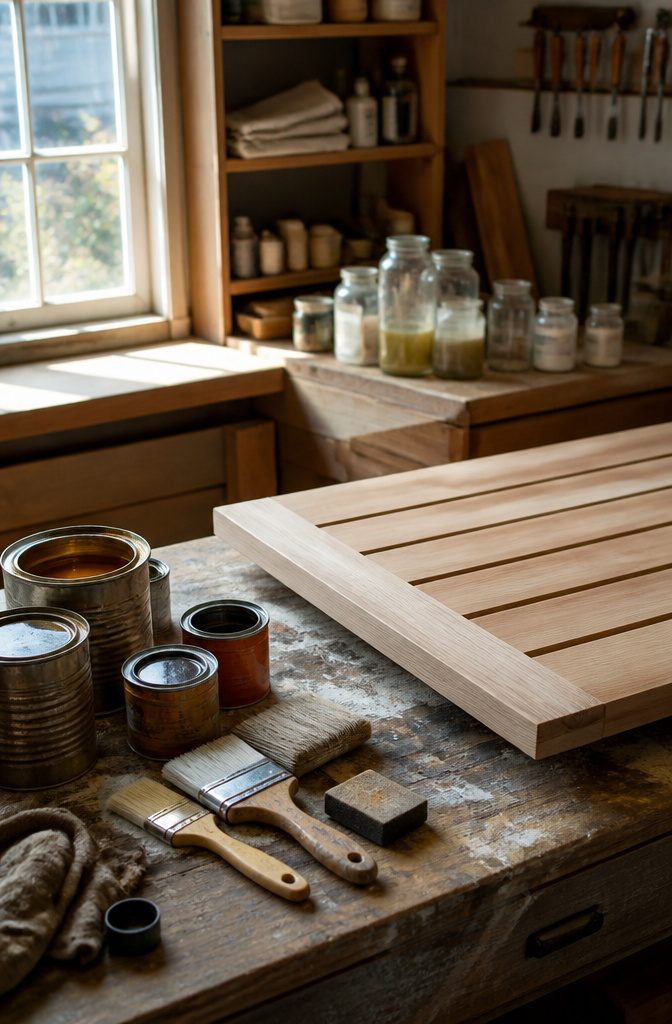
Spar urethane and Behr outdoor stain behave like two different animals on softwood versus hardwood, and the prep changes accordingly.
On pine or Douglas fir, the grain raises aggressively the first time water or solvent hits it, so I sand to 220 grit, wipe with a barely damp rag to raise the fibers, then sand again at 220 before the first coat of anything.
Cedar and redwood are tighter-grained and resinous; 180 grit is plenty, but a light wipe with mineral spirits works better than water to check for glue spots or milling marks that the finish will spotlight.
Application conditions matter more than the can admits.
I have brushed spar urethane at 55 degrees and watched it turn cloudy and never fully clear. Wait for 65–75 degrees, humidity under 65%, and no dew point within four hours of sundown.
The urethane needs three coats, scuffing between with 320 grit, and the recoat window is narrow: within 4–6 hours for most brands, or you wait a full 24 and sand again.
Miss that window and the next coat beads or peels six months later.
Behr’s semi-transparent outdoor stain is more forgiving on timing but thirstier on softwoods. Two coats on pine, one on cedar if you want some silvering to show through eventually.
I have found the maintenance interval lands at 18–24 months on horizontal pine surfaces, closer to three years on vertical cedar legs. The sign to refinish is when water stops beading and starts darkening the wood.
At that point, a light wash with deck cleaner and a single refresher coat buys another stretch; let it go to gray and you are sanding back to bare wood again.
Frequently Asked Questions
What wood should I use for an outdoor table?
Cedar and redwood last longest against rain and sun because their natural oils push back rot, bugs, and warping.
Treated pine costs less and accepts stain well, but it checks and twists once the surface finish wears thin. Composite boards need no maintenance after installation, though they feel hollow under a saw and cannot take oil-based finishes.
How much does it cost to build a DIY outdoor table?
A simple 35-inch square table built from 2×4 and 2×6 Douglas fir runs about $20 in lumber at 2024 prices if you already own a drill and Kreg jig.
A modern slatted design with 1×4 slats, 2×6 legs, and 2×2 framing costs closer to $85. Glue, exterior screws, and a quart of spar urethane add another $15 to $25.
What tools do I need to build an outdoor table?
The short list is a miter saw, drill, Kreg Jig, and clamps. A circular saw with a clamped straightedge works instead of a miter saw for straight cuts.
The Kreg Jig is worth buying rather than borrowing, since it sets the pocket hole angle and depth that hidden joints depend on. Four clamps is the minimum; six makes assembly easier.
What to put in the middle of an outdoor table?
Most builders focus on building the table itself rather than styling it, since the slatted top with quarter-inch gaps is designed to drain rain rather than hold objects.
How much would it cost to build my own picnic table?
A simple 35-inch square outdoor table costs about $20 in lumber, while larger designs like a 72-inch rectangular table run about $45 in boards.
A farmhouse-scale build at 9 1/2 feet costs a lot more in redwood or cedar, plus truck rental for hauling long boards.
How to make table legs out of wood?
For a 2×4 leg, glue two boards face-to-face into a laminated square and cut to length after the glue-up so both ends stay flush. A true 4×4 needs only cutting to length first.
Inset legs inside the frame rather than at the corners; this creates a box structure that resists sideways racking. Use three screws per leg, pre-drilled with a 1/8-inch bit, and angle them slightly for better grip against outward pressure.