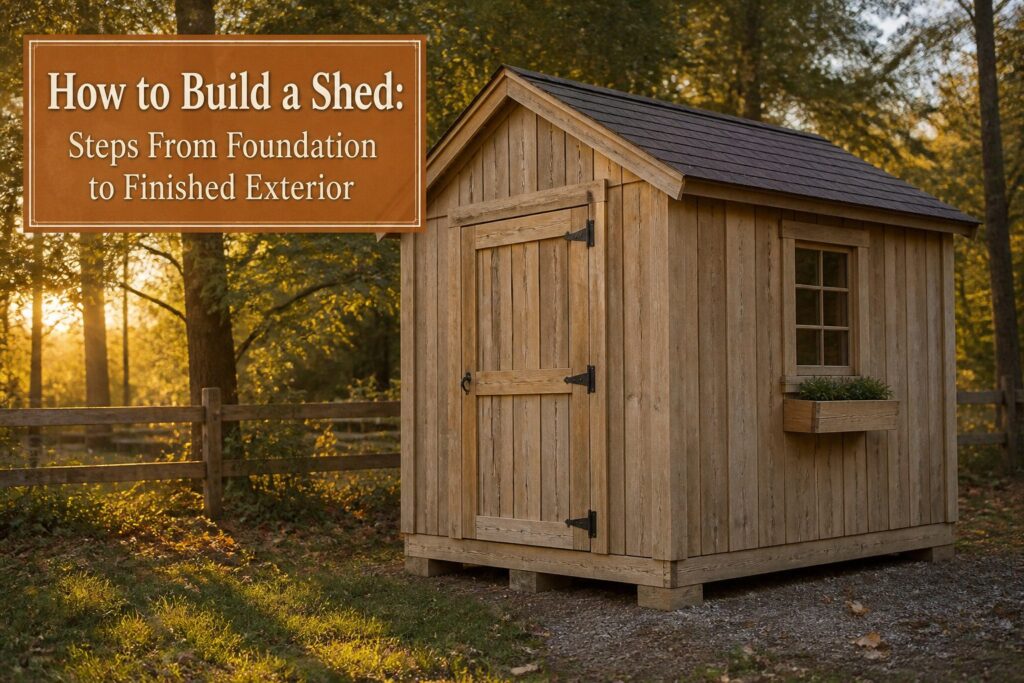
A finished shed takes one long weekend and about $1,200 in pressure-treated lumber if you already own a circular saw and a framing nailer.
Most people lose that time not on the walls or roof, but on a foundation they overbuild into a concrete project they did not need.
Start with a 6×6 skid frame. It sits heavy enough to survive freeze-thaw cycles without a single bag of cement, and if your lease ends or the light changes, a come-along and a flatbed move the whole building intact.
[link-whisper-related-posts]1. Build the Foundation
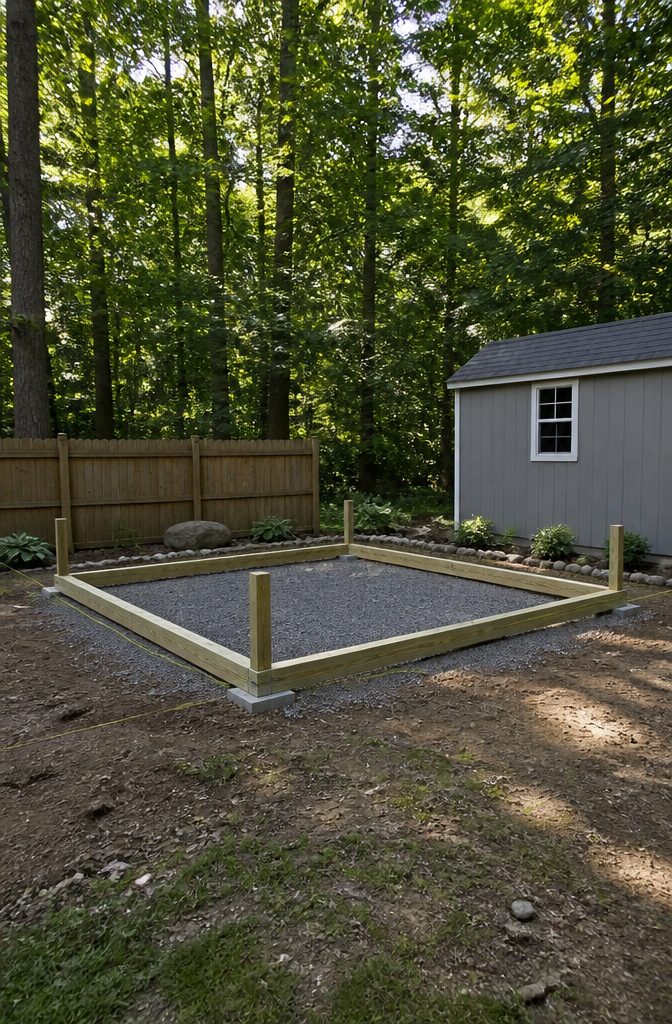
Pressure-treated 6"x6" x 16′ timbers give a shed foundation the mass to stay put through freeze-thaw cycles without the concrete commitment.
I laid out piers in a rectangle, dropped a post on each corner, and checked plumb on two faces before the first nail.
The 6x6s are overkill for a storage box, but that bulk is what lets you skid the whole shed later with a come-along if the lease ends or the sun pattern changes.
Four piers, four posts, string lines pulled tight; anything more and you are building a deck, not a shed. Layout and leveling eat an afternoon, but square rim joists that drop on without a fight are worth it.

【Premium Quality Materials】Fashioned from galvanized steel, each joist hanger demonstrates outstanding durability against corrosion and rust, ensuring a robust and enduring connection between the joist and header
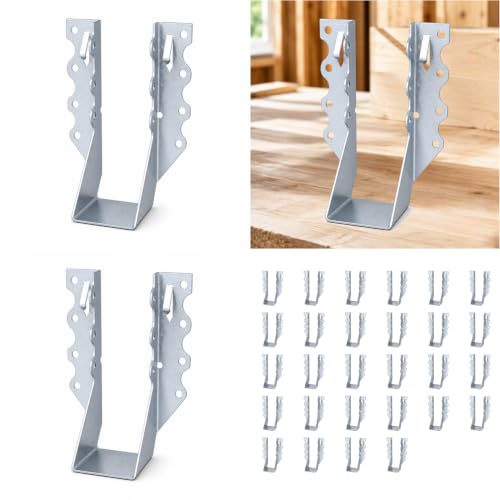
Nominal 2x6 Fit - Designed for nominal 2 x 6 lumber, actual size 1-1/2 in. x 5-1/2 in., for deck, floor, ceiling, roof, shed and pergola framing projects.

【High Quality Material】Outdoor shed floor mat is made of high-quality felt material, which has excellent water and oil absorption functions. Bottom is a sturdy and wear-resistant waterproof PE backing, providing anti-seepage protection. Providing protection for valuable equipment and shed floors to prevent rusting. Ensure that storage space is in a dry state for a long time
2. Construct the Floor
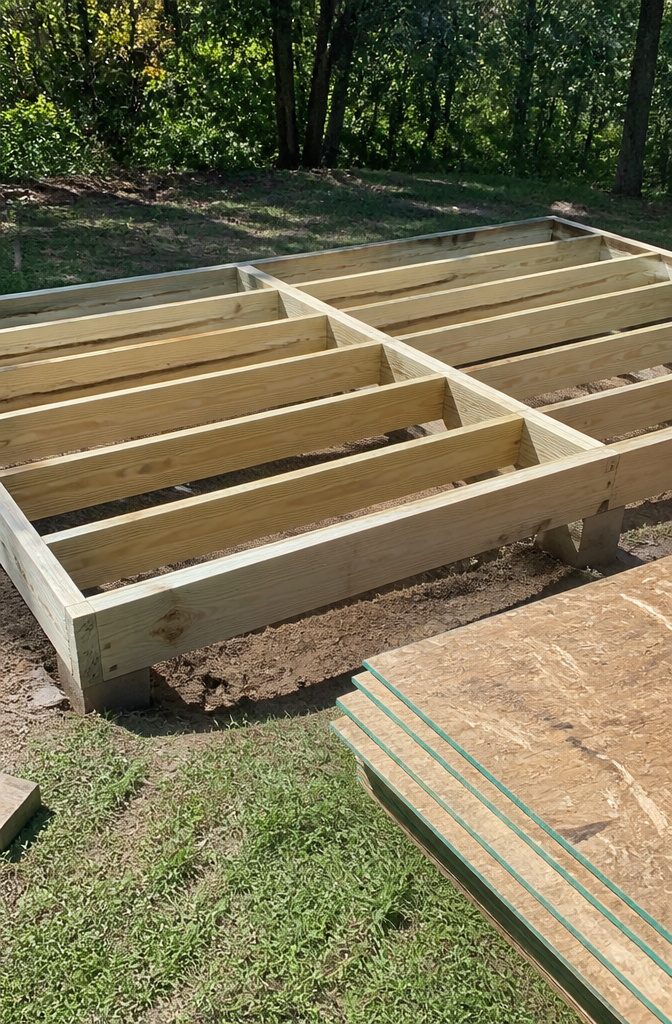
Pressure-treated 2x6s laid 16 inches on center make up the frame, with rim joists running the perimeter and a middle joist bisecting the span to keep the plywood from sagging.
Simpson Seismic / Hurricane Ties anchor each joist to the foundation; skip them and a hard wind can lift the whole floor off the blocks.
The ties cost about a dollar apiece and take thirty seconds per joint with a structural screw.
For the surface, 3/4-inch pressure-treated plywood is the floor you walk on.
Anything thinner will bounce under a loaded wheelbarrow. I run the sheets perpendicular to the joists, staggering seams so no two meet on the same bearer, and leave a pencil-width gap at the edges for seasonal swelling.
Screws every 8 inches along the joists, not nails; nails work loose where the ground shifts.

Durable, beautiful wood finish 25 Year Warranty on Finish, Lifetime Warranty on Structure
3. Frame the Walls
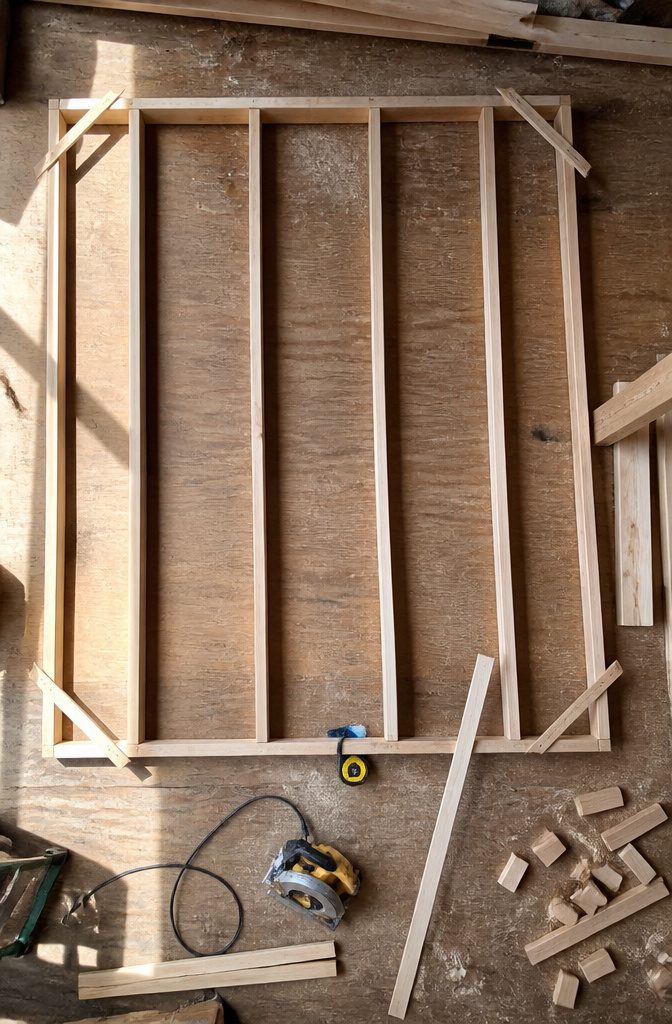
Wall framing happens on the floor deck, not upright. I laid out the side walls with 2x4s right on the shed floor, which lets you square the frame and nail on sheathing while the wall is still horizontal.
That flat assembly is heavier to lift, but it beats wrestling plywood onto a vertical wall ten feet in the air.
Bracing runs from the wall top to stakes in the ground, not to the deck itself.
That clearance matters because the two short end walls get framed on the deck too, then stood up without the long wall braces blocking them.
The back wall and the door wall frame up without sheathing at this stage. The short walls sit inside the long walls, so their sheathing laps past the corner onto the long wall.
You cannot add that sheathing while the wall lies flat. The door wall stays bare for another reason: running sheathing up past the top plate and onto the trusses later adds racking strength I wanted there.
I had planned the same extension on the back wall, but a storm was coming and I cut the sheets flush to save time.

NAIL REPLACEMENT: The Strong-Drive SD Connector #9 x 1-1/2 inch screw is specifically designed to replace nails in certain Simpson Strong-Tie connectors and is the only screw tested and approved for that application. The single-fastener load capacity of the #9 SD exceeds the capacity of a 10d common nail.
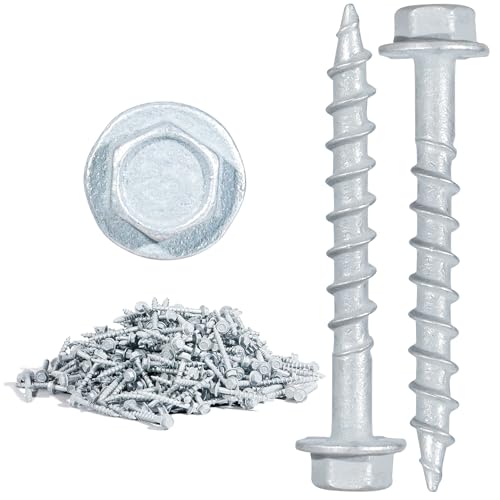
Built for Connector Applications: Designed for joist hangers, framing connectors, and other structural wood connections, these #9 x 1-1/2" SD connector screws feature a 1/4" hex head and 0.380" diameter for secure fastening and reliable 10D nail replacement

【High-quality Galvanized Screws】: Heavy-duty joist hanger screws was made from high-carbon steel with zinc plating for superior strength, rust resistance, and smooth self-tapping penetration in joist hangers. The coated screws for your framing hardware
4. Stand Up the Walls
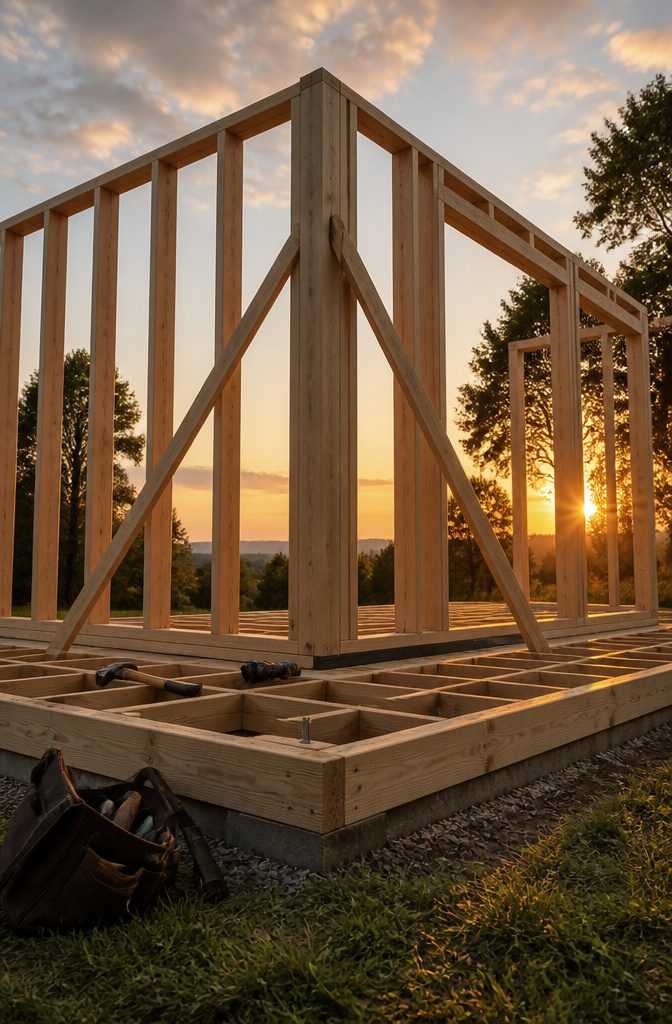
Raising the walls is the moment the shed stops looking like a platform and starts looking like a building. The first wall is the heaviest and the most awkward, because there is nothing yet to lean it against.
A long 2×4 cut to the height of the wall works as a temporary brace; one end nails to the top plate, the other stakes into the ground a few feet out.
Without that brace, the wall will rock or fall the second you let go.
The second wall meets the first at a corner, and that joint is where alignment matters most. The end studs should overlap so the top plates tie together, not just butt up.
Nail through the overlapping corner into the end grain of the adjoining wall; it sounds weak, but three 16d nails in a line hold better than you would expect.
What does not hold is a corner that is out of plumb. Check both faces of the corner with a level before the third wall goes up, because once three walls are standing, the mistake is locked in.
The fourth wall, with the door opening, is lighter but trickier to brace because the header span has no stud in the middle.
A diagonal brace from the header to the far bottom corner keeps it square while you toenail the bottom plate to the floor joists.
Leave the bottom plate under the door rough opening in place until the walls are all braced and true; it stabilizes the frame, and you cut it out last with a handsaw.
That single cut, done too early, is how the door gap ends up an inch wider at one end than the other.

Heavy-Duty Construction: Made from durable metal for superior strength and long-lasting performance.

【Function】FOROIRON Trailer Stake Pocket Bracket design to secure 2'' x 4'' lumber, prevent the boards from sliding. The trailer piles provide additional transportation space. Suitable for adding wooden piles and tie down points to trailer use

Inner Width:1-1/2";Works with 2″ x 4″ wood railings
5. Install the Roof Trusses
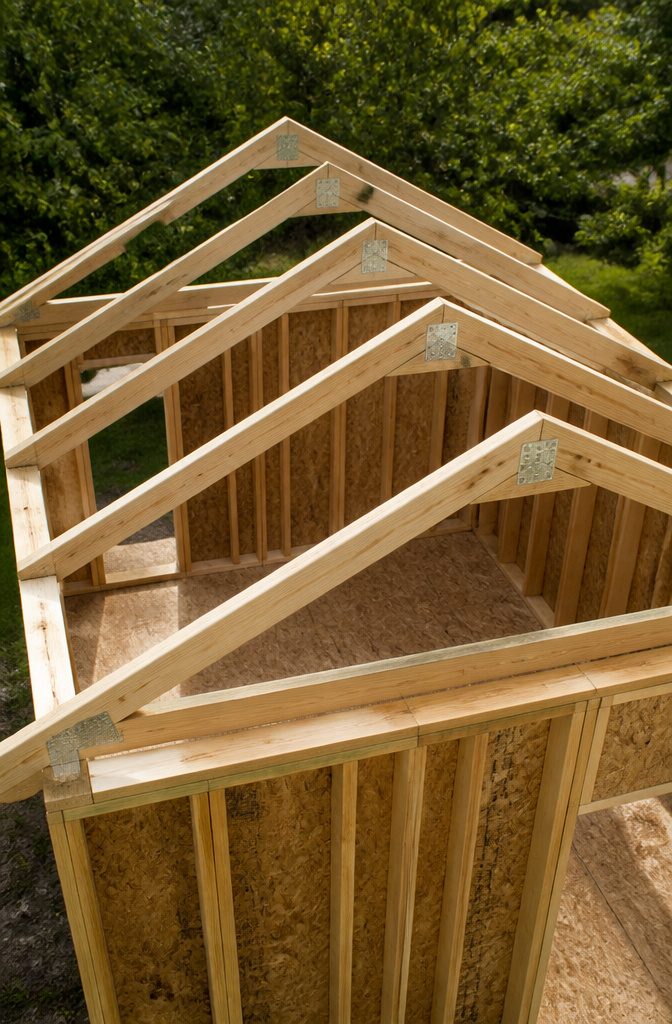
Roof trusses usually arrive as pre-built triangles, and the first thing to check is whether the builder followed your plan for overhang.
I once accepted a delivery without measuring, then spent an afternoon trimming tails that were meant for a wider footprint.
The heel height, where the truss sits on the top plate, must match your wall framing exactly; a mismatch here throws off the entire roof plane.
Setting them goes faster with two people, but one person can manage if the first truss is braced dead plumb.
I run a temporary ledger across the gable ends, nail it to the inside of the end trusses, and use it as a straightedge while I work toward the middle.
Each truss gets secured to the wall plate with hurricane ties, not just toenails; the metal is cheap insurance against lift in a real storm.
Spacing is typically 24 inches on center, and I mark it on both walls before lifting anything so I am not guessing with a truss hovering overhead.
Once the field trusses are standing, collar ties or ceiling joists go in to keep the walls from spreading under load.
The gable overhang gets its own short lookouts, nailed to the end truss and run back to the first common truss.
By the time plywood sheathing goes on, the whole assembly should feel like a drum: tight, regular, and not bouncing when you walk the peak.

【High-Quality Materials】This outdoor shed floor mat is made from premium felt material, offering excellent water and oil absorption. The bottom features a durable, abrasion-resistant, waterproof PE backing that provides leak-proof protection. It safeguards your valuable equipment and shed floor from rust, ensuring your storage space stays dry for the long term.

Youyikoo Joist Hangers】:The black 2x6 joist hanger is designed for joist-to-header reinforcement in wood-framed constructions like roofs, decking, floors, and ceilings. Enhances the wood structure's resistance to strong winds/earthquakes, making it more loing-lasting

[Security and Durability] The whole storage shed is a steel frame structure, the metal garden storage shed adopts electro-galvanized steel process and paint treatment, which is suitable for various climates, without worrying about the metal rusting, the all-metal storage shed will not be deformed by the sun, and has excellent moisture-proof ,UV resistant performance.
6. Finish the Exterior
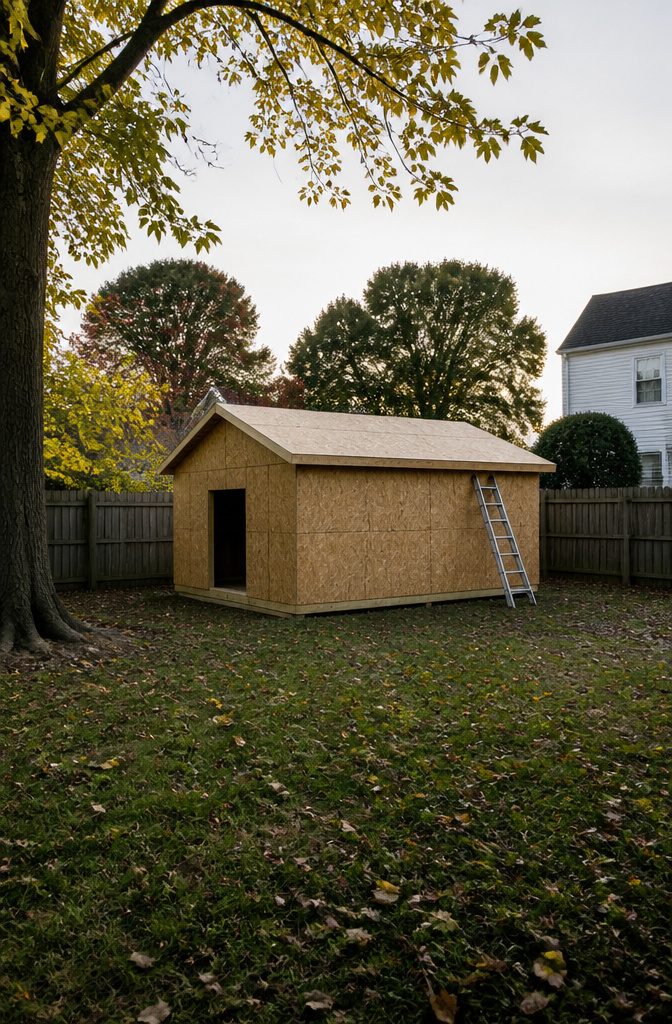
Siding goes up fast once the walls are square, but the roof is where water finds its way in if you get lazy.
I ran my OSB sheathing past the fascia boards by about a quarter inch on the eaves, keeping it flush at the gable ends.
That overhang matters: it lets the drip edge seat properly and kicks runoff clear of the wood below. Drip edge belongs on every roof edge, not just the front you can see from the yard.
The metal costs a few dollars more per linear foot than skipping it, and skipping it costs a new fascia board in three years.
Sealing comes next, and the order matters.
Drip edge first, then underlayment, then shingles or metal panels. Each layer laps over the one below it like shingles themselves do.
I caulked the siding butt joints and every place trim meets sheathing, but I stopped short of turning the whole shed into a bathtub: it needs to breathe somewhere.
The gable ends, kept flush, don’t trap water the way a sloppy overhang would. That small choice, quarter inch one place and dead flush the other, is what keeps the walls dry once the storms hit.
7. Install Doors and Windows
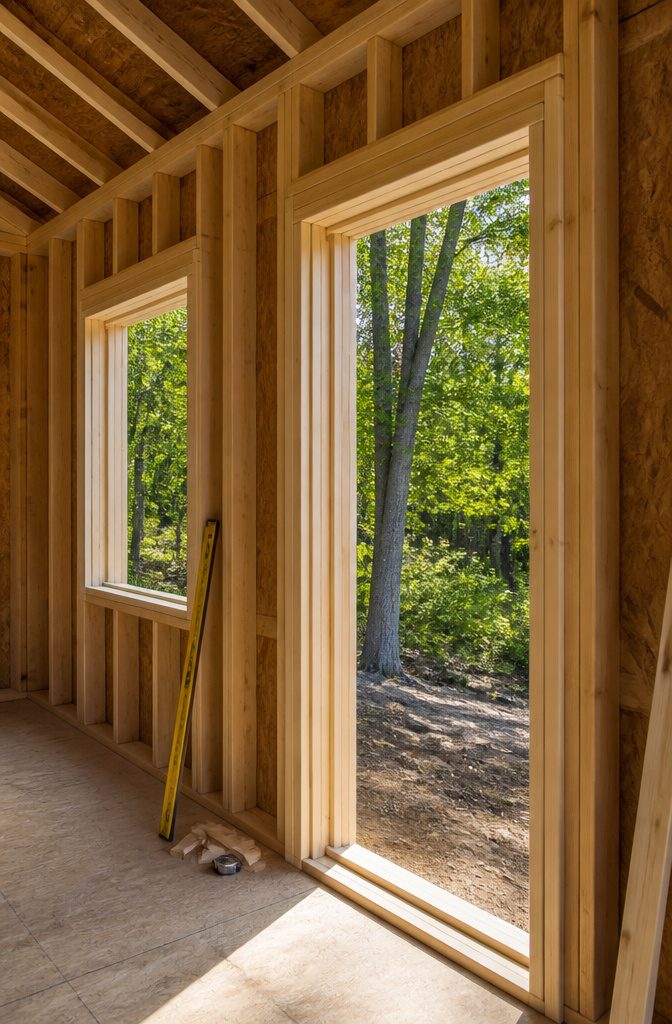
The openings you framed earlier are the weak point in every shed wall, so the lumber around them needs to be doubled up before anything else goes in.
I learned this the hard way on a garden shed where I skipped the jack studs and watched the door frame rack within a season.
Double trimmers and a header rated for the span are what keep that rectangle a rectangle once the wall carries roof load and seasonal movement.
For the door itself, pre-hung units save a weekend of shimming and mortising, but the rough opening has to be right.
I give it a half inch of play in width and a quarter inch in height; too tight and the frame bows, too loose and the shims never quite take out the slop.
Level the sill first, plumb the hinge side, then fasten through the shims into the framing. The strike side mostly takes care of itself if the hinge side is true.
Windows go in the same sequence: flashing tape on the sill before the unit touches the opening, then level, shim, and fasten through the nailing flange or brickmold.
I run a bead of sealant under the flange and another over the head before the trim goes on, because water that gets past the siding likes to collect on top of the window and find its way in.
On that same garden shed, I skipped the head flashing and patched the drywall inside twice before I understood where the stain was coming from.

Fastener Screw Size

Built for Connector Applications: Designed for joist hangers, framing connectors, and other structural wood connections, these #9 x 1-1/2" SD connector screws feature a 1/4" hex head and 0.380" diameter for secure fastening and reliable 10D nail replacement

RELIABLE PERFORMANCE & DURABILITY: Constructed from 18-gauge galvanized steel, the H2.5A provides exceptional uplift resistance and durability in both residential and commercial applications, ensuring reliable performance in harsh environments.
Materials and Tools
Pressure-treated lumber for the foundation and floor framing is the one place where cheaping out costs more later.
The green-tinted stuff at the lumber yard has been forced with preservatives under pressure, so it actually survives ground contact and the damp that collects under a shed.
I used standard SPF studs on my first build to save a few dollars, and two years later the bottom plates were soft enough to poke with a screwdriver.
The replacement took a full Saturday I had planned for something else.
3/4 inch plywood is the minimum I’d walk on for a subfloor.
Anything thinner flexes enough to crack tile if you ever finish the interior, and it telegraphs every joist through vinyl. AC-grade with the sanded face up gives you a clean surface without the price of cabinet ply.
For tools, a framing nail gun changes the whole pace of wall assembly. Hand-nailing studs is possible, and I did it once, but the gun lets you hold the level and the board at the same time while you work.
A 4-foot level lives on the subfloor during layout; a torpedo level fits inside the frame for checking stud plumb where the long level won’t sit.
Circular saws handle 95% of cuts, but a miter box or chop saw earns its space on the lumber pile if your roof has any angle at all.
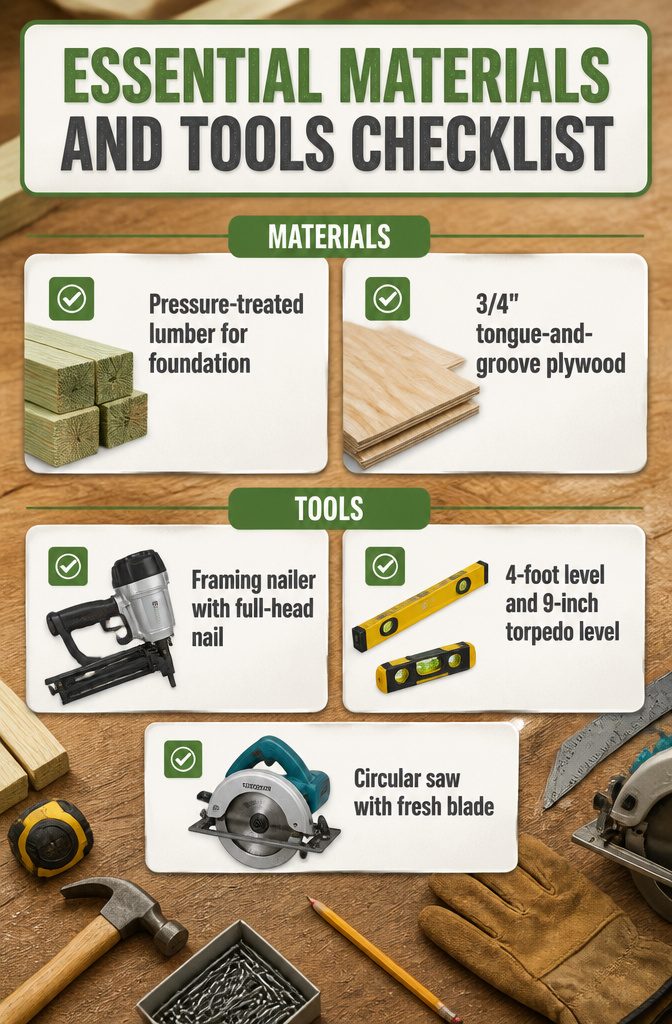
- Pressure-treated 4x4s or 6x6s for skids and posts; 2×6 or 2×8 joists depending on span
- 3/4" tongue-and-groove plywood for the subfloor; the interlock removes the need for blocking at every seam
- A framing nailer with a full-head nail capability; some jurisdictions do not allow clipped-head nails for structural work
- Two levels: one 4-foot and one 9-inch torpedo
- Circular saw with a fresh blade; expect to cut through nails once or twice no matter how careful the layout

Made to Last: The 2x4 joist hangers for wood is made of 18 gauge carbon steel and galvanized to prevent rust, ensuring long-term strength and stability. It performs reliably even in harsh climates, including tropical storm areas

Rock-Solid Strength: The 2x4 joist anchor connector is designed specifically for 2x4 lumber (internal size 1.5" × 3.5"), locking joists and rafters tightly in place. It handles heavy loads like a champ, keeping your structure safe and sturdy
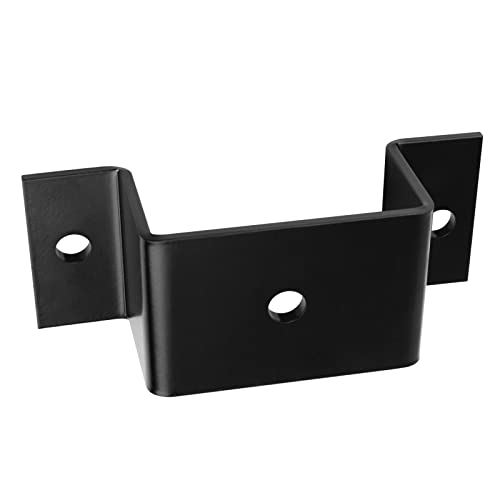
Fits Standard 2 x 4 Lumber Uprights Steel Stake Posts(Bracket Inner Size: 1-5/8" x 3-1/2")
Weatherproofing
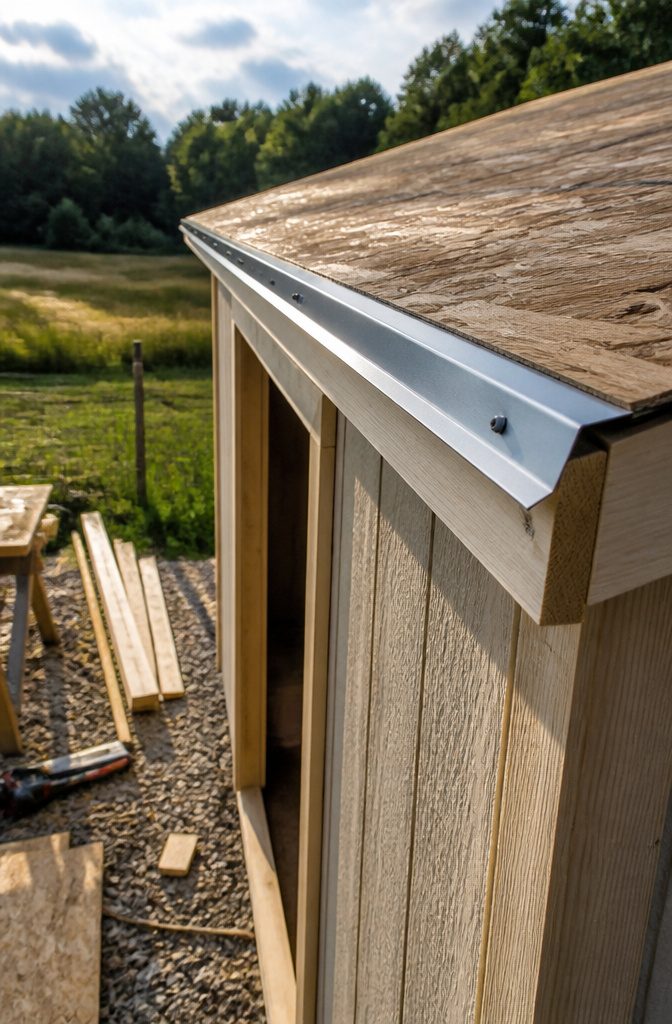
Water finds the gap you forgot. On my first shed, I ran the OSB sheathing flush to the fascia all around, and the drip edge sat proud instead of tucking underneath where it belonged.
Two seasons later the bottom chord of every truss on the eave side had darkened.
Bring the roof sheathing about a quarter inch past the fascia on the eaves, keep it flush on the gable ends, and the drip edge has something to bite.
I used drip edge on all four sides of the roof after that, not just the eaves.
The metal lip kicks runoff clear of the siding, and where two planes meet it bridges the seam so water doesn’t pool in the corner.
Sealant helps, but the geometry does the real work. If you’re using PVC trim anywhere, give it extra backing or bracing; it softens in summer heat and can belly out, opening a channel where water runs behind instead of off.

Waterproof Backing and Absorbent Top: the felt surface helps collect moisture, mud, dust and light drips from shoes, tools and stored equipment, while the PE backing forms a waterproof barrier between the mat and the floor below; This layered structure is suited to outdoor storage areas where damp ground, rainy weather and routine yard work can carry debris indoors; Use it to help keep shed, garage and carport floors cleaner during seasonal storage and daily access

Package Includes: our package contains 2 pieces of outdoor storage shed floor mats, each measures approx. 6 x 4 ft/ 188 x 122 cm, which can not only protect the outdoor storage shed from being eroded by damp ground, but also help keep your outdoor storage shed clean, bringing much convenience to you

[Stable Floor Frame]: This storage shed is equipped with a special floor frame, which greatly improves the overall stability and firmness of the whole structure.
Design Considerations
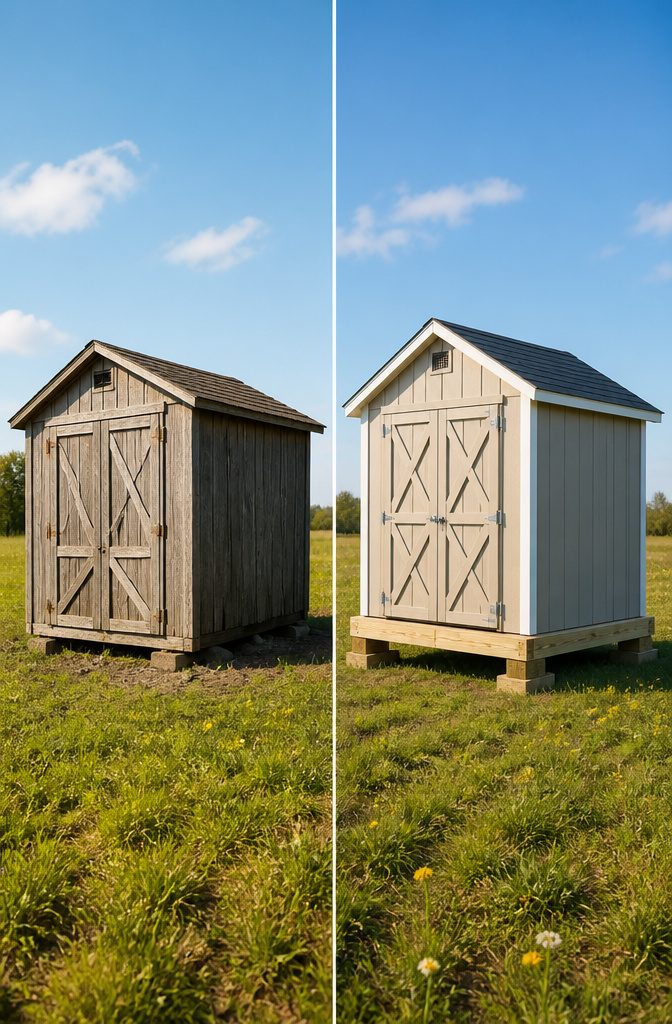
A portable shed built on 6"x6" timbers sits heavy enough to stay put in a wind but light enough to drag onto a flatbed when the lease ends.
The timbers form a simple skid foundation, lifted slightly off the soil so moisture drains instead of pooling against the floor joists.
Pressure-treated 4"x4"s are what most plans call for, and they bow or split under the weight of a riding mower and a few hundred pounds of garden tools.
The 6"x6" stock costs more upfront and hurts more to carry, but the extra two inches of section mean you can span soft ground without the frame twisting.
The real limit is the doorway. A shed that skids intact needs a door wide enough for your bulkiest item, usually the mower deck, measured with the handlebars folded.
Anything narrower and you are tilting equipment through a gap that scrapes paint every time. Mobility also means keeping the roof pitch low; a steep gable catches wind like a sail when you are winching the thing onto a trailer.
I would stick to a single slope or a shallow gable and skip the overhangs that look cute but snag on fence posts during a move.
Frequently Asked Questions
What materials do I need to build a shed?
You need pressure-treated 6×6 timbers for the foundation skids, pressure-treated 2x6s for floor joists spaced 16 inches on center, and 3/4-inch pressure-treated plywood for the subfloor.
Standard 2x4s work for wall framing, and you will want Simpson hurricane ties, drip edge metal, and either shingles or metal panels for the roof.
How do I frame the walls of a shed?
Build each wall flat on the floor deck, not upright. Square the frame and nail on sheathing while it is still horizontal, then lift the whole assembly into place.
Run temporary braces from the top plate to stakes in the ground to hold walls plumb while you stand the remaining walls.
What is the best way to weatherproof my shed?
Run roof sheathing about 1/4 inch past the fascia on eaves so the drip edge tucks underneath and kicks runoff clear.
Keep sheathing flush at gable ends. Install drip edge on all four roof edges, then underlayment, then shingles or panels, with each layer lapping over the one below it like shingles themselves do.
Is it cheaper to buy or build a shed?
A self-built shed on 6×6 skids also retains the advantage of being movable without demolition.
Can I build a shed for under $500?
It does mention that hurricane ties run about a dollar apiece and that 6×6 timbers cost more upfront than 4x4s, while noting that cheaper materials often lead to expensive repairs later.