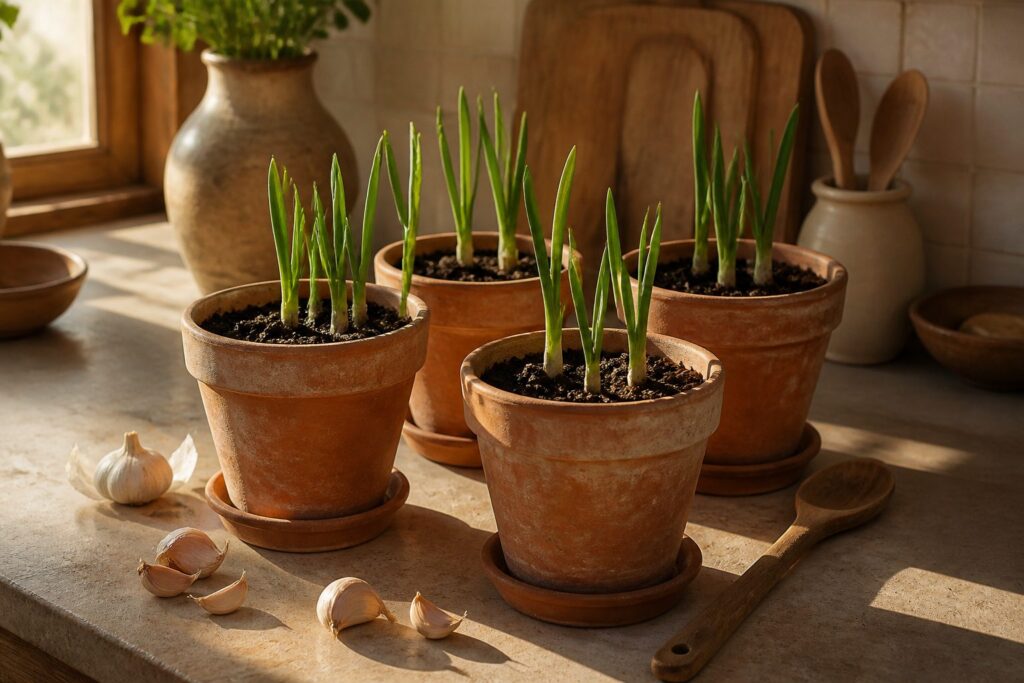
Growing garlic in pots means full-sized bulbs from a container in eight to nine months, but only if you match the variety to your winter.
Hardneck types need six to eight weeks below 45°F to bulb at all; plant softneck in a mild zone and you will harvest, plant hardneck there and you will wait for a bulb that never forms.
That first mistake, variety versus climate, costs the whole season before the clove even touches soil.
The thin papery wrapper on each clove stays on at planting, and that detail protects against rot through months of container moisture that garden beds never see.
[link-whisper-related-posts]1. Choose the Right Garlic Variety
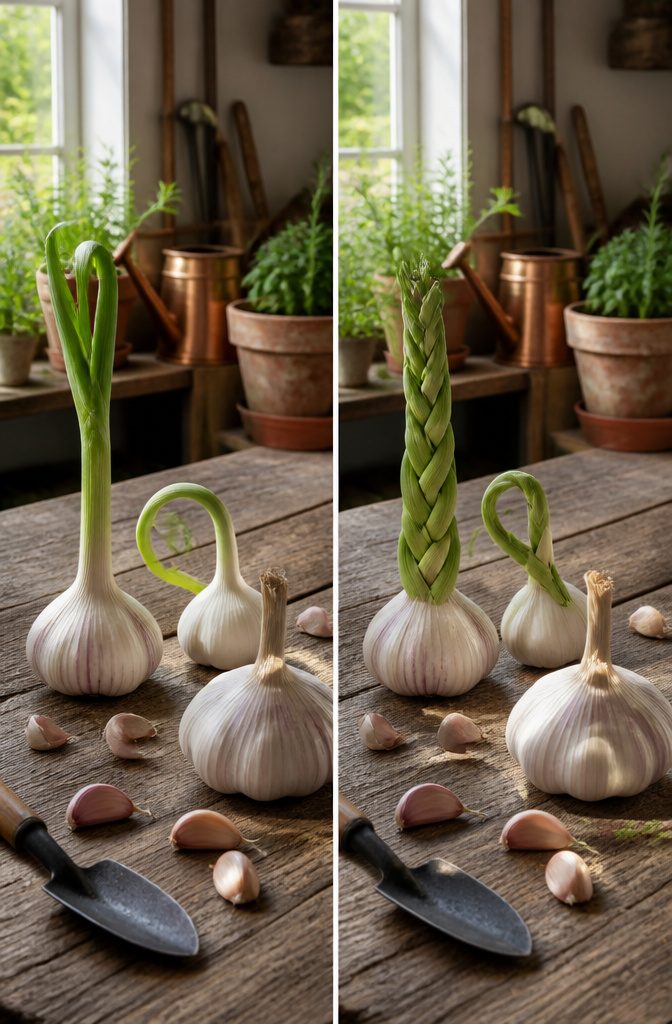
Hardneck garlic is built for cold winters. The cloves run larger and fewer per head, and in late spring it sends up an edible scape that tastes like a milder, snappier green bean.
Hardneck needs 6 to 8 weeks below 45°F to break dormancy and form a full bulb, so if your winters stay cold, this is your default choice. Storage is the tradeoff: it keeps only a few months before sprouting or drying out.
Softneck skips the scape and gives you more, smaller cloves. What it offers back is shelf life.
The flexible stems braid neatly and the bulbs store longer, which is why grocery stores stock almost nothing else. In mild climates where hardneck’s chill requirement is hard to satisfy, softneck is the practical move.
Elephant garlic sits slightly outside this choice. The bulbs are massive, the flavor is gentle, and botanically it is closer to a leek than to true garlic.
It roasts beautifully and splits into easy, plump cloves, but it will not give you the sharp heat of the real thing.

A great tasting healthy. Heirloom, Non-GMO
Bold, Rich Flavor: Known for their robust, spicy taste that intensifies when cooked—perfect for roasting, sautés, and garlic-infused oils.

Large, Firm Garlic Cloves for Planting. Each bulb produces thick, well-formed garlic cloves that separate cleanly. Customers consistently mention the firm texture and size, making these garlic seeds for planting easy to handle and space evenly.
2. Select a Suitable Container
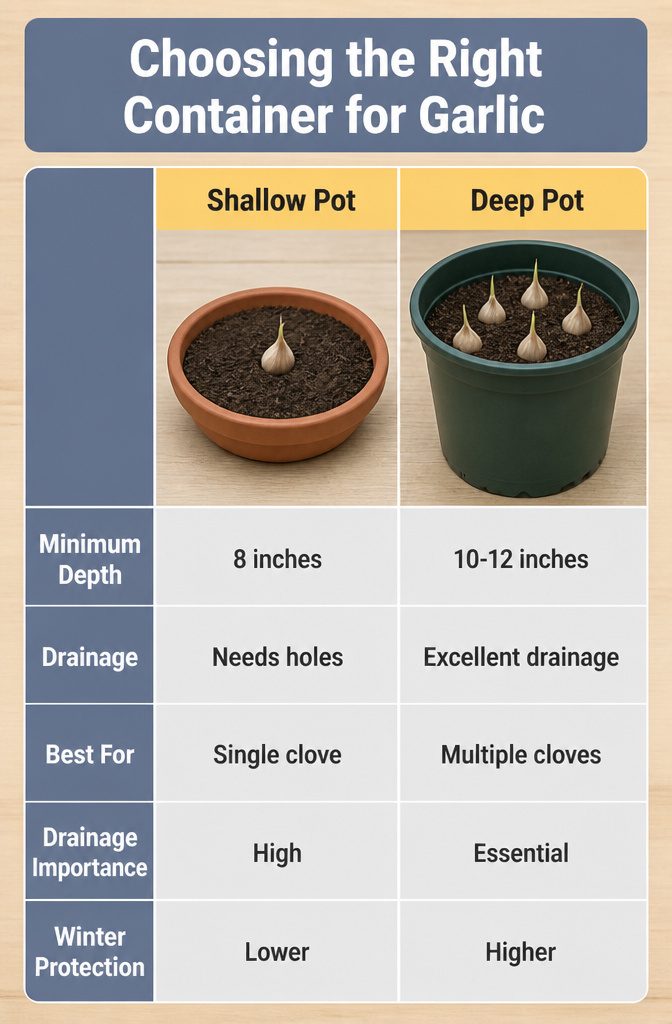
Garlic roots need room to spread downward, and shallow pots leave them cramped and yield poor bulbs. An 8-inch depth is the minimum for a single clove, with two- or three-gallon pots doing the job nicely.
Want more cloves? A five- or ten-gallon container holds several without crowding.
Drainage holes in the bottom are non-negotiable. Garlic rots fast in standing water, and a sealed base turns the pot into a soup bowl after rain.
Material choice shapes how the cloves survive winter. Plastic is cheap and easy to find, though it heats up fast in summer sun and offers little insulation when frost arrives.
Glazed ceramic drains well and buffers soil temperature better, but only if the glaze and body are rated frost-proof; a cheap glazed pot that traps moisture in its walls will crack by February.
Fiberstone, a mix of fiberglass and crushed stone, handles freeze-thaw cycles without flaking and insulates better than plastic.
I would skip unglazed terra cotta entirely for this project. The porous clay pulls water all winter, then freezes, cracks, and leaves you sweeping shards off the patio in spring.

PREMIUM GARLIC BULBS FOR PLANTING: 4 Healthy high-quality softneck garlic bulbs selected for strong growth, excellent flavor, and reliable garden performance. Each bulbs will have

Great for Culinary Use in the Kitchen and for Planting and Growing Garlic
3. Prepare the Soil
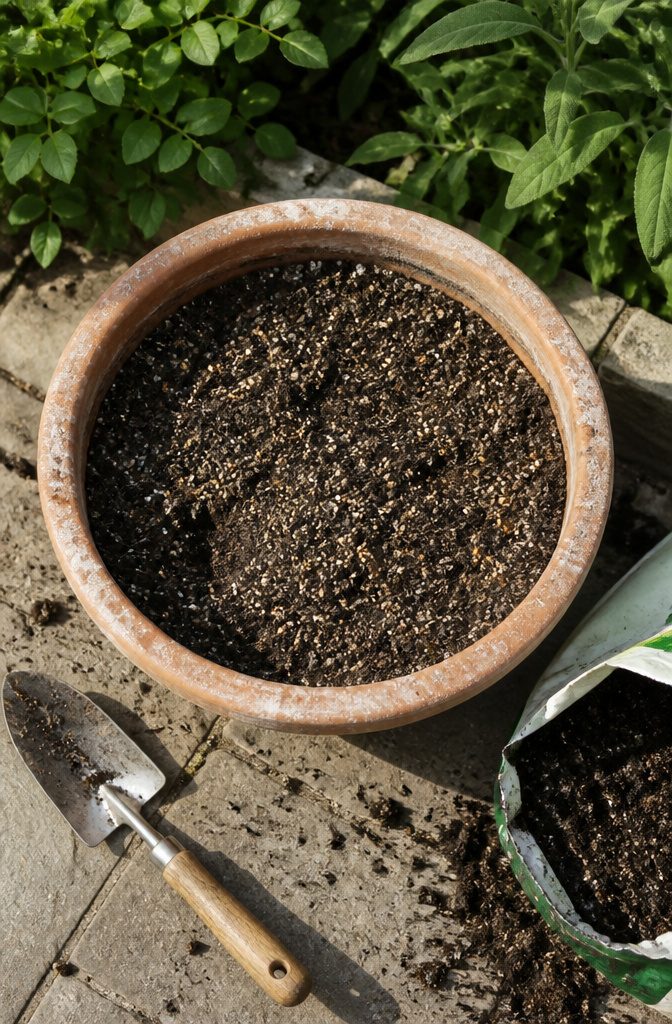
Garlic rots fast in heavy soil, especially through a wet winter, so the mix matters more than the pot itself.
A 75:25 blend of potting soil to compost drains well enough to keep cloves from sitting in water, while the compost feeds the long haul: eight to nine months from planting to harvest is a lot to ask of any container.
I stir in 2 to 3 tablespoons of granular organic fertilizer per pot before the cloves go in.
BulbTone works here, or any bulb-formulated organic granules with a decent phosphorus number; garlic is a bulb crop, not a leafy green, and phosphorus is what builds the head underground.
The trowel gets it distributed evenly, not concentrated in one corner where roots might burn.

Modern Style: This 8 inch ceramic plant pot is fired at high temperature and features a modern glazed vertical stripe design, perfect for decorating your home, patio, garden, lawn, balcony, and office

Self-Watering Feature: The Fielda 8 Inch Plastic Planter comes with a built-in self-watering system that uses absorbent cotton wicks to draw water from the bottom tray into the planter. This ensures your plants stay hydrated with less effort, saving you from frequent watering. Whether you're a busy gardening enthusiast or away for long periods, you can easily maintain your plants' moisture balance, ensuring they get the right amount of water and nutrients.

8 inch Planter With Drainage Holes and Mesh Pad: Large drain holes are good for draining, and with leak-proof mesh pads, it keeps soil from running away, suitable for orchids, succulents, cacti, other flowers and green plants, perfect for home decoration.
4. Plant the Cloves
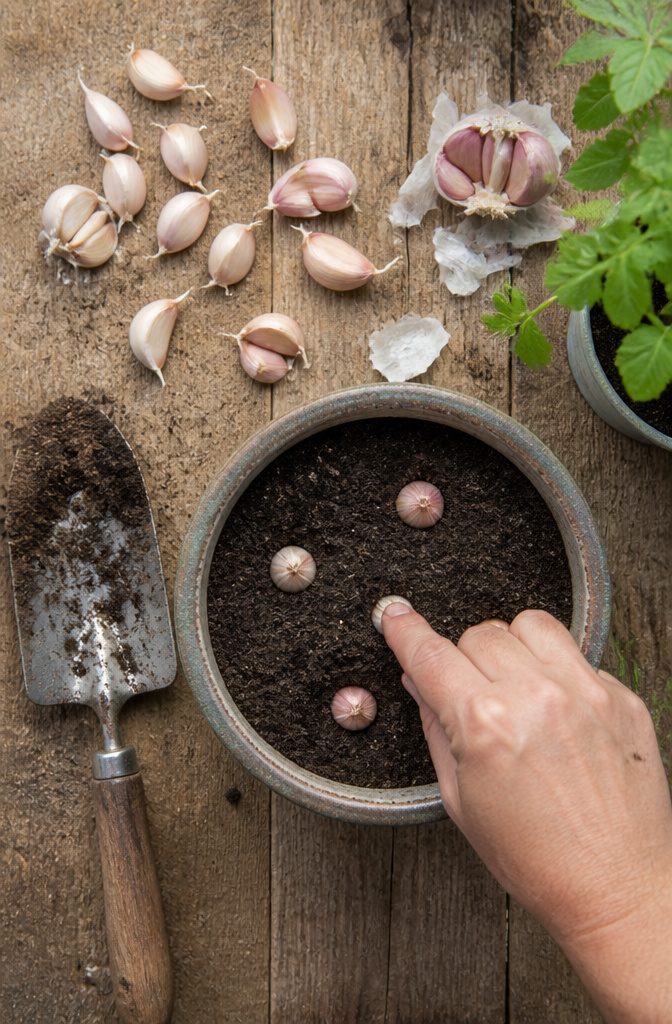
Fall timing for container garlic lands in that narrow window after the first killing frost but before the soil in your pot actually freezes solid, usually about one to two weeks after that initial frost hits.
The cold snap triggers root growth while the cloves still have time to anchor themselves.
I crack the bulb apart with my thumbs the same morning I plant, separating it into individual cloves and saving only the largest, healthiest ones for the pot.
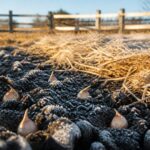
The papery skins stay on; that thin wrapper protects the clove from rot and pests through the months ahead. Anything small or soft goes straight to the kitchen, not the soil.
Each clove gets planted pointy end up, 2 to 3 inches deep, with 3 to 6 inches of space on all sides. In a container, I skip the trowel and push them down with my finger until the base sits well below the surface.
The soil settles after the first watering, so that initial depth matters. Crowding is the mistake that costs you; cramped cloves yield small heads no matter how good your soil is.
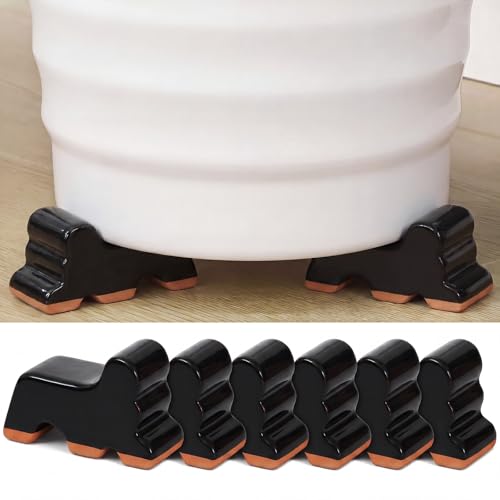
Sufficient to Use and Replace: the package includes 6 pieces of pot risers for outdoor planters in black and brown colors, suitable for lifting plants pots, meeting your using needs and practical for planting lovers

HANDMADE HIGH‑FIRED STONEWARE – Each bonsai pot is individually handcrafted and fired at 2300°F (1260°C), producing dense, vitrified ceramic stoneware with exceptional durability and refined detail.

HANDMADE HIGH‑FIRED STONEWARE – Each bonsai pot is individually handcrafted and fired at 2300°F (1260°C), producing dense, vitrified ceramic stoneware with exceptional durability and refined detail.
5. Mulch and Protect
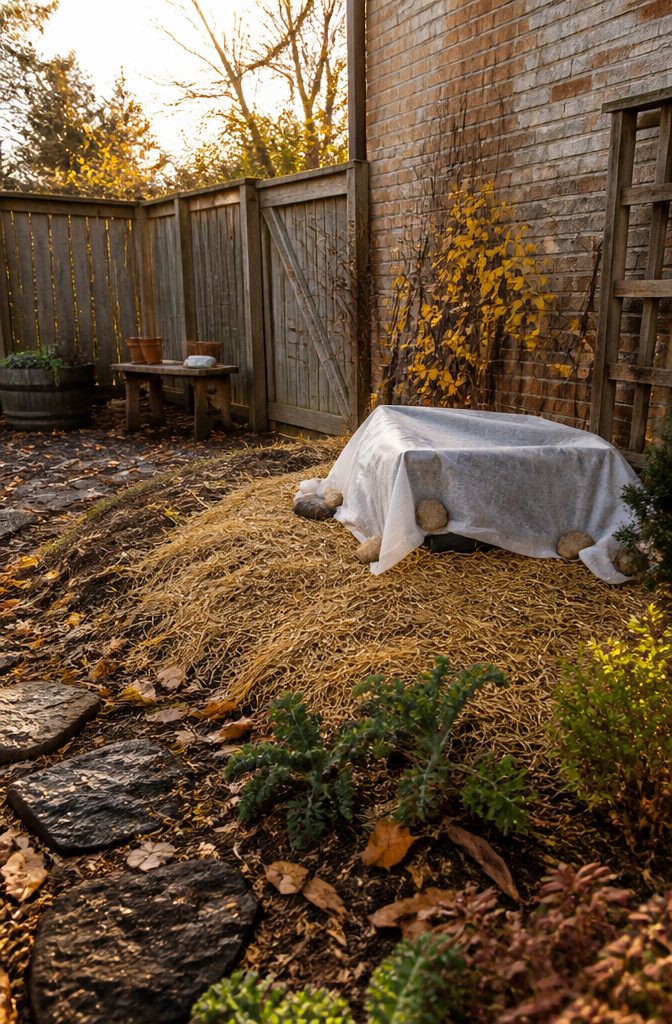
A 2- to 3-inch layer of mulch on top of the soil keeps container garlic from drying out and, more importantly, from freezing solid.
Pots sit above ground, so they lose heat faster than in-ground beds; the mulch acts as a buffer against those temperature swings.
For real cold snaps, frost cloth or an old bedsheet draped over the pot and weighted at the edges buys several degrees of protection.
I pull it off during the day so sunlight and air reach the leaves. On nights that stay near freezing, wrapping blankets around the pot like a skirt traps enough ground warmth to keep roots alive.
If the forecast drops well below 20°F for days, the garage becomes your best option. An unheated space stays cold enough to trigger proper bulbing but prevents the root ball from freezing through.
I move pots in before the hard freeze hits and bring them back out once the worst passes, checking that the mulch is still in place.

100% Natural Compost for Plants - Compost is a nutrient-rich, soil-like substance made from blending yard trimmings and plant residue, such as leaves and grass clippings. Together, they’re composted to make a growing medium that’s part fertilizer, part soil amendment. When mixed with garden soil, compost helps loosen soil, holds onto moisture, and provides essential nutrients for plants.

NATURAL AND ORGANIC NUTRIENT RICH FERTILIZER: We’re on a mission to get America growing again and it all starts with what’s right beneath us — your soil; Grow a bountiful garden in your home with the Back to the Roots All-Purpose Peat-Free Potting Mix, packed with the nutrients needed for your plants, flowers, and vegetables to thrive

Tailored for Ferns: Our Fern Potting Soil Mix in the ample 8-quart package is specifically formulated to meet the unique needs of ferns. This specialized blend provides the perfect combination of moisture retention, aeration, and nutrient support required for the optimal growth of ferns.
6. Water Regularly
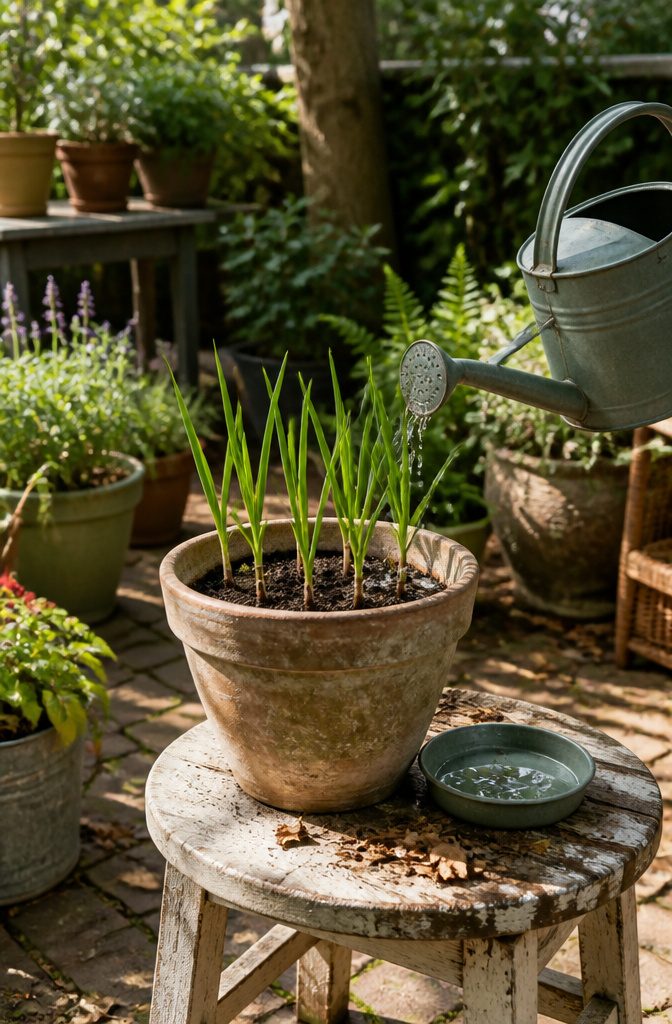
Container garlic dries out faster than garlic planted in the ground, so checking the soil by feel becomes a habit worth forming.
I press a finger into the dirt near the edge of the pot; if the surface is dry, it’s time to water.
During active spring growth, especially once the bulbs begin forming below ground, the soil needs to stay evenly moist.
About 1 inch of water per week from rain or your own watering can keeps things where they should be, but soggy soil invites rot and you’ll lose the bulb entirely.
As the lower leaves start yellowing and harvest draws closer, pull back. Too much moisture late in the season delays curing and increases the risk of problems in the finished bulbs.
That shift from steady water to almost none marks the final stage, and getting the timing right matters as much as any other step.

Hardneck Garlic Bulbs for planting grow into flavorful homegrown garlic with firm bulbs, large individual cloves and distinctive curling scapes, making them an excellent choice for vegetable gardens, raised beds and kitchen gardens
Hardneck Garlic Bulbs for planting grow into flavorful homegrown garlic with firm bulbs, large individual cloves and distinctive curling scapes, making them an excellent choice for vegetable gardens, raised beds and kitchen gardens
7. Harvest and Cure
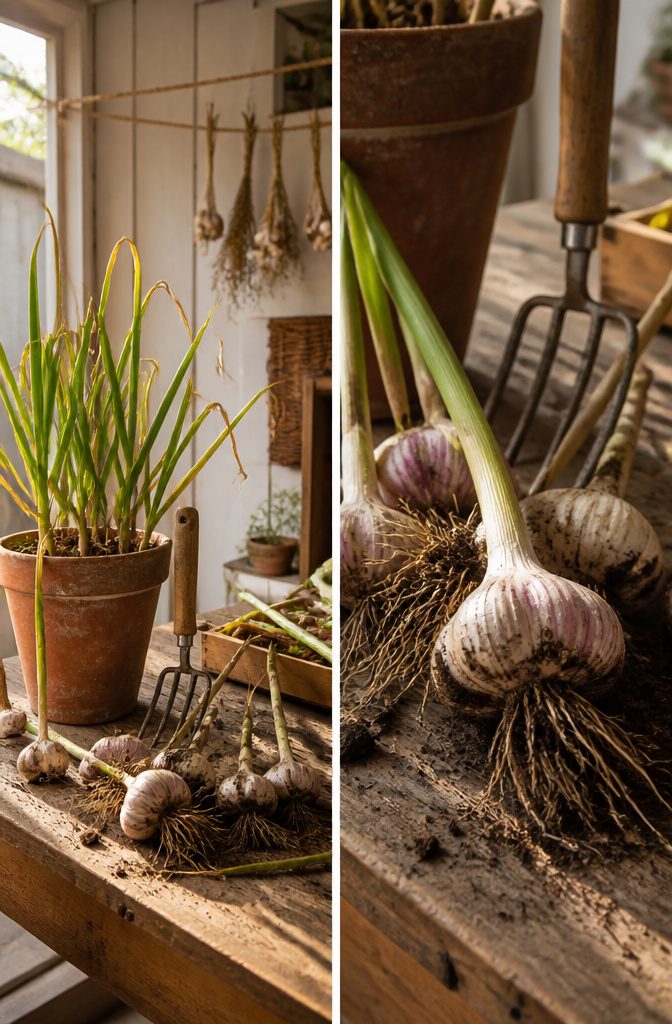
Yellow lower leaves mean the bulb below has stopped swelling, which is the only reliable signal in a pot where you can’t judge by calendar month.
Wait until roughly one-third to one-half of those lower leaves have turned, not every leaf, or the cloves may start separating and the bulb won’t keep.
I ease a hand fork under the root ball rather than tugging the stalk, since a punctured garlic bulb rots in storage instead of curing.
Softneck varieties give you the option of braiding the pliable stalks into hanging bunches before they dry, which saves space and looks better than my hardneck zip-tie method.
Either way, the drying space needs shade, airflow, and a week or two for the papery skins to tighten.
Full sun, which some sources suggest, bleaches flavor and risks cooking the cloves on hot afternoons. After the outer skins rattle, trim the leaves to an inch above the bulb and move the garlic to a cool, dark pantry.
Three months is a fair storage span for bulbs kept dry; any longer and you’re gambling against sprouting.
Hardneck vs. Softneck
The first season I tried garlic in pots, I planted softneck ‘California Early’ because the nursery had it in bulk. It braided beautifully after curing and sat on my counter for months without sprouting.
The next fall I switched to hardneck ‘Chesnok Red’ for the scapes, and while the individual cloves were larger, I was roasting the last bulbs by February while the previous year’s softneck was still holding.
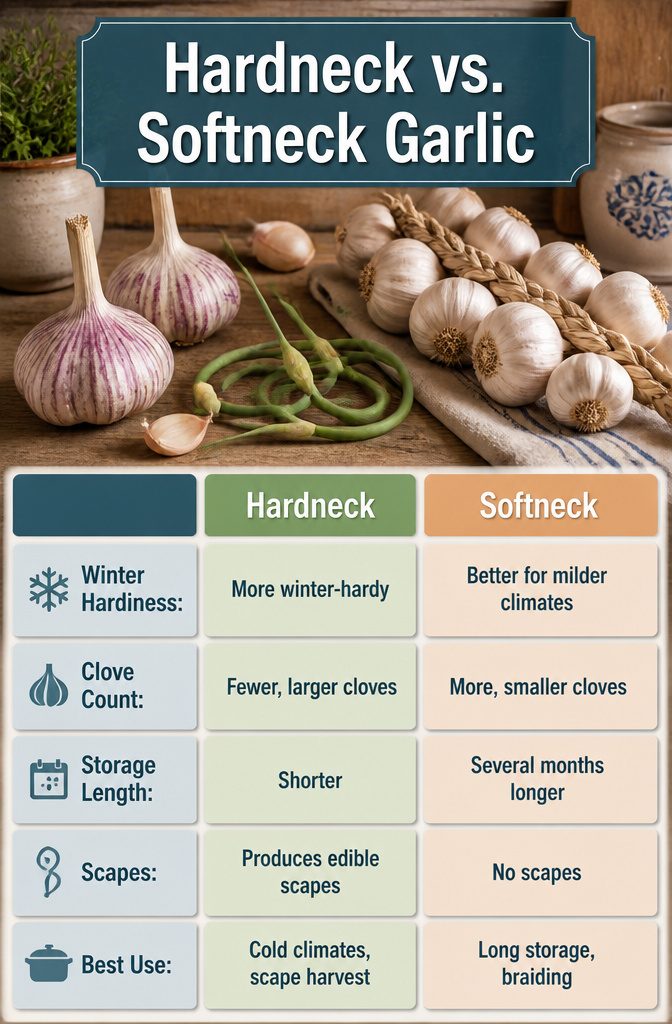
Hardneck garlic suits cold winters and gives you scapes; softneck stores longer and braids. Elephant garlic, which is technically closer to leek, plants in either spring or autumn and delivers mild, oversized bulbs best roasted whole.
| Attribute | Hardneck | Softneck | Elephant Garlic |
|---|---|---|---|
| Winter hardiness | More winter-hardy | Better for milder climates | Plant spring or autumn |
| Clove count | Fewer, larger cloves | More, smaller cloves | Very large, mild bulbs |
| Storage length | Shorter | Several months longer | n/a |
| Scapes | Produces edible scapes | No scapes | n/a |
| Best use | Cold climates, scape harvest | Long storage, braiding | Roasting |
Eat hardneck varieties first; their storage window closes sooner. Softneck’s flexible stem and longer shelf life make it the practical choice if you want garlic through winter without buying new seed stock.
Container Materials Compared
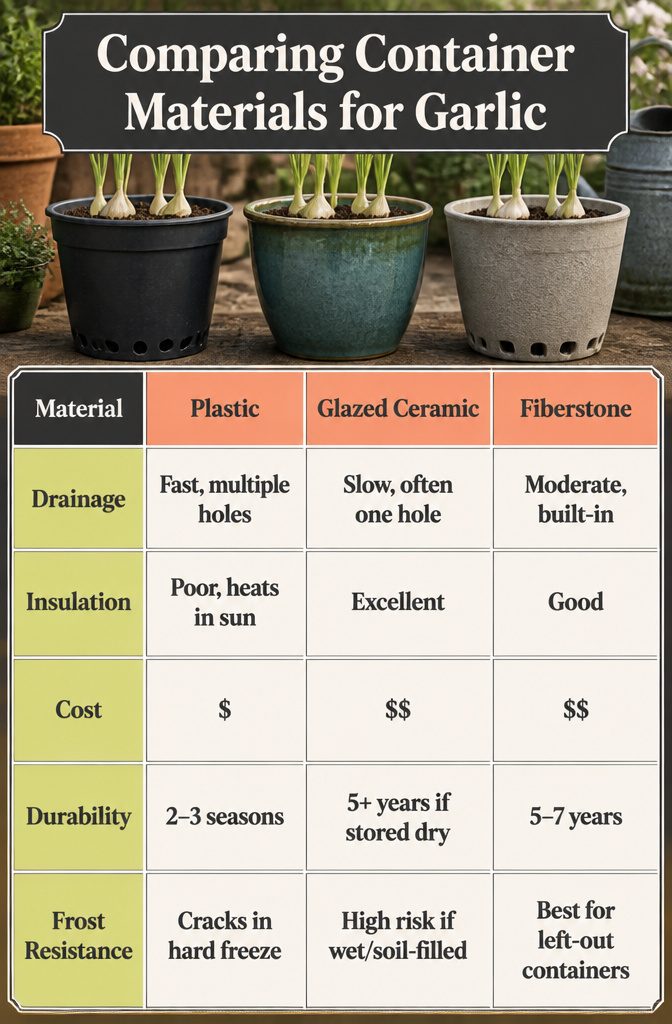
Plastic pots drain fast and stay light enough to move, but summer heat cooks the roots and winter frost cracks the walls in two or three seasons.
Glazed ceramic buys you insulation and looks finished on a patio, yet the drainage hole is often a single pin-sized opening that needs widening with a masonry bit before you plant.
Fiberstone, the resin-and-stone composite, splits the difference: it insulates like ceramic, weighs half as much, and the molded drainage is already generous. For renters in cold zones, fiberstone survives the freeze-thaw cycle that splits glazed pots by February.
| Material | Drainage | Insulation | Cost | Durability | Frost Resistance |
|---|---|---|---|---|---|
| Plastic | Fast, multiple holes | Poor, heats in sun | $ | 2–3 seasons | Cracks in hard freeze |
| Glazed ceramic | Slow, often one hole | Excellent | $$ | 5+ years if stored dry | High risk if wet/soil-filled |
| Fiberstone | Moderate, built-in | Good | $$ | 5–7 years | Best for left-out containers |
Glazed pots work, but fiberstone drains better and I have not lost a clove to rot since I switched. The cloves rotted before sprouting because water sat in the base for days after rain.
Ceramic works if you drill extra holes and keep it under an eave, but that is two extra steps I no longer bother with. Plastic is fine for a single mild-winter trial run, though you will replace it.
Fertilizer Timing
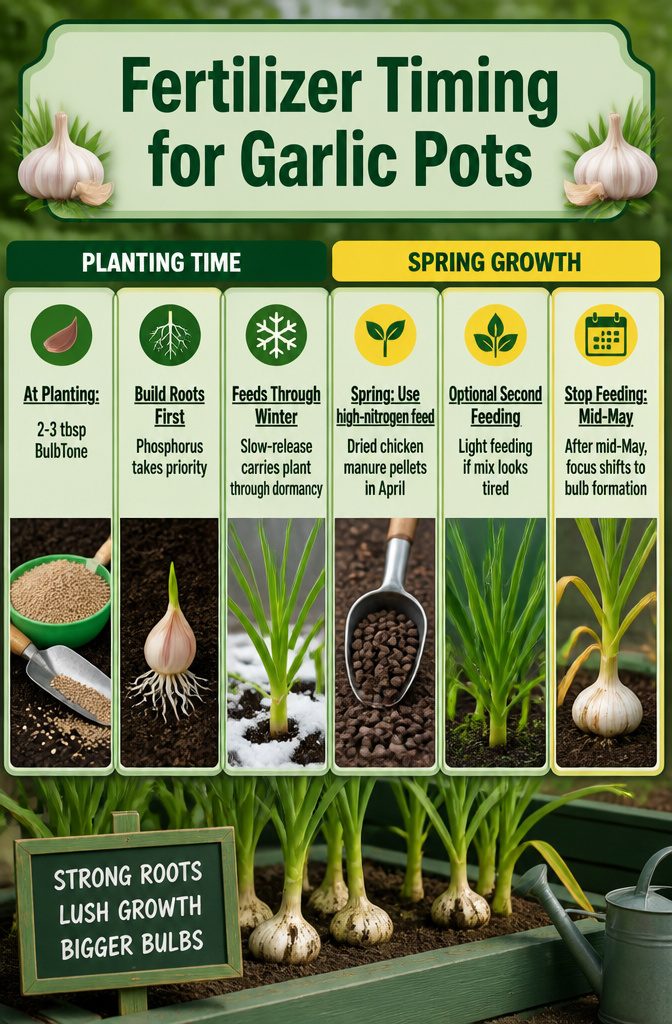
Garlic in a pot lives on two different diets, and the swap between them matters more than the brand name on the bag.
At planting time, the clove is building the root system that will eventually feed the bulb, so phosphorus takes priority.
I stir 2 to 3 tablespoons of BulbTone or another granular organic fertilizer formulated for bulbs into the full potting mix before any cloves go in, distributing it with a trowel so no clove sits in a concentrated pocket.
That single slow-release feeding carries the plant through winter dormancy.
Once green shoots push through in spring, the game changes.
Leaf growth ramps up fast, and nitrogen drives it. I switch to a high-nitrogen feed, dried chicken manure pellets being the straightforward option, and apply it when strong growth resumes in April.
A second light feeding may help if the mix looks tired, but I stop by mid-May. After that, the plant shifts energy downward into bulb formation, and extra nitrogen late in the season produces lush tops with undersized heads underneath.
Feed from April when you see strong spring growth, using a high nitrogen feed such as dried chicken manure pellets. Stop feeding in mid-May.
That hard stop in mid-May is the detail that saves the harvest. The two-stage approach mirrors what garlic actually does: roots and bulb foundation first, leafy engine second, then a quiet finish while the head swells below ground.

🌳 PROFESSIONALLY MIXED IN THE USA - Each bag is hand blended on our small family farm with premium horticultural grade ingredients: Coco Coir, Canadian Peat Moss, Perlite, Worm Castings- 1 QUART BAG

It's known for its dark-brown, complex soil texture that drains well.
What Can Go Wrong
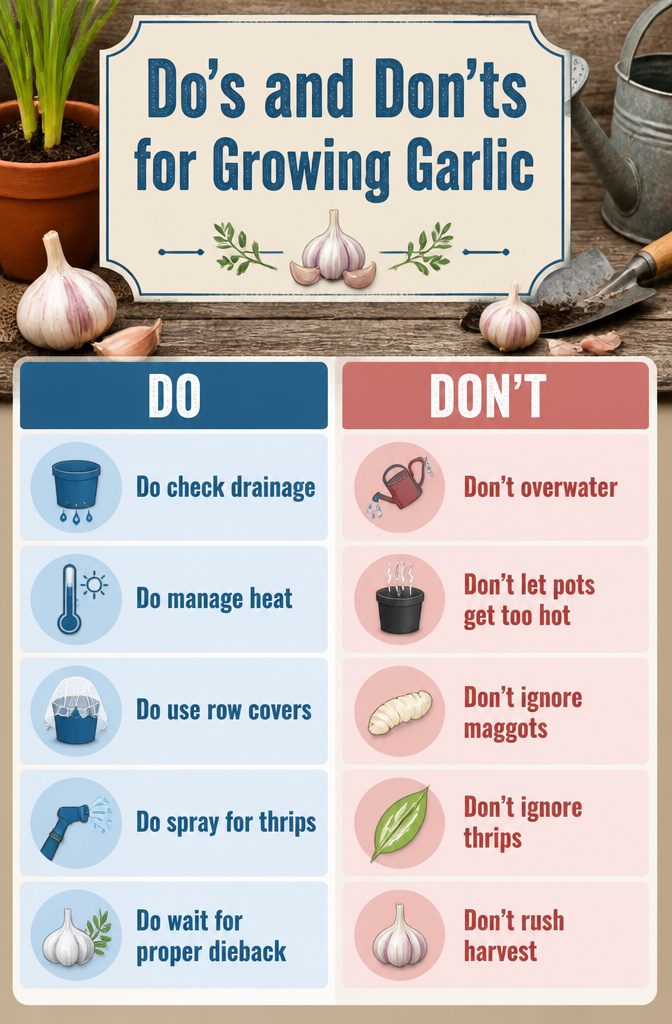
Garlic in pots faces a narrower set of problems than garden garlic, but the ones that show up hit harder in confined space.
Overwatering is the fastest way to rot a crop: containers hold moisture around the bulb in a way open ground does not, and a single week of daily drizzle can finish what a whole season of care built.
I lost half a pot two springs ago by leaving the saucer under the pot during a rainy April; the cloves turned to mush before the leaves even yellowed.
Heat stress sneaks up differently. Black plastic pots sitting on a concrete balcony can push soil temperature past what garlic roots tolerate, while the same plant in a glazed ceramic pot against a north wall stays comfortable.
If leaves crisp at the edges mid-season despite regular water, the container itself may be cooking the bulb.
Onion maggots and thrips still find container garlic, though most container-specific guides barely mention them.
The maggots leave cream-colored, legless larvae inside damaged bulbs with visible holes; floating row covers or netting over the pot breaks their cycle where they have been a recurring problem.
Thrips show as whitish streaks between leaves, and a strong spray of water usually knocks them off small plantings before they distort growth. I have not needed more than that.
Premature harvest is the mistake I repeat. Pulling when the first leaf browns, rather than waiting for roughly half the foliage to die back, gives bulbs that are edible but will not store past a few weeks.
The urge to see what you have grown is hard to resist; the garlic pays for the impatience in shelf life.
Frequently Asked Questions
When is the best time to plant garlic?
Plant garlic in the fall, about one to two weeks after the first killing frost but before the soil in your pot freezes solid.
This cold snap triggers root growth while giving the cloves time to anchor themselves. In mild-winter climates, you may plant later, though spring-planted garlic often produces smaller bulbs.
How deep should garlic cloves be planted?
Garlic cloves should be planted 2 to 3 inches deep with the pointy end facing up.
In a container, use your finger to push each clove down until the base sits well below the surface. The soil settles after the first watering, so that initial depth matters for proper development.
What type of garlic should I grow?
Choose hardneck garlic for cold climates where winters stay below 45°F for 6 to 8 weeks, since it needs that chill to form a full bulb and produces edible scapes.
Pick softneck garlic for milder climates, as it stores longer and braids neatly but skips the scape. Elephant garlic, technically closer to leek, delivers mild, oversized bulbs best roasted whole.
How many garlic can you plant in a 5 gallon bucket?
A five-gallon container holds several garlic cloves without crowding, giving each 3 to 6 inches of space on all sides.
For a single clove, an 8-inch depth is the minimum, with two- or three-gallon pots doing the job nicely. Crowding is the mistake that costs you, since cramped cloves yield small heads no matter how good your soil is.
What is the best container to grow garlic in?
Fiberstone pots offer the best balance for container garlic, insulating roots through freeze-thaw cycles while weighing less than ceramic. Glazed ceramic works if frost-proof and generously drilled for drainage, though cheap glazed pots trap moisture and crack in winter.
Plastic is fine for a mild-winter trial but heats up fast in summer sun and cracks within a few seasons; skip unglazed terra cotta entirely, as the porous clay pulls water, freezes, and shatters.
What are some common mistakes people make when planting garlic?
Overwatering rots garlic fastest in containers, since pots hold moisture around the bulb in a way open ground does not, and leaving a saucer under the pot during rain can turn cloves to mush.
Premature harvest costs shelf life; pulling when the first leaf browns rather than waiting until one-third to one-half of lower leaves yellow gives bulbs that store only weeks. Crowding cloves and using shallow pots also produce small, disappointing heads.